User Guide
■Cable connection
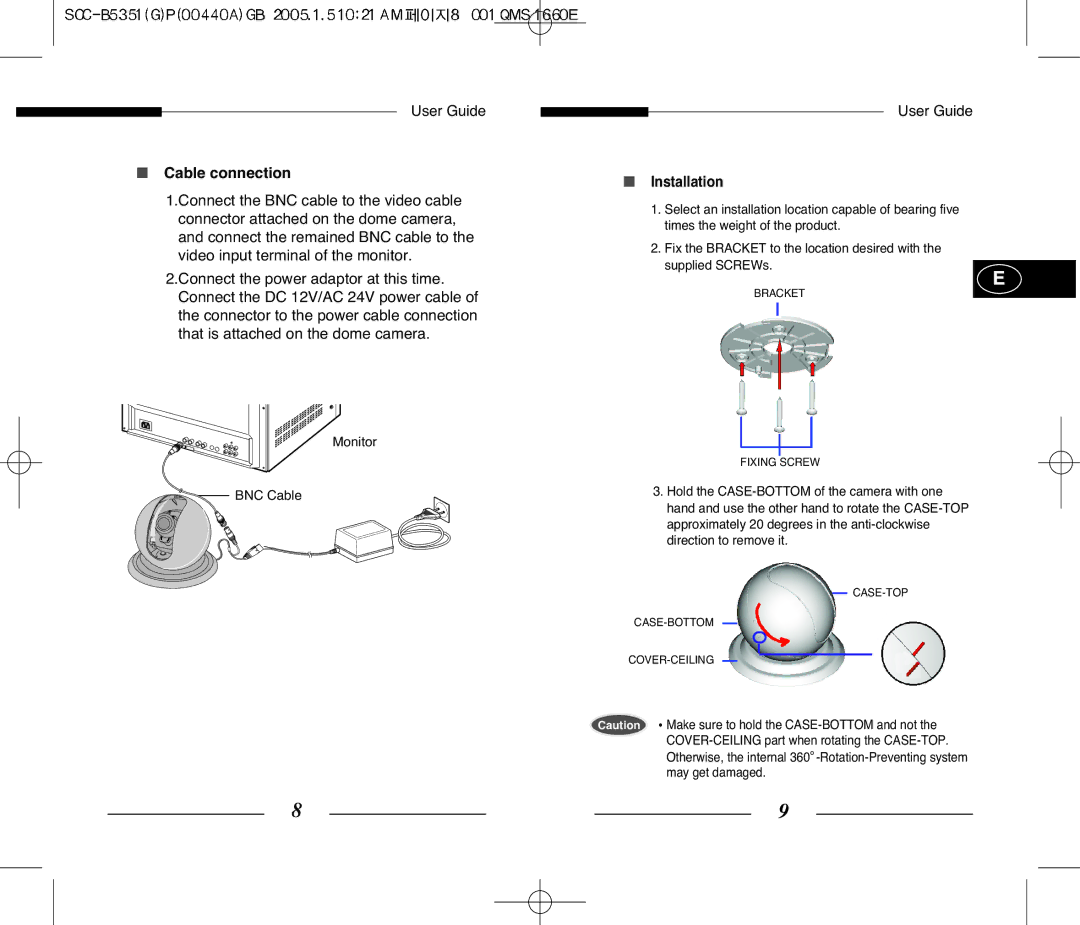
1.Connect the BNC cable to the video cable connector attached on the dome camera, and connect the remained BNC cable to the video input terminal of the monitor.
2.Connect the power adaptor at this time. Connect the DC 12V/AC 24V power cable of the connector to the power cable connection that is attached on the dome camera.
Monitor
BNC Cable
User Guide
■Installation
1.Select an installation location capable of bearing five times the weight of the product.
2.Fix the BRACKET to the location desired with the supplied SCREWs.
E
BRACKET
FIXING SCREW
3.Hold the
Caution Make sure to hold the
8 |
|
|
| 9 |
|
| |||
|
|
|
|
|
