INSTALLATION & MAINTENANCE
The User’s Manual is for common use.
Make use of the User’s Manual depending upon your washing machine model.
ENVIRONMENT
Leave some space
Maintain at least 10cm between the washer and the wall.
Place the washer on a sturdy flat surface. If the washer is placed on an uneven or weak surface, noise or vibration occurs. (Allowable is 1˚)
Adjust the legs for even placement.
Never install the washer near water.
Do not place the washer in steamy rooms or where the washer is directly exposed to rain.Moisture may destroy the electrical insulation causing an electrical shock hazard.
Avoid direct sunlight or heaters.
As plastic and electrical components are affected by direct heat,never place the washer near furnaces, boilers, etc. Do not place under direct sunlight.
LEVELLING | • If the washer | is not leveled with the ground, it makes the machine tremble more or be out of order. |
| So, make sure | that the washer is leveled properly. |
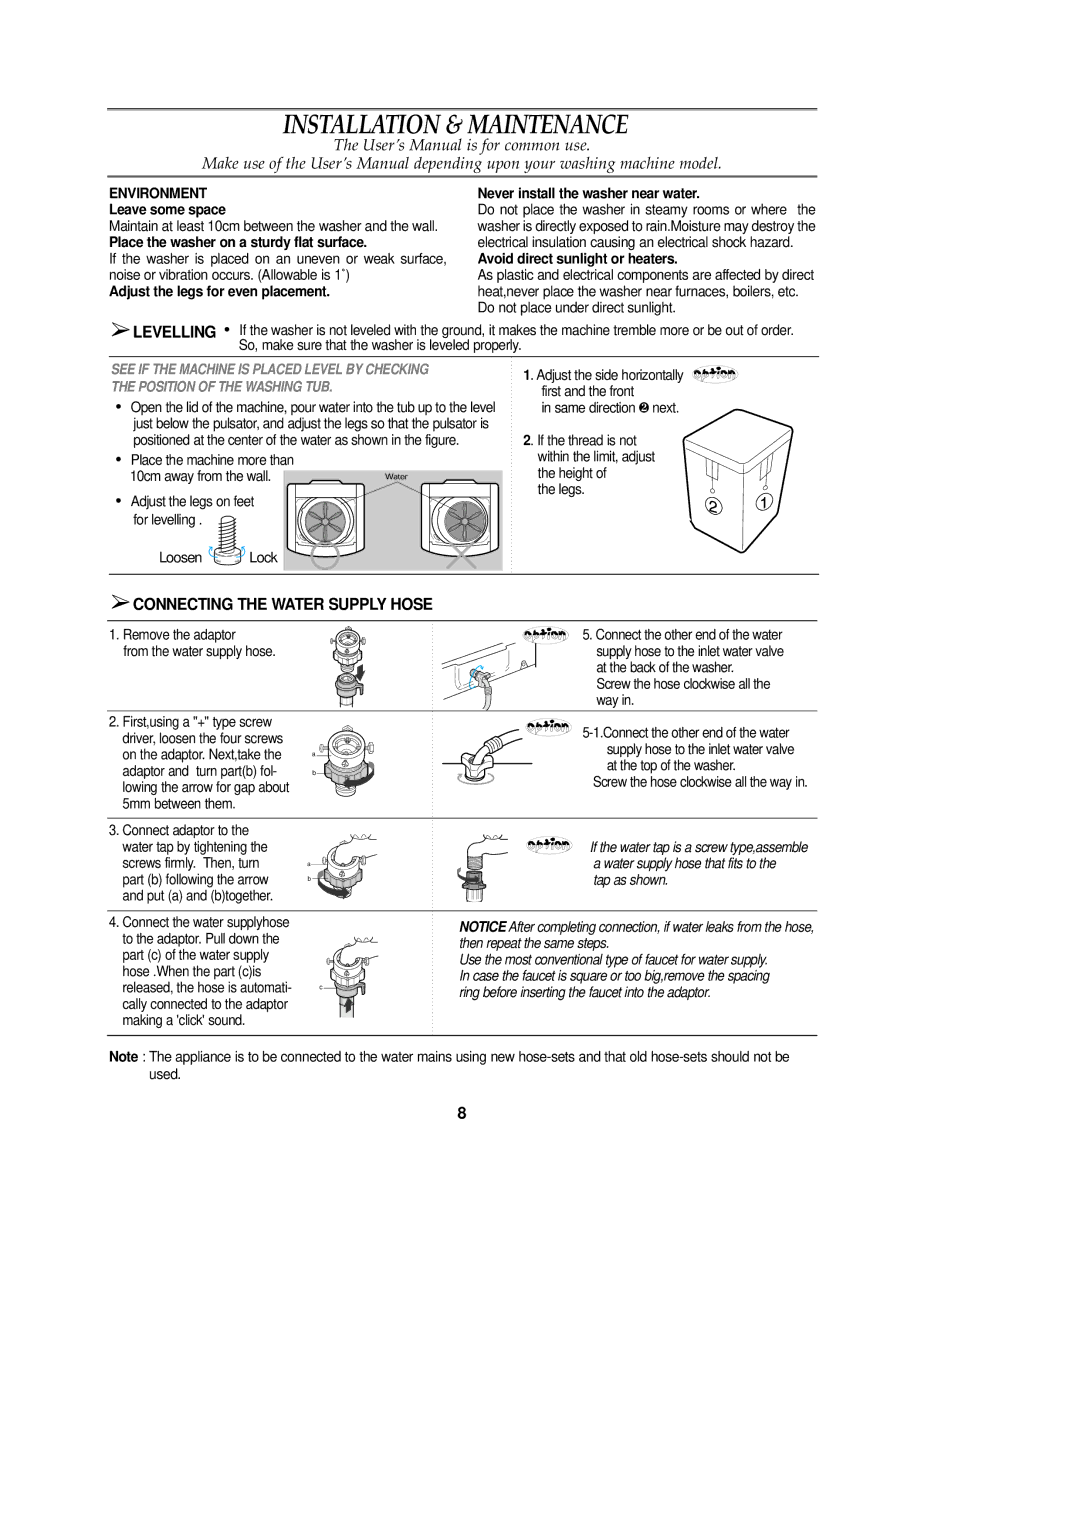
SEE IF THE MACHINE IS PLACED LEVEL BY CHECKING THE POSITION OF THE WASHING TUB.
•Open the lid of the machine, pour water into the tub up to the level just below the pulsator, and adjust the legs so that the pulsator is positioned at the center of the water as shown in the figure.
•Place the machine more than
10cm away from the wall.
• Adjust the legs on feet for levelling .
1 . Adjust the side horizontally
first and the front |
|
in same direction | ❷ next. |
2 . If the thread is not within the limit, adjust the height of
the legs.
Loosen ![]() Lock
Lock
 CONNECTING THE WATER SUPPLY HOSE
1.Remove the adaptor
from the water supply hose.
5.Connect the other end of the water supply hose to the inlet water valve at the back of the washer.
Screw the hose clockwise all the way in.
2. First,using a "+" type screw |
|
| |
driver, loosen the four screws |
|
| |
|
| supply hose to the inlet water valve | |
on the adaptor. Next,take the | a |
| |
|
| at the top of the washer. | |
adaptor and turn part(b) fol- | b |
| |
| Screw the hose clockwise all the way in. | ||
lowing the arrow for gap about |
|
| |
|
|
| |
5mm between them. |
|
|
|
3. Connect adaptor to the |
|
|
|
water tap by tightening the |
|
| If the water tap is a screw type,assemble |
screws firmly. Then, turn | a |
| a water supply hose that fits to the |
part (b) following the arrow | b |
| tap as shown. |
and put (a) and (b)together. |
|
|
|
4. Connect the water supplyhose |
|
| NOTICE After completing connection, if water leaks from the hose, |
to the adaptor. Pull down the |
|
| |
|
| then repeat the same steps. | |
part (c) of the water supply |
|
| |
|
| Use the most conventional type of faucet for water supply. | |
hose .When the part (c)is |
|
| |
|
| In case the faucet is square or too big,remove the spacing | |
released, the hose is automati- |
| c | |
| ring before inserting the faucet into the adaptor. | ||
cally connected to the adaptor |
|
| |
|
|
| |
making a 'click' sound. |
|
|
|
Note : The appliance is to be connected to the water mains using new
8