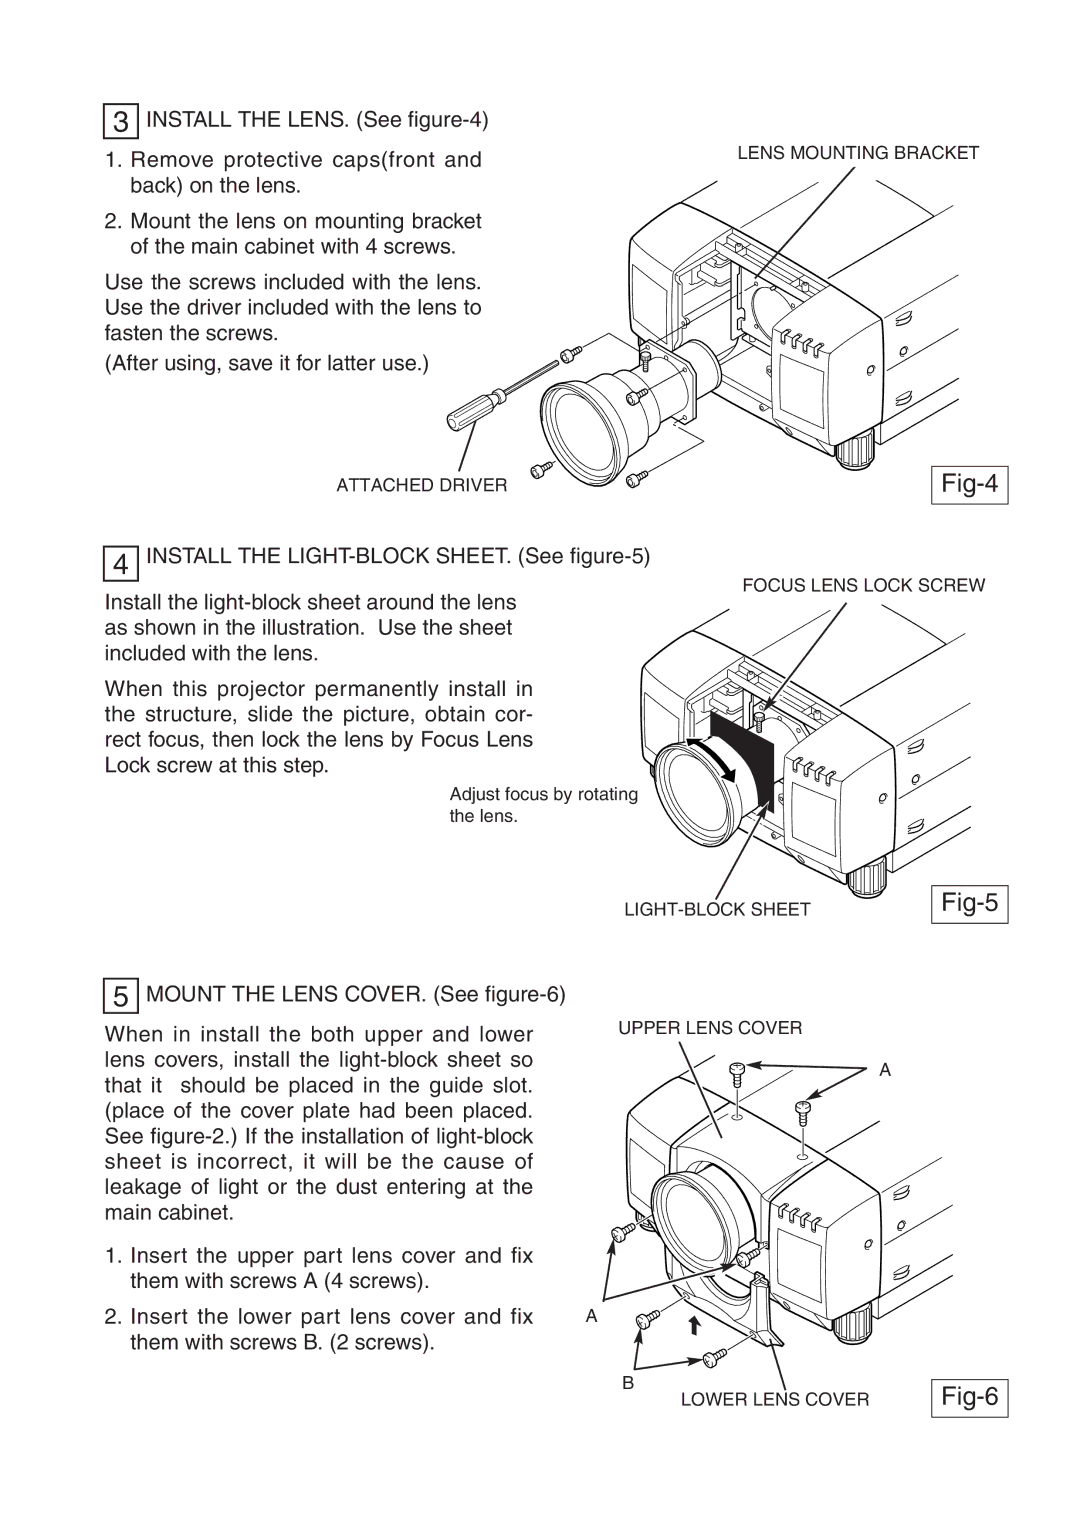
3INSTALL THE LENS. (See
1.Remove protective caps(front and back) on the lens.
2.Mount the lens on mounting bracket of the main cabinet with 4 screws.
Use the screws included with the lens. Use the driver included with the lens to fasten the screws.
(After using, save it for latter use.)
ATTACHED DRIVER
4INSTALL THE
Install the
When this projector permanently install in the structure, slide the picture, obtain cor- rect focus, then lock the lens by Focus Lens Lock screw at this step.
Adjust focus by rotating the lens.
LENS MOUNTING BRACKET
Fig-4
FOCUS LENS LOCK SCREW
Fig-5
5
MOUNT THE LENS COVER. (See
When in install the both upper and lower lens covers, install the
1.Insert the upper part lens cover and fix them with screws A (4 screws).
2.Insert the lower part lens cover and fix them with screws B. (2 screws).
UPPER LENS COVER
![]() A
A
A
B
LOWER LENS COVER