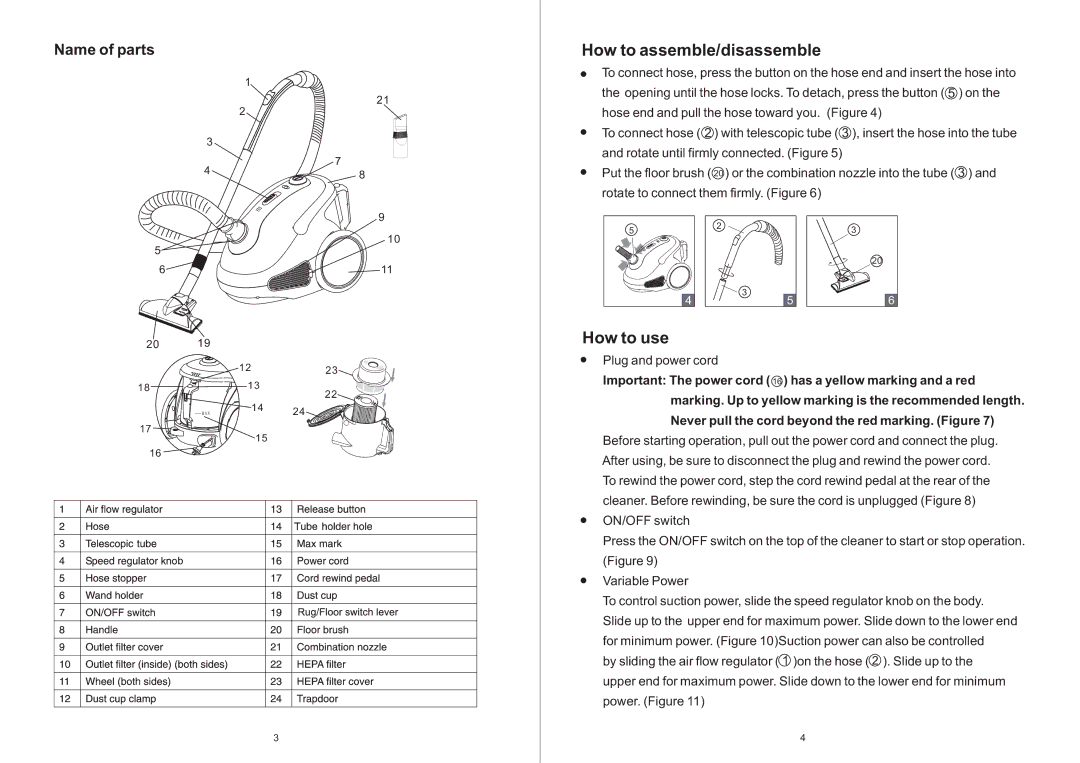
Name of parts
3
4
1
21
2
7
8
How to assemble/disassemble
·To connect hose, press the button on the hose end and insert the hose into the opening until the hose locks. To detach, press the button ( 5 ) on the hose end and pull the hose toward you. (Figure 4)
·To connect hose ( 2 ) with telescopic tube ( 3 ), insert the hose into the tube and rotate until firmly connected. (Figure 5)
·Put the floor brush ( 20 ) or the combination nozzle into the tube ( 3 ) and rotate to connect them firmly. (Figure 6)
5
6
9
10
![]() 11
11
5 |
2
3
3
20
20 19
18
MAX
17
16
1223
13
22
1424 ![]()
15
How to use
·Plug and power cord
Important: The power cord ( 16 ) has a yellow marking and a red marking. Up to yellow marking is the recommended length. Never pull the cord beyond the red marking. (Figure 7)
Before starting operation, pull out the power cord and connect the plug. After using, be sure to disconnect the plug and rewind the power cord. To rewind the power cord, step the cord rewind pedal at the rear of the cleaner. Before rewinding, be sure the cord is unplugged (Figure 8)
·ON/OFF switch
Press the ON/OFF switch on the top of the cleaner to start or stop operation. (Figure 9)
·Variable Power
To control suction power, slide the speed regulator knob on the body. Slide up to the upper end for maximum power. Slide down to the lower end for minimum power. (Figure 10)Suction power can also be controlled
by sliding the air flow regulator ( 1 )on the hose ( 2 ). Slide up to the upper end for maximum power. Slide down to the lower end for minimum power. (Figure 11)
3 | 4 |