ASSEMBLY INSTRUCTIONS
1
2
3
1![]()
![]()
![]()
2
1
3
2
■TOOL LIST
•Screwdriver (Phillips or Standard)
•Allen wrench 4mm
•10mm wrench
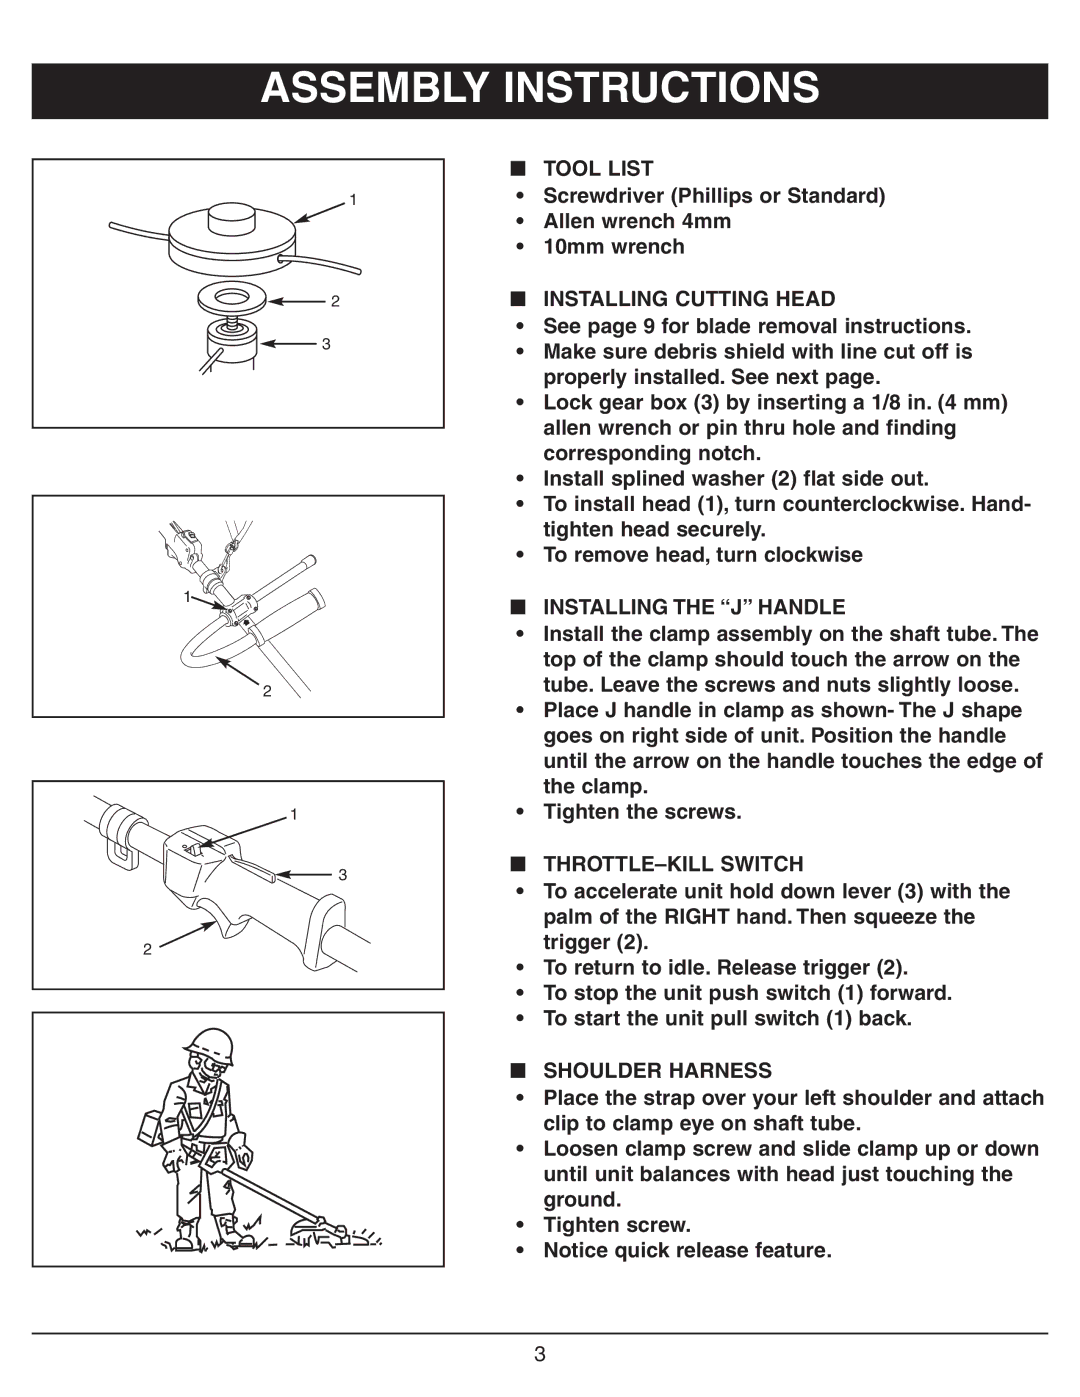
■INSTALLING CUTTING HEAD
•See page 9 for blade removal instructions.
•Make sure debris shield with line cut off is properly installed. See next page.
•Lock gear box (3) by inserting a 1/8 in. (4 mm) allen wrench or pin thru hole and finding corresponding notch.
•Install splined washer (2) flat side out.
•To install head (1), turn counterclockwise. Hand- tighten head securely.
•To remove head, turn clockwise
■INSTALLING THE “J” HANDLE
•Install the clamp assembly on the shaft tube. The top of the clamp should touch the arrow on the tube. Leave the screws and nuts slightly loose.
•Place J handle in clamp as shown- The J shape goes on right side of unit. Position the handle until the arrow on the handle touches the edge of the clamp.
•Tighten the screws.
■THROTTLE–KILL SWITCH
•To accelerate unit hold down lever (3) with the palm of the RIGHT hand. Then squeeze the trigger (2).
•To return to idle. Release trigger (2).
•To stop the unit push switch (1) forward.
•To start the unit pull switch (1) back.
■SHOULDER HARNESS
•Place the strap over your left shoulder and attach clip to clamp eye on shaft tube.
•Loosen clamp screw and slide clamp up or down until unit balances with head just touching the ground.
•Tighten screw.
•Notice quick release feature.
3