4. Place the right side panel in the slot of floor panel.
5. Place the front panel in the slot of bottom panel.
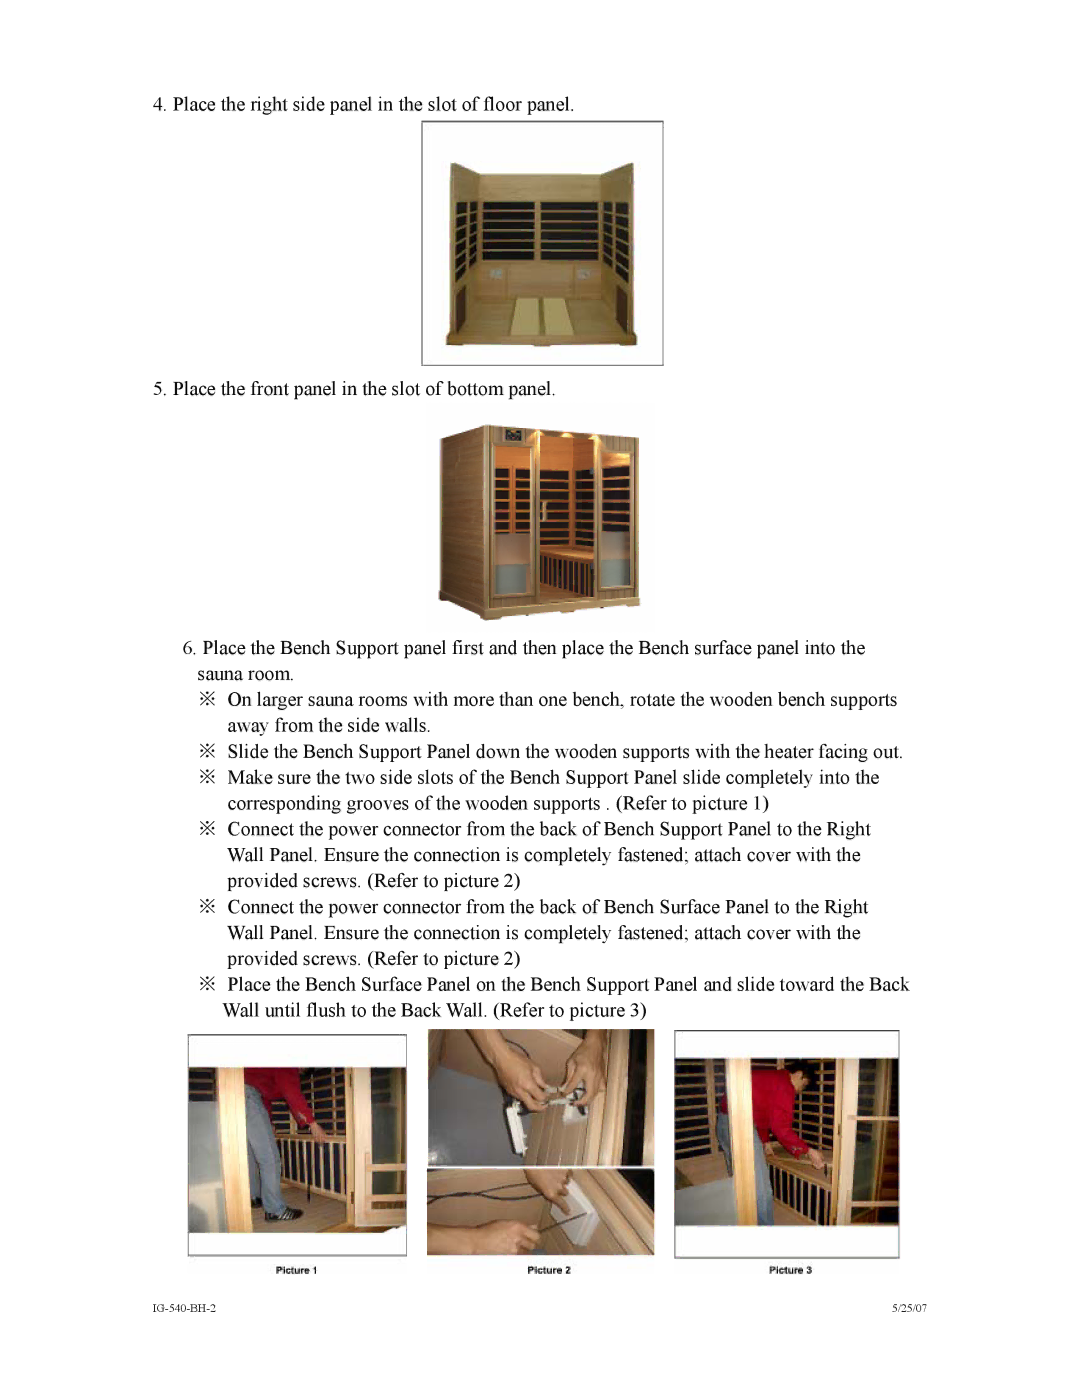
6.Place the Bench Support panel first and then place the Bench surface panel into the sauna room.
※On larger sauna rooms with more than one bench, rotate the wooden bench supports away from the side walls.
※Slide the Bench Support Panel down the wooden supports with the heater facing out.
※Make sure the two side slots of the Bench Support Panel slide completely into the corresponding grooves of the wooden supports . (Refer to picture 1)
※Connect the power connector from the back of Bench Support Panel to the Right Wall Panel. Ensure the connection is completely fastened; attach cover with the provided screws. (Refer to picture 2)
※Connect the power connector from the back of Bench Surface Panel to the Right Wall Panel. Ensure the connection is completely fastened; attach cover with the provided screws. (Refer to picture 2)
※Place the Bench Surface Panel on the Bench Support Panel and slide toward the Back Wall until flush to the Back Wall. (Refer to picture 3)
| 5/25/07 |
