
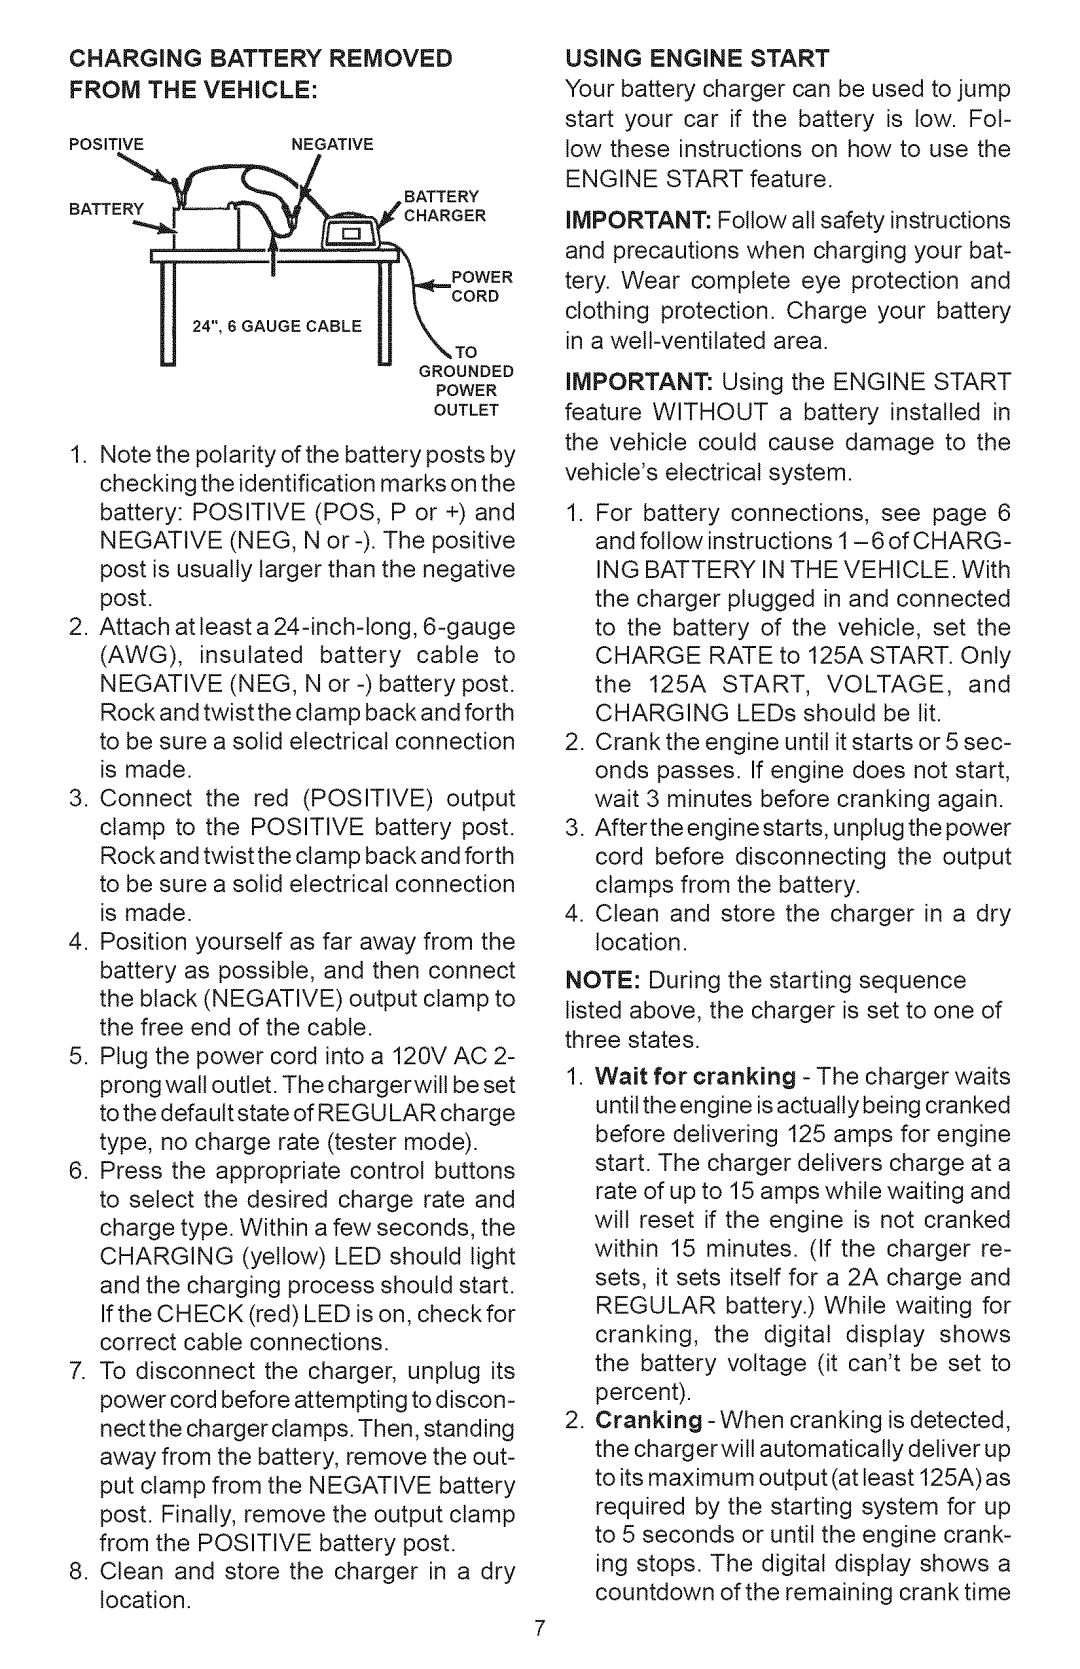
200.71226 specifications
The Sears 200.71226 is a versatile and durable multi-function electric tool that caters to both DIY enthusiasts and professional craftspeople alike. Designed for reliability and high performance, this tool offers a wide array of features that make it suitable for various tasks around the home or workshop.One of the standout features of the Sears 200.71226 is its powerful motor, which delivers consistent performance across different applications. The motor is engineered to provide ample torque, enabling users to handle tough materials with ease, whether cutting, sanding, or grinding. This makes it an ideal tool for woodworking, metalworking, and even complex crafting projects.
The design of the Sears 200.71226 emphasizes user comfort and convenience. It boasts an ergonomic handle that reduces fatigue during prolonged use, ensuring that users can work efficiently without compromising on comfort. Additionally, the tool's lightweight structure means that users can easily maneuver it without straining their wrists or arms, making it perfect for extended projects.
Equipped with a quick-change chuck, the Sears 200.71226 allows users to easily swap out bits, blades, and attachments without the need for additional tools. This feature not only saves time but also enhances the tool's versatility, as users can switch between different functions with minimal downtime.
Another technological advantage of the Sears 200.71226 is its variable speed control. This functionality allows users to adjust the speed to suit the specific task at hand, from high-speed drilling to more controlled sanding. This control over speed ensures precision and quality in various applications, making sure that the final results meet the highest standards.
The Sears 200.71226 also incorporates safety features, such as an integrated safety switch that prevents accidental startups. This attention to safety is paramount, particularly for those who may be less experienced in handling power tools.
In summary, the Sears 200.71226 is a robust and reliable multi-function electric tool, characterized by its powerful motor, ergonomic design, quick-change chuck, variable speed control, and essential safety features. Whether you're a hobbyist or a professional, this tool is engineered to provide the performance and versatility needed to tackle a wide range of projects effectively. With its combination of quality and innovation, the Sears 200.71226 stands out as a valuable addition to any toolkit.