#6-3041 SNAPPERIZER KIT
3.Hook the ends of the springs over the tabs on the bottom plate as shown. See Figure 3. After hooking the
springs on the tabs, use pliers to squeeze each hook closed over the tab.
CLOSE ENDS WITH PLIERS
TAB ON BOTTOM
PLATE (RING)
Figure 3 - Spring Connection Detail
4.Position the bottom plate with FRONT marking between the front wheels. See Figure 4. Hook the ends of each spring over the nearest wheel arm bracket. Reconnect the spark plug wire to ready the mower for operation.
OPERATING HINTS
Before starting the engine, raise the mower deck into the highest cutting height (lowest notches) or in position to allow maximum pulverizing with minimum of grass being cut. Run engine at top speed and low ground speed for best results. If leaf
CAUTION: The Snapperizer is not intended for shredding large sticks or tree limbs. The area must be cleared of stones, wire, large sticks or other objects, which could jam the blade and stall the engine. If jamming occurs, and cannot be cleared by rotating blade with recoil starter, DISCONNECT and SECURE SPARK PLUG WIRE, raise deck and manually rotate blade until jamming object can be removed.
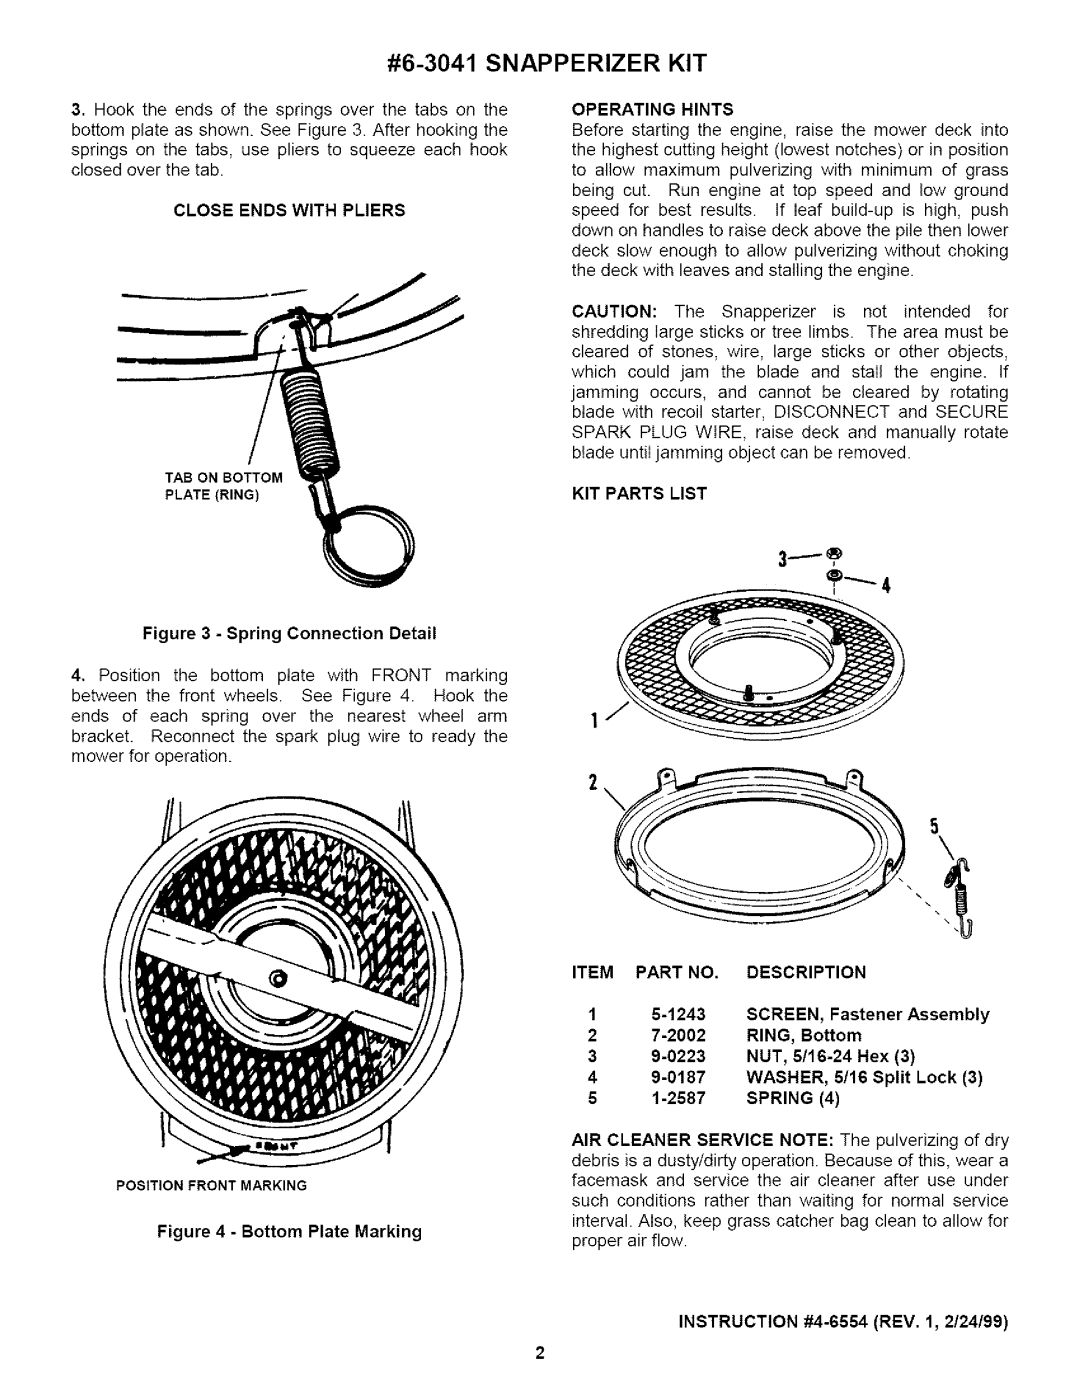
KIT PARTS LIST
5
@
ITEM PART NO,
1
2
3
4
5
DESCRIPTION
SCREEN, Fastener Assembly
RING, Bottom
NUT,
WASHER, 5/16 Split Lock (3)
SPRING (4)
POSITION FRONT MARKING
Figure 4 - Bottom Plate Marking
AIR CLEANER SERVICE NOTE: The pulverizing of dry
debris is a dusty/dirty operation. Because of this, wear a facemask and service the air cleaner after use under
such conditions rather than waiting for normal service interval. Also, keep grass catcher bag clean to allow for proper air flow.
INSTRUCTION
2