ENFORCER VIDEO DOOR PHONE
Installation Notes:
1. Unpack the video door phone and note the included parts.
2.Read this manual thoroughly. A clear understanding of the manual will make installation and operation much easier.
3.Find a good location to mount the monitor and camera. Make sure there is enough room to wire both units correctly with 22AWG
4.Use only
5.Avoid mounting either the cameras or the monitors near sources of strong electromagnetic signals or other electronic devices as they may cause interference.
6.Avoid mounting the cameras in direct sunlight or exposing the camera to strong vibrations or direct rain or other moisture, as it may damage them.
7.The camera and the monitor contain no
Installation (monitor):
1.The monitor must be positioned so that the image can be seen clearly and the user can operate the monitor’s functions.
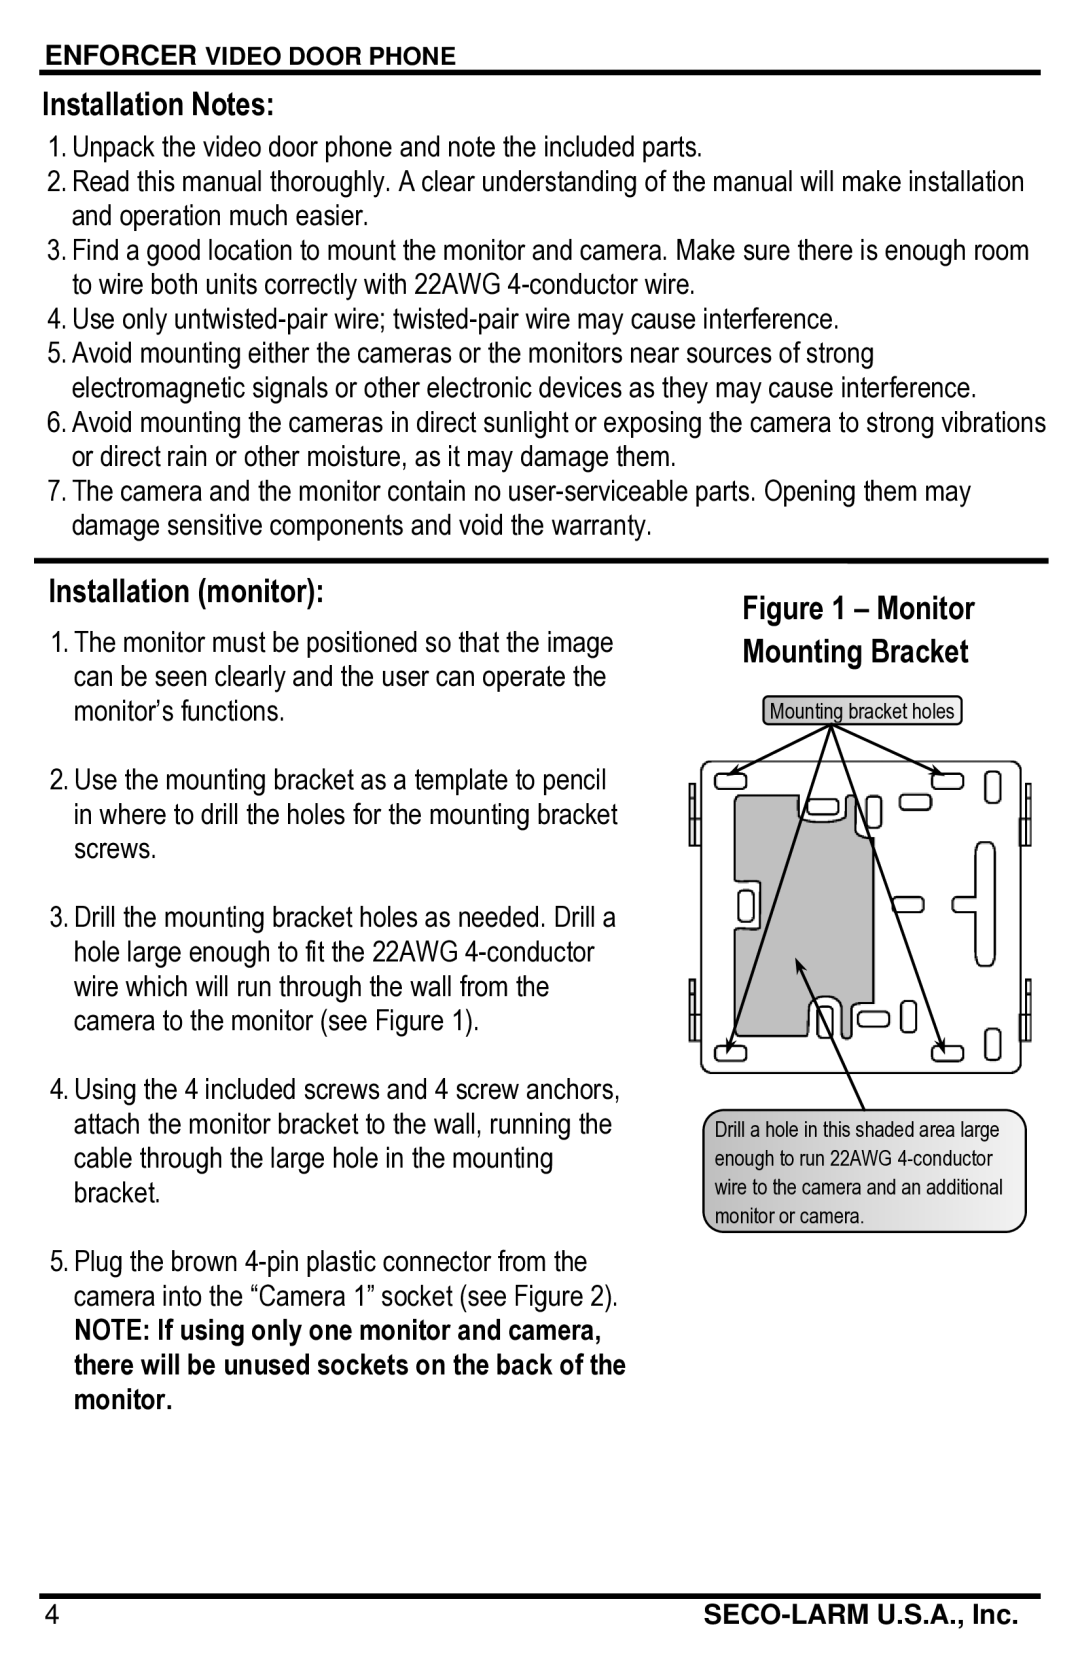
2.Use the mounting bracket as a template to pencil in where to drill the holes for the mounting bracket screws.
3.Drill the mounting bracket holes as needed. Drill a hole large enough to fit the 22AWG
4.Using the 4 included screws and 4 screw anchors, attach the monitor bracket to the wall, running the cable through the large hole in the mounting bracket.
Figure 1 – Monitor Mounting Bracket
Mounting bracket holes
Drill a hole in this shaded area large enough to run 22AWG
5.Plug the brown
NOTE: If using only one monitor and camera, there will be unused sockets on the back of the monitor.
4 |