INSTRUCCIONES DE USO
OPERATING INSTRUCTIONS
Para Usar su Aspiradora Inalámbrica
1.Para encender la unidad, deslice la llave de encendido a la posición “On” (encendido).
2.Para apagar la unidad, deslice la llave de encendido a la posición “Off” (apagado).
3.Viene con una boquilla esquinera para limpiar lugares angostos y difíciles de acceder. Viene con un cepillo limpiador para limpiar tapizados, muebles, etc.
Para usar el Cepillo Eléctrico
1Verifique que esté apagada.
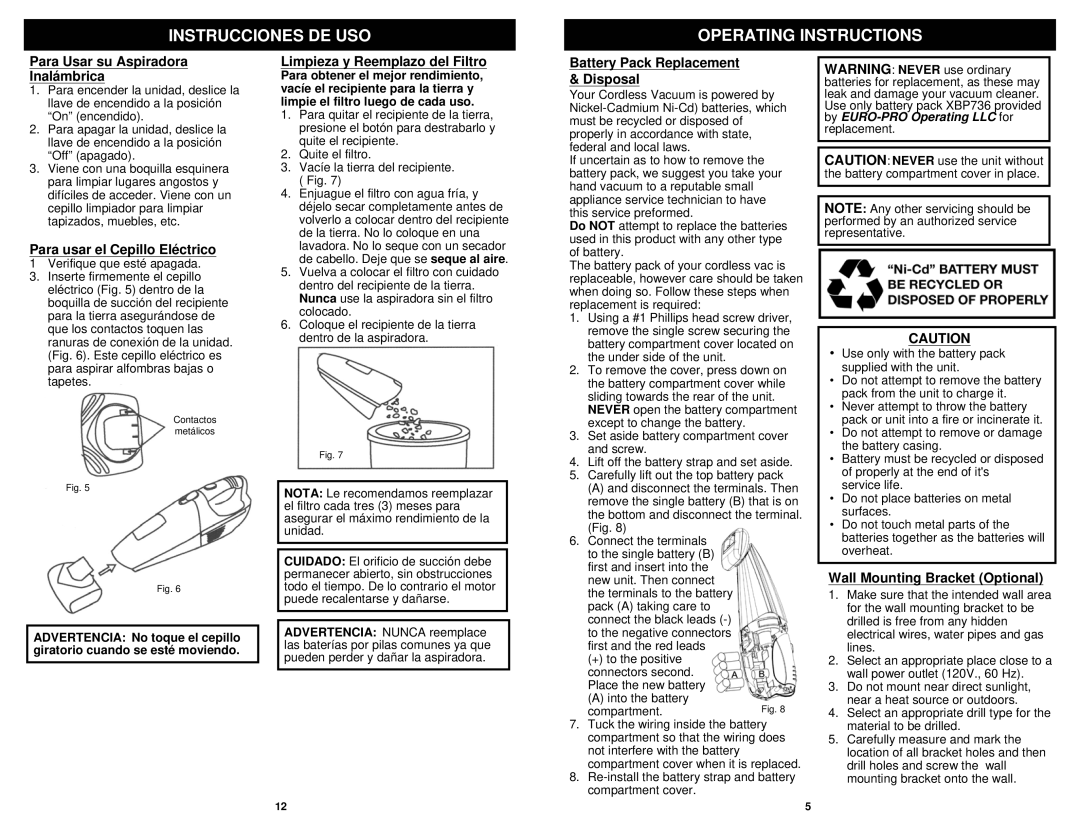
3.Inserte firmemente el cepillo eléctrico (Fig. 5) dentro de la boquilla de succión del recipiente para la tierra asegurándose de que los contactos toquen las ranuras de conexión de la unidad. (Fig. 6). Este cepillo eléctrico es para aspirar alfombras bajas o tapetes.
Contactos metálicos
Fig. 5
Fig. 6
ADVERTENCIA: No toque el cepillo giratorio cuando se esté moviendo.
Limpieza y Reemplazo del Filtro
Para obtener el mejor rendimiento, vacíe el recipiente para la tierra y limpie el filtro luego de cada uso.
1.Para quitar el recipiente de la tierra, presione el botón para destrabarlo y quite el recipiente.
2.Quite el filtro.
3.Vacíe la tierra del recipiente. ( Fig. 7)
4.Enjuague el filtro con agua fría, y déjelo secar completamente antes de volverlo a colocar dentro del recipiente de la tierra. No lo coloque en una lavadora. No lo seque con un secador de cabello. Deje que se seque al aire.
5.Vuelva a colocar el filtro con cuidado dentro del recipiente de la tierra. Nunca use la aspiradora sin el filtro colocado.
6.Coloque el recipiente de la tierra dentro de la aspiradora.
Fig. 7
NOTA: Le recomendamos reemplazar el filtro cada tres (3) meses para asegurar el máximo rendimiento de la unidad.
CUIDADO: El orificio de succión debe permanecer abierto, sin obstrucciones todo el tiempo. De lo contrario el motor puede recalentarse y dañarse.
ADVERTENCIA: NUNCA reemplace las baterías por pilas comunes ya que pueden perder y dañar la aspiradora.
Battery Pack Replacement & Disposal
Your Cordless Vacuum is powered by
If uncertain as to how to remove the battery pack, we suggest you take your hand vacuum to a reputable small appliance service technician to have this service preformed.
Do NOT attempt to replace the batteries used in this product with any other type of battery.
The battery pack of your cordless vac is replaceable, however care should be taken when doing so. Follow these steps when replacement is required:
1.Using a #1 Phillips head screw driver, remove the single screw securing the battery compartment cover located on the under side of the unit.
2.To remove the cover, press down on the battery compartment cover while sliding towards the rear of the unit.
NEVER open the battery compartment except to change the battery.
3.Set aside battery compartment cover and screw.
4.Lift off the battery strap and set aside.
5.Carefully lift out the top battery pack
(A)and disconnect the terminals. Then remove the single battery (B) that is on the bottom and disconnect the terminal. (Fig. 8)
6.Connect the terminals to the single battery (B) first and insert into the new unit. Then connect the terminals to the battery pack (A) taking care to connect the black leads
(+) to the positive connectors second. Place the new battery
(A)into the battery
compartment.
7.Tuck the wiring inside the battery compartment so that the wiring does not interfere with the battery compartment cover when it is replaced.
8.
WARNING: NEVER use ordinary batteries for replacement, as these may leak and damage your vacuum cleaner. Use only battery pack XBP736 provided by
CAUTION: NEVER use the unit without the battery compartment cover in place.
NOTE: Any other servicing should be performed by an authorized service representative.
CAUTION
•Use only with the battery pack supplied with the unit.
•Do not attempt to remove the battery pack from the unit to charge it.
•Never attempt to throw the battery pack or unit into a fire or incinerate it.
•Do not attempt to remove or damage the battery casing.
•Battery must be recycled or disposed of properly at the end of it's service life.
•Do not place batteries on metal surfaces.
•Do not touch metal parts of the batteries together as the batteries will overheat.
Wall Mounting Bracket (Optional)
1.Make sure that the intended wall area for the wall mounting bracket to be drilled is free from any hidden electrical wires, water pipes and gas lines.
2.Select an appropriate place close to a wall power outlet (120V., 60 Hz).
3.Do not mount near direct sunlight, near a heat source or outdoors.
4.Select an appropriate drill type for the material to be drilled.
5.Carefully measure and mark the location of all bracket holes and then drill holes and screw the wall mounting bracket onto the wall.
12
5