
LC-15M4U specifications
The Sharp LC-15M4U is a compact and versatile LCD television that combines innovative technology with user-friendly features. Designed for those seeking a quality viewing experience in smaller spaces, this model is particularly popular for bedrooms, kitchens, or as a secondary TV in apartments.One of the standout features of the LC-15M4U is its 15-inch LCD display, which offers vibrant colors and sharp images. With a resolution of 1024 x 768 pixels, it delivers clear picture quality, making it suitable for watching movies, shows, or playing video games. The screen's size strikes a perfect balance for intimate settings, ensuring that viewers can enjoy high-definition content without straining their eyes.
The LC-15M4U harnesses advanced technologies such as Sharp's proprietary Aquos LCD technology. This technology enhances the overall image quality by improving brightness and contrast, leading to a more immersive viewing experience. The TV also includes a fast response time, minimizing blurring during fast-moving scenes, which is particularly beneficial for action films or sports.
Connectivity is another strong point of the LC-15M4U. Equipped with multiple input options, including HDMI, composite video, and audio jacks, it allows users to connect various devices such as gaming consoles, DVD players, or sound systems with ease. The presence of a built-in tuner means users can access over-the-air broadcast channels without the need for additional equipment.
This model also features an integrated speaker system designed to provide clear audio to complement its visual performance. While the built-in speakers may not rival high-end sound systems, they offer satisfactory sound quality for everyday viewing.
In terms of usability, the LC-15M4U comes with an intuitive remote control that streamlines navigation through channels and settings. It also includes features like on-screen menus, making it easy for users to customize their viewing preferences.
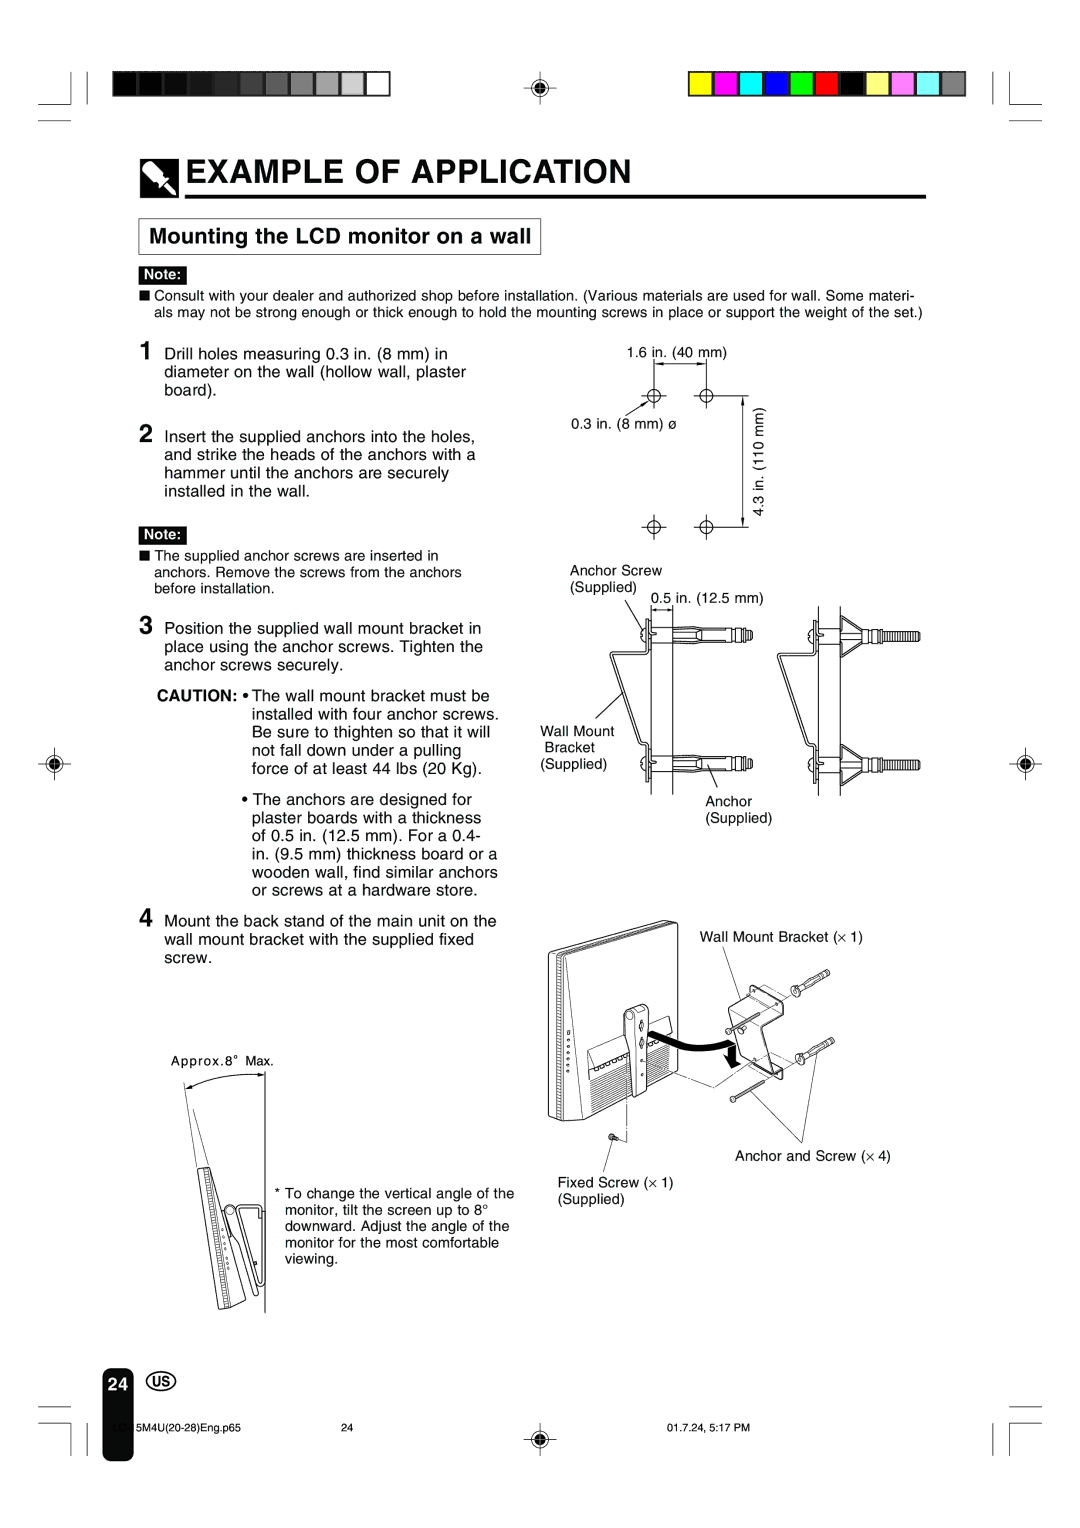
Additionally, the design of the LC-15M4U is sleek and modern, making it an attractive addition to any room. Its lightweight build allows for easy mounting on walls or positioning on stands, versatile enough to fit various decor styles.
In conclusion, the Sharp LC-15M4U is a commendable option for consumers looking for a small yet powerful television. With its impressive display quality, versatile connectivity options, and practical features, it meets the needs of modern viewers while being compact enough to fit into any lifestyle.