Maintenance | 4 |
4.Periodically inspect the pump, system components and sump for debris and foreign objects. Keep the sump free of all refuse. Perform routine maintenance as required.
![]() Risk of flooding. Flooding can cause personal injury or property damage. This pump comes with the auto- matic float switch mounted on the motor cover ready for oper- ation. Do not change switch settings. Refer to the “Motor, Switch & Cord Specifications” chart for switch settings.
Risk of flooding. Flooding can cause personal injury or property damage. This pump comes with the auto- matic float switch mounted on the motor cover ready for oper- ation. Do not change switch settings. Refer to the “Motor, Switch & Cord Specifications” chart for switch settings.
MAINTENANCE
To Clean the Pump Screen:
NOTICE: Attempting to disassemble motor will void warranty.
![]() Risk of electrical shock. Shock can burn or kill. Always unplug the pump from the power source before servic- ing any system component. Do not lift pump by power cord.
Risk of electrical shock. Shock can burn or kill. Always unplug the pump from the power source before servic- ing any system component. Do not lift pump by power cord.
1.Disconnect power before servicing.
![]() Risk of Electric shock. Shock can burn or cause death. When servicing the system always disconnect power cord from the electrical outlet.
Risk of Electric shock. Shock can burn or cause death. When servicing the system always disconnect power cord from the electrical outlet.
2.Loosen the discharge pipe.
3.Use the pump handle to lift the pump out of the sump pit and place the pump on a clean level surface.
4.To clean the screen, use a screwdriver to unsnap the screen (See Figure 1), remove and rinse off the screen.
![]() -Airlock
-Airlock![]()
![]() (Remove screen
(Remove screen ![]()
![]() and
and ![]() look under
look under![]()
![]()
![]()
![]() pump
pump![]() for access)
for access) ![]()
Figure 1 – To clean the screen and anti-airlock valve.
5.
6.Put the pump back into the sump pit.
7.
8.Check the system operation by filling the basin with water and observing the pump’s operation through one complete cycle.
![]()
![]()
![]()
![]()
![]()
![]()
![]()
![]()
![]() Flood hazard. May cause personal injury or prop- erty damage. Failure to make this operational check can lead to improper operation, premature pump failure and flooding.
Flood hazard. May cause personal injury or prop- erty damage. Failure to make this operational check can lead to improper operation, premature pump failure and flooding.
To Replace the Vertical Float Switch:
NOTICE: The float must be able to complete its entire cycle without interference from any other object.
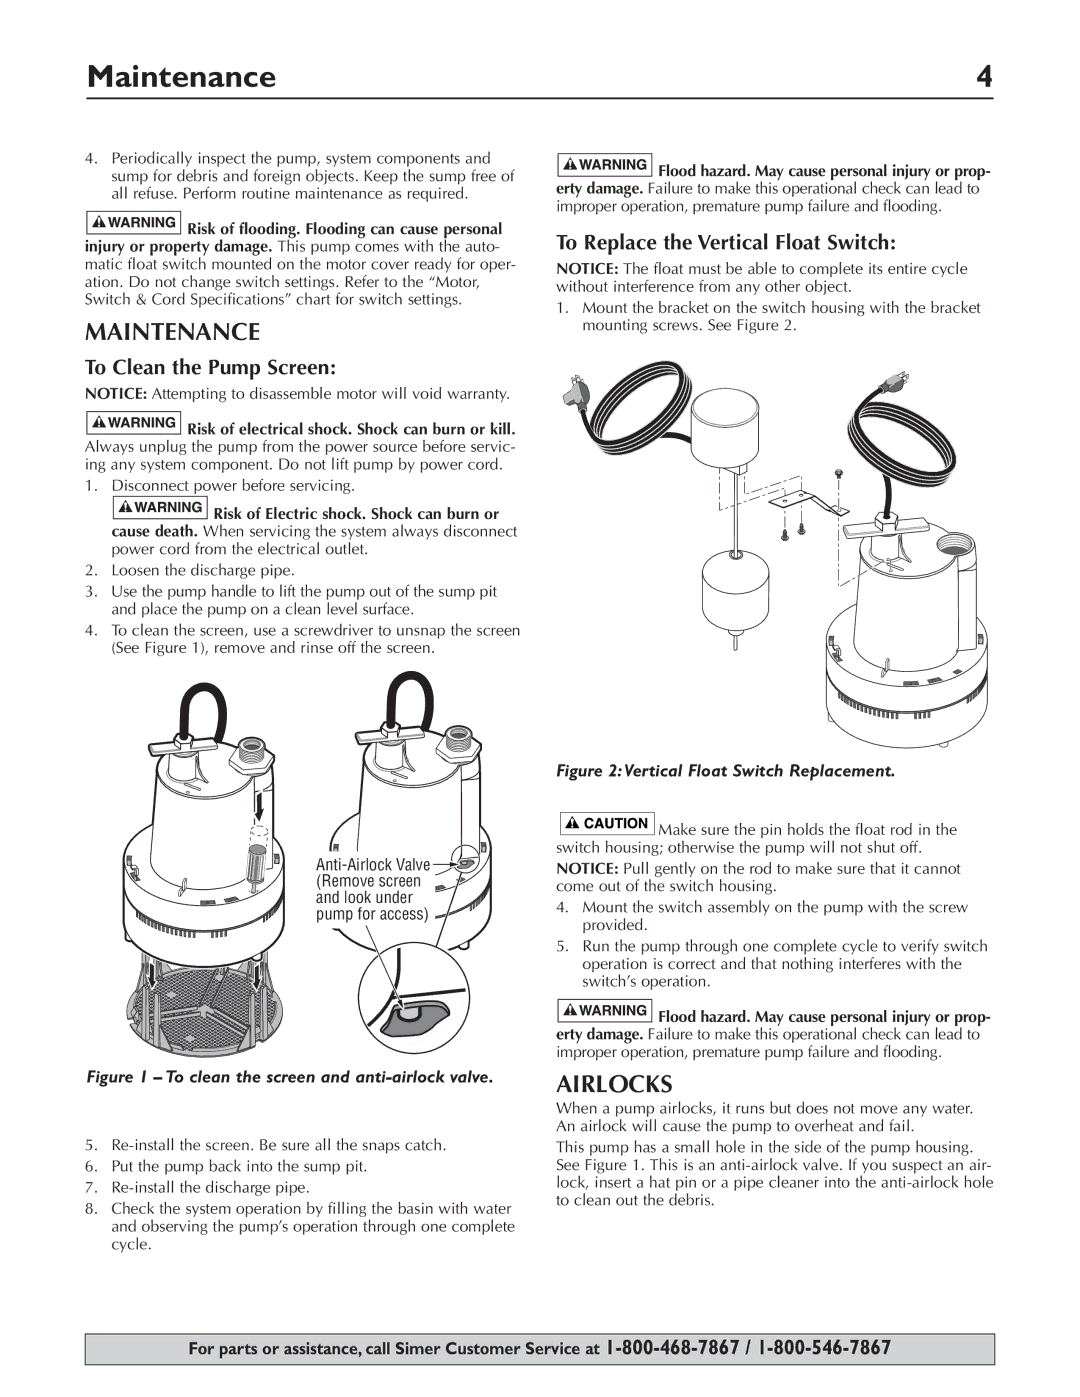
1.Mount the bracket on the switch housing with the bracket mounting screws. See Figure 2.
Figure 2:Vertical Float Switch Replacement.
![]()
![]()
![]()
![]()
![]()
![]()
![]()
![]()
![]()
![]() Make sure the pin holds the float rod in the switch housing; otherwise the pump will not shut off.
Make sure the pin holds the float rod in the switch housing; otherwise the pump will not shut off.
NOTICE: Pull gently on the rod to make sure that it cannot come out of the switch housing.
4.Mount the switch assembly on the pump with the screw provided.
5.Run the pump through one complete cycle to verify switch operation is correct and that nothing interferes with the switch’s operation.
![]()
![]()
![]()
![]()
![]()
![]()
![]()
![]()
![]() Flood hazard. May cause personal injury or prop- erty damage. Failure to make this operational check can lead to improper operation, premature pump failure and flooding.
Flood hazard. May cause personal injury or prop- erty damage. Failure to make this operational check can lead to improper operation, premature pump failure and flooding.
AIRLOCKS
When a pump airlocks, it runs but does not move any water. An airlock will cause the pump to overheat and fail.
This pump has a small hole in the side of the pump housing. See Figure 1. This is an
For parts or assistance, call Simer Customer Service at