Service
DRIVE BELT ADJUSTMENT (Continued)
If the auger drive slips (auger slows or doesn't rotate nor- mally while blowing snow), or stays engaged when the control is disengaged — and the auger clutch rod has been properly adjusted — the auger drive belt may be out of adjustment.
![]()
![]() WARNING
WARNING
Auger must NOT rotate unless the Auger Control lever has been depressed. Proper Auger Drive Belt adjustments stop the auger within 5 seconds after the Auger Control is disengaged.
Checking Auger Belt & Belt Guide Adjustments
1.Insert the Engine Key and start the Snowthrower.
2.Engage and disengage the Auger Control a series of ten times, checking that the auger comes to a com- plete stop within 5 seconds after the control is disen- gaged each time.
3.If the auger comes to a complete stop each time with- in 5 seconds, the adjustment is correct. If the auger does NOT come to a complete stop within the neces- sary 5 seconds, the adjustment is incorrect: readjust- ing the Auger Belt & Belt Guide according to the pro- cedures below.
Adjusting Auger Drive Belt
1.Make certain that the snowthrower is off, the Engine Key has been removed, and the spark plug discon- nected.
2.Check that there is no slack in the auger drive clutch rod (see Figure 25). If there is, follow the Auger Drive Clutch Rod Adjustment procedure on page 19.
3.Measure the length of the auger drive clutch spring (Figure 25).
4.Fully depress the auger control and measure the expanded length of the spring.
The spring should expand
5.Using a 3/8” wrench, loosen the Belt Cover screws and remove the Belt Cover.
6.Loosen the adjustment bolt (see Figure 26) and move the auger idler pulley.
7.Tighten the adjustment bolt and repeat steps
8.Test run the unit. The auger must NOT rotate unless the Auger Control lever has been depressed. Proper Auger Drive Belt adjustments stop the auger within 5 seconds after the Auger Control is disengaged. If the auger drive fails either of these tests, repeat the adjustment procedures.
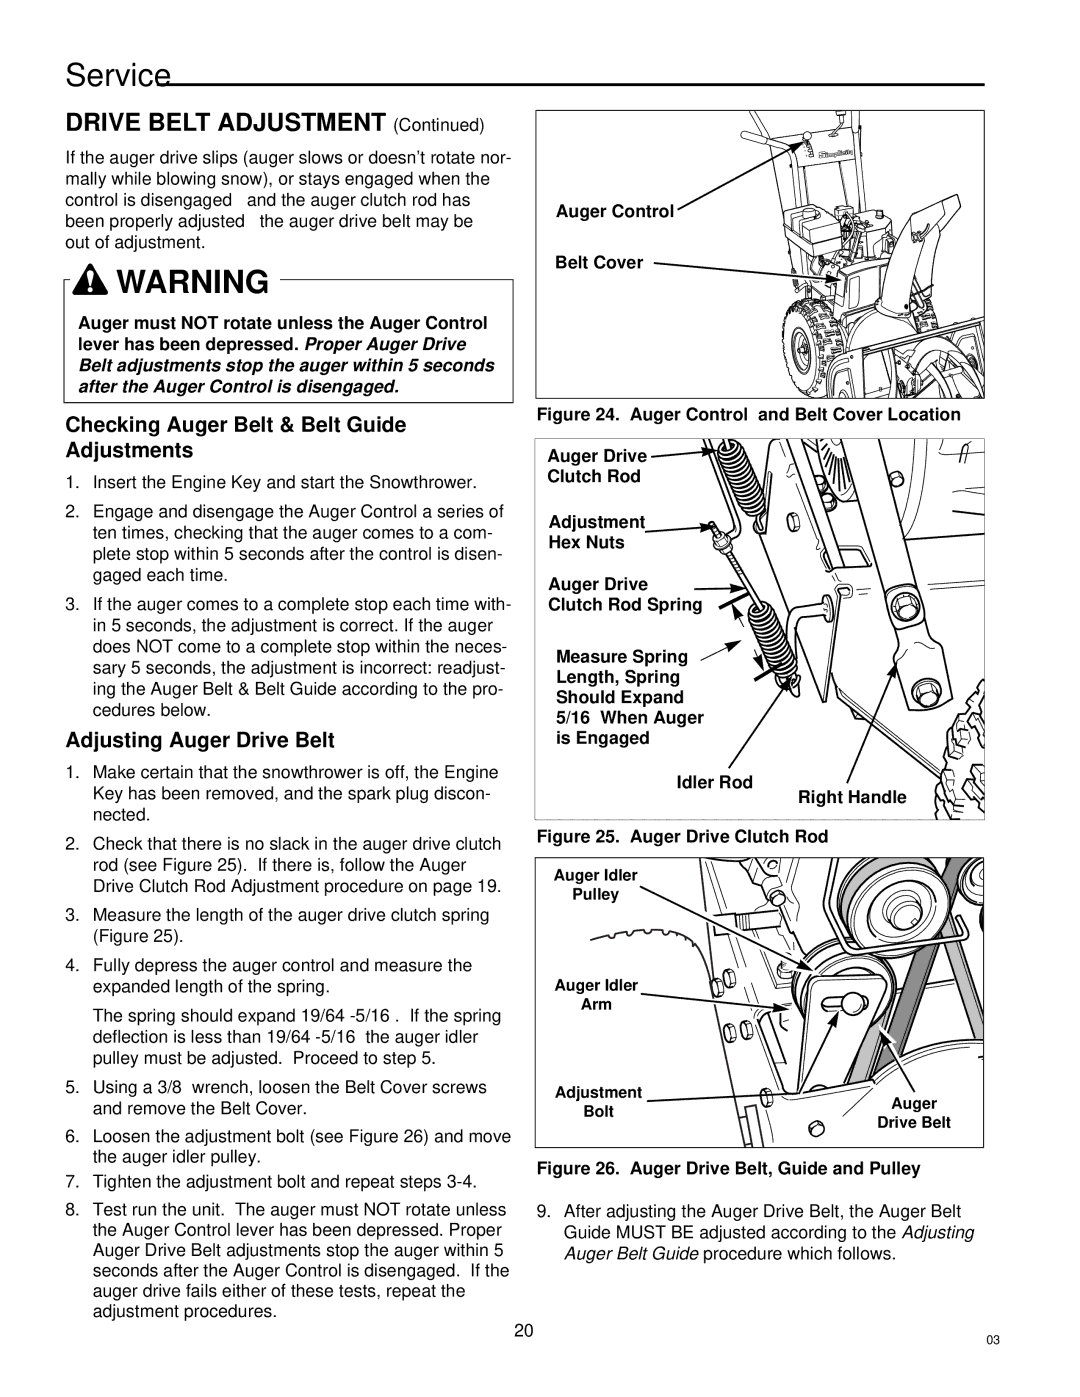
Auger Control |
Belt Cover |
Figure 24. Auger Control and Belt Cover Location
Auger Drive |
Clutch Rod |
Adjustment |
Hex Nuts |
Auger Drive |
Clutch Rod Spring |
Measure Spring |
Length, Spring |
Should Expand |
5/16” When Auger |
is Engaged |
Idler Rod |
Right Handle |
Figure 25. Auger Drive Clutch Rod
Auger Idler |
| |
Pulley |
| |
Auger Idler |
| |
Arm |
| |
Adjustment | Auger | |
Bolt | ||
Drive Belt | ||
|
Figure 26. Auger Drive Belt, Guide and Pulley
9.After adjusting the Auger Drive Belt, the Auger Belt Guide MUST BE adjusted according to the Adjusting Auger Belt Guide procedure which follows.
20
03