Manuals
/
Simplicity
/
Lawn and Garden
/
Snow Blower
Simplicity
1694584 319E Auger Drive Belt Replacement, Troubleshooting, Adjustments, & Service
Models:
1694583 319M
1694584 319E
1
20
22
22
Download
22 pages
9.48 Kb
15
16
17
18
19
20
21
22
Troubleshooting
Specifications
Maintenance
Proper Fuel Mixing Procedure
Discharge Chute Adjustment
How to
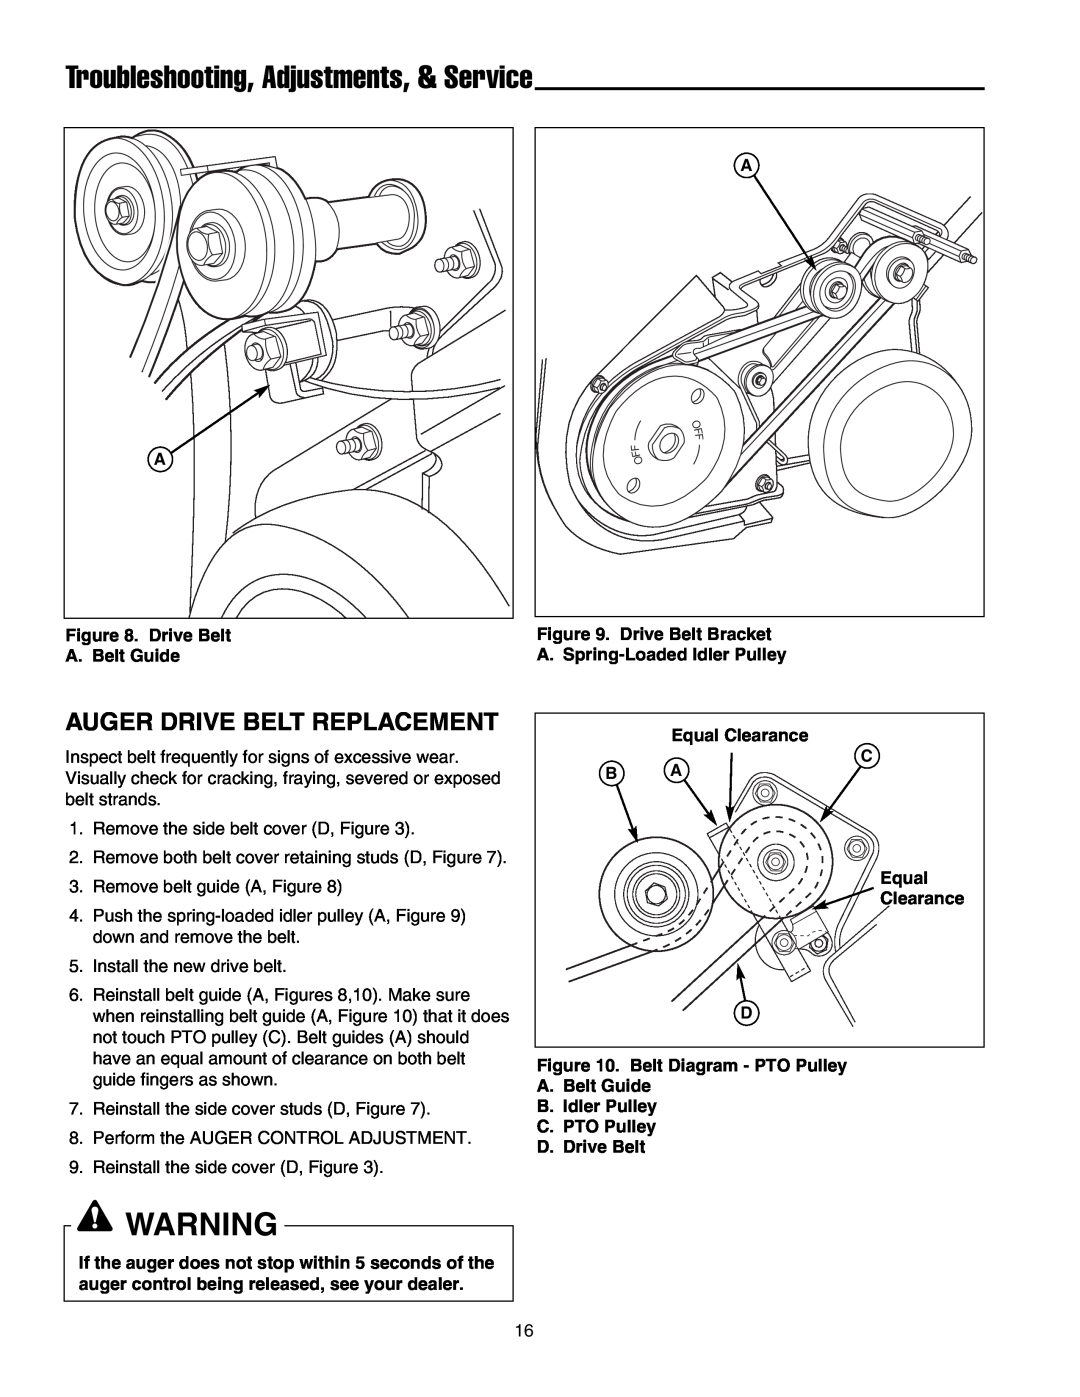
Auger Drive Belt Replacement
Safety
Features Controls
Ignition Switch
Page 20
Image 20
Page 19
Page 21
Page 20
Image 20
Page 19
Page 21
Contents
Print Vendor Instructions
Operator’s Manuals
Paper Size
Press
THIS PAGE INTENTIONALLY BLANK FOR PLACEMENT ONLY - DO NOT PRINT
319M Models
319E Models
OPERATOR’S MANUAL
Single Stage Snowthrower
Page
Table of Contents
Safety Rules & Information
Regular Maintenance
Troubleshooting, Adjustments, & Service
Safety Rules & Information
TRAINING
PREPARATION
OPERATION
Safety Rules
SERVICE, MAINTENANCE, AND STORAGE
CHILDREN
CLEARING A CLOGGED DISCHARGE CHUTE
IDENTIFICATION NUMBERS
ID Tag
PRODUCT
REFERENCE DATA
Safety Decals / Identification Numbers
SAFETY DECALS
Features Controls
CONTROL LOCATIONS
Features & Controls
Ignition Switch
Chute Deflector Control
Chute Direction Control
Discharge Chute Adjustment
Operation
GENERAL OPERATION
DANGER
FUEL AND OIL MIXTURE
PROPER FUEL MIXING PROCEDURE
Operation
STARTING THE ENGINE
STOPPING THE ENGINE
OPERATING THE SNOWTHROWER
SNOWTHROWING TIPS
STORAGE
After Each Use
Regular Maintenance
MAINTENANCE SCHEDULE
ENGINE / SEASONAL MAINTENANCE
CHECK AUGER CABLE & STOPPING TIME
Troubleshooting Adjustments, & Service
TROUBLESHOOTING
PROBLEM
PROBABLE CAUSE
Troubleshooting, Adjustments, & Service
AUGER CONTROL ADJUSTMENT
Adjustment
Inspection
Troubleshooting, Adjustments, & Service
AUGER DRIVE BELT IDLER PULLEY ADJUSTMENT
AUGER DRIVE BELT REPLACEMENT
AUGER FLITE SHOE REPLACEMENT
SPECIFICATIONS
REPLACEMENT PARTS
MAINTENANCE ITEMS
TECHNICAL MANUALS
Top
Page
Image
Contents