SM 1619X00516
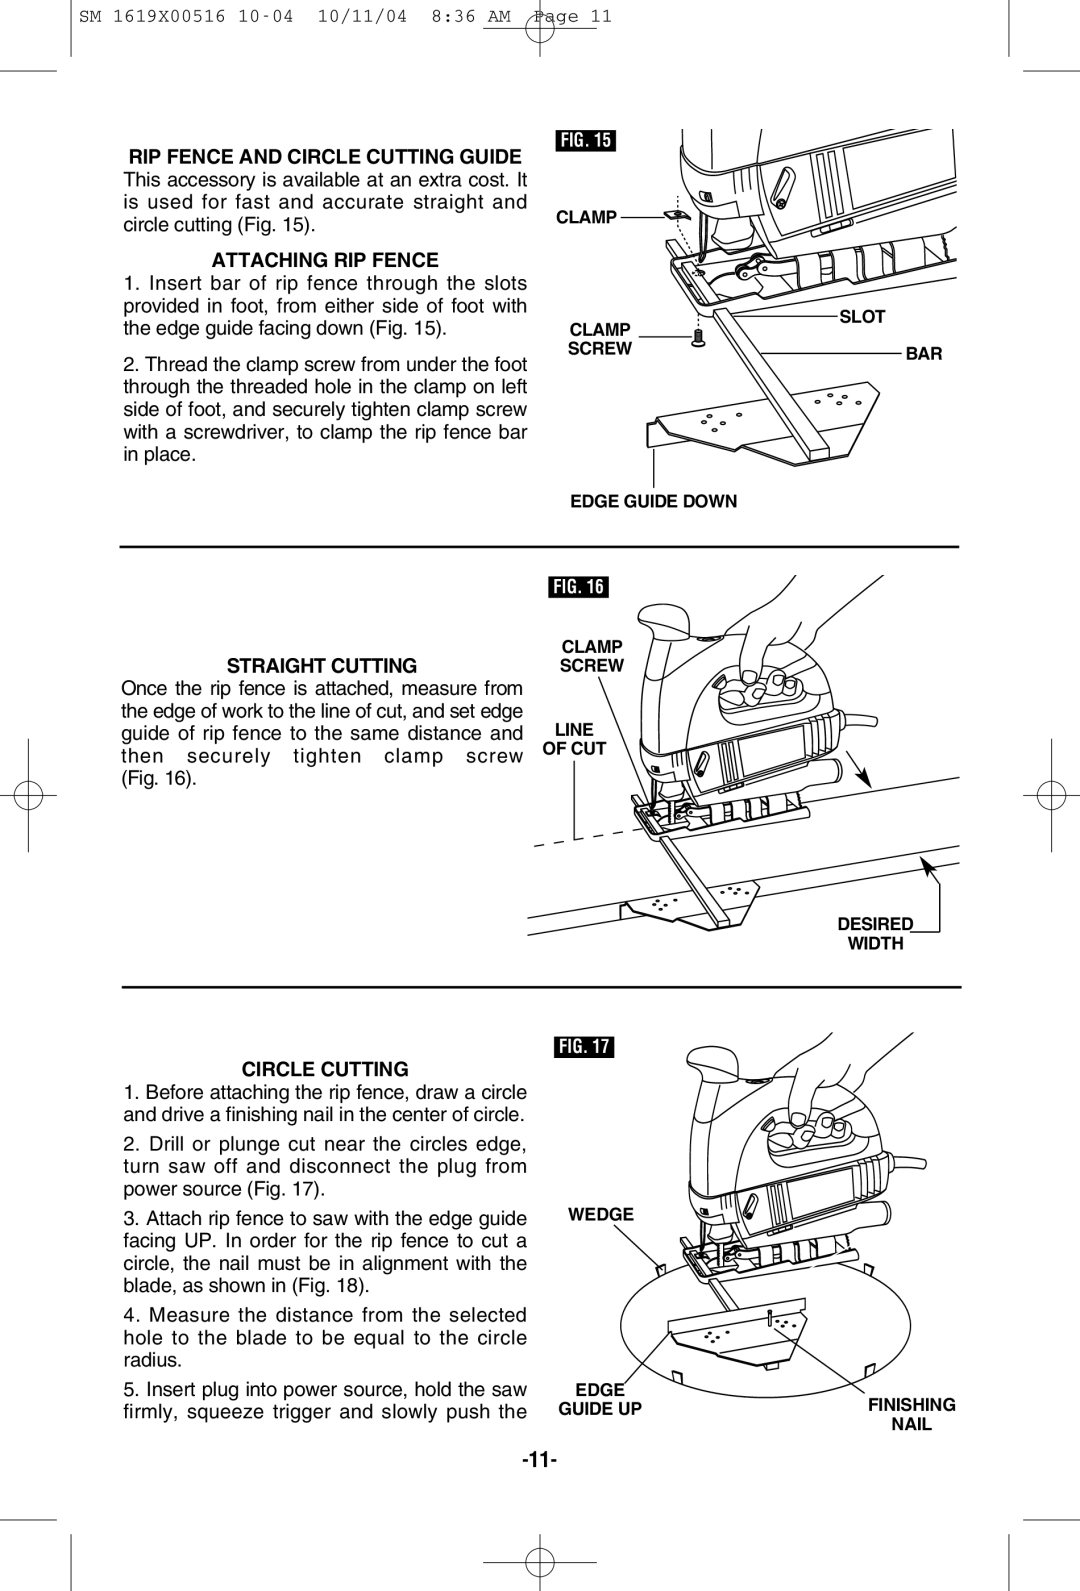
RIP FENCE AND CIRCLE CUTTING GUIDE This accessory is available at an extra cost. It is used for fast and accurate straight and circle cutting (Fig. 15).
ATTACHING RIP FENCE
1.Insert bar of rip fence through the slots provided in foot, from either side of foot with the edge guide facing down (Fig. 15).
2.Thread the clamp screw from under the foot through the threaded hole in the clamp on left side of foot, and securely tighten clamp screw with a screwdriver, to clamp the rip fence bar in place.
FIG. 15
CLAMP ![]()
![]()
![]()
CLAMP | SLOT |
| |
SCREW | BAR |
EDGE GUIDE DOWN
STRAIGHT CUTTING
Once the rip fence is attached, measure from the edge of work to the line of cut, and set edge guide of rip fence to the same distance and then securely tighten clamp screw (Fig. 16).
FIG. 16
CLAMP SCREW
LINE
OF CUT
DESIRED
WIDTH
CIRCLE CUTTING
1.Before attaching the rip fence, draw a circle and drive a finishing nail in the center of circle.
2.Drill or plunge cut near the circles edge, turn saw off and disconnect the plug from power source (Fig. 17).
3.Attach rip fence to saw with the edge guide facing UP. In order for the rip fence to cut a circle, the nail must be in alignment with the blade, as shown in (Fig. 18).
4.Measure the distance from the selected hole to the blade to be equal to the circle radius.
5.Insert plug into power source, hold the saw firmly, squeeze trigger and slowly push the
FIG. 17
WEDGE
EDGE
GUIDE UP
FINISHING
NAIL