Installation Instructions for the Skuttle
Model No.
READ AND SAVE THESE INSTRUCTIONS
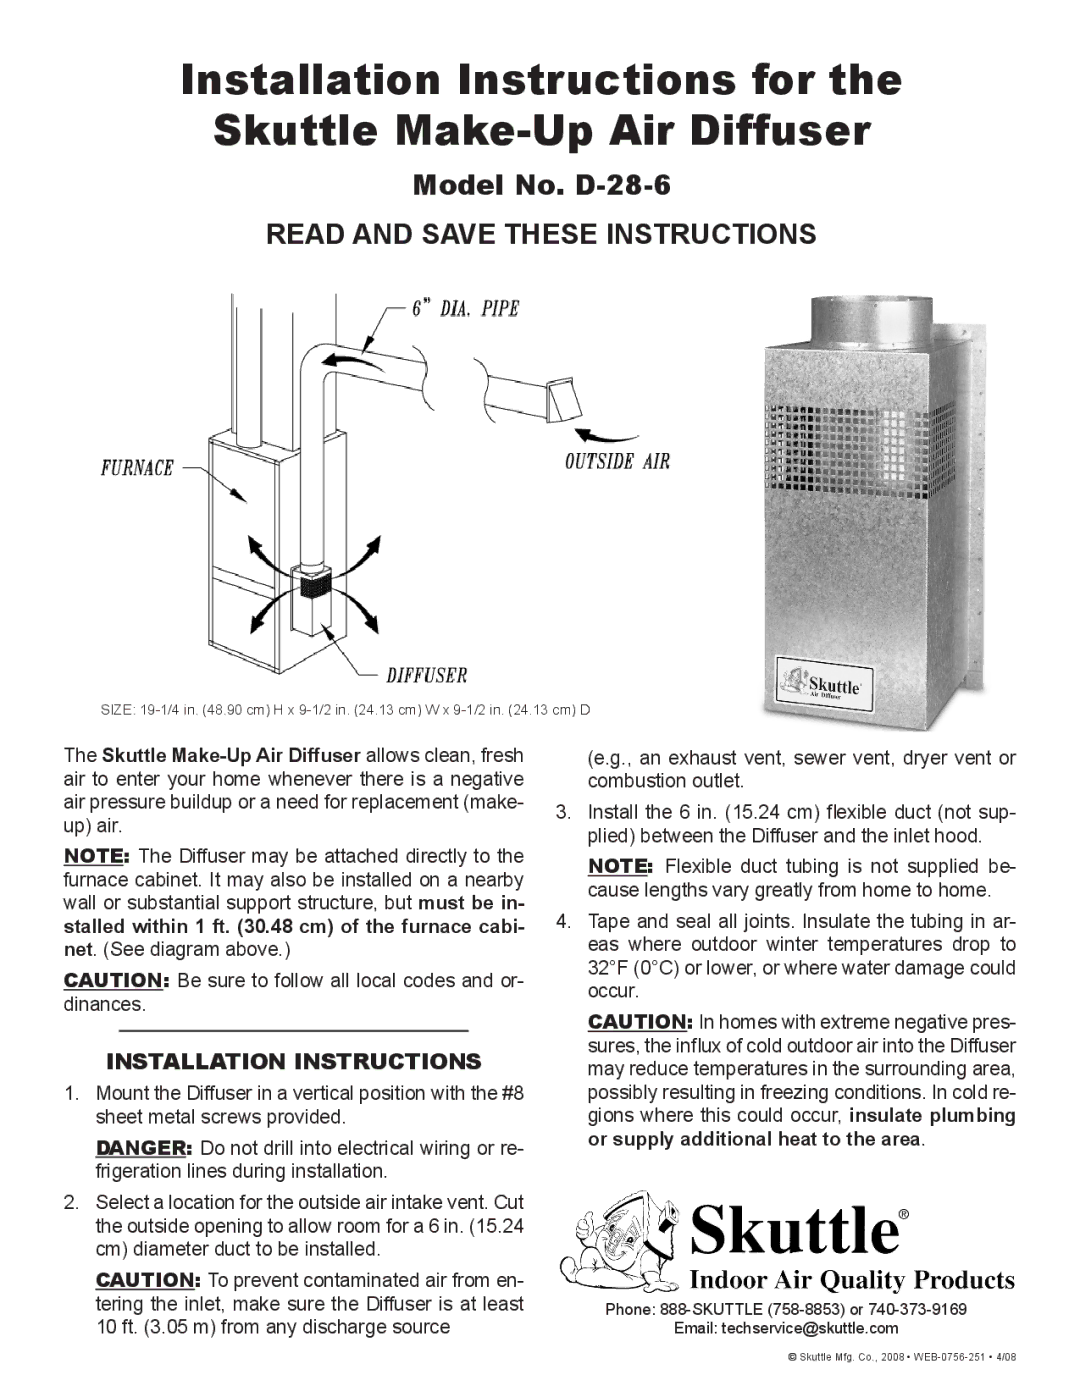
SIZE:
The Skuttle
NOTE: The Diffuser may be attached directly to the furnace cabinet. It may also be installed on a nearby wall or substantial support structure, but must be in- stalled within 1 ft. (30.48 cm) of the furnace cabi- net. (See diagram above.)
CAUTION: Be sure to follow all local codes and or- dinances.
INSTALLATION INSTRUCTIONS
1.Mount the Diffuser in a vertical position with the #8 sheet metal screws provided.
DANGER: Do not drill into electrical wiring or re- frigeration lines during installation.
2.Select a location for the outside air intake vent. Cut the outside opening to allow room for a 6 in. (15.24 cm) diameter duct to be installed.
CAUTION: To prevent contaminated air from en- tering the inlet, make sure the Diffuser is at least 10 ft. (3.05 m) from any discharge source
(e.g., an exhaust vent, sewer vent, dryer vent or combustion outlet.
3.Install the 6 in. (15.24 cm) flexible duct (not sup- plied) between the Diffuser and the inlet hood.
NOTE: Flexible duct tubing is not supplied be- cause lengths vary greatly from home to home.
4.Tape and seal all joints. Insulate the tubing in ar- eas where outdoor winter temperatures drop to 32°F (0°C) or lower, or where water damage could occur.
CAUTION: In homes with extreme negative pres- sures, the influx of cold outdoor air into the Diffuser may reduce temperatures in the surrounding area, possibly resulting in freezing conditions. In cold re- gions where this could occur, insulate plumbing or supply additional heat to the area.
Phone:
Email: techservice@skuttle.com
© Skuttle Mfg. Co., 2008 •
