EZ Connect 2.4GHz High Gain Antenna Ceiling Box Kit Installation Instruction
Using the supplied ethernet cable, attach the ethernet input to your radio with the ethernet output from the amplifier.
Amplifier
POE Remote Unit
Access Point
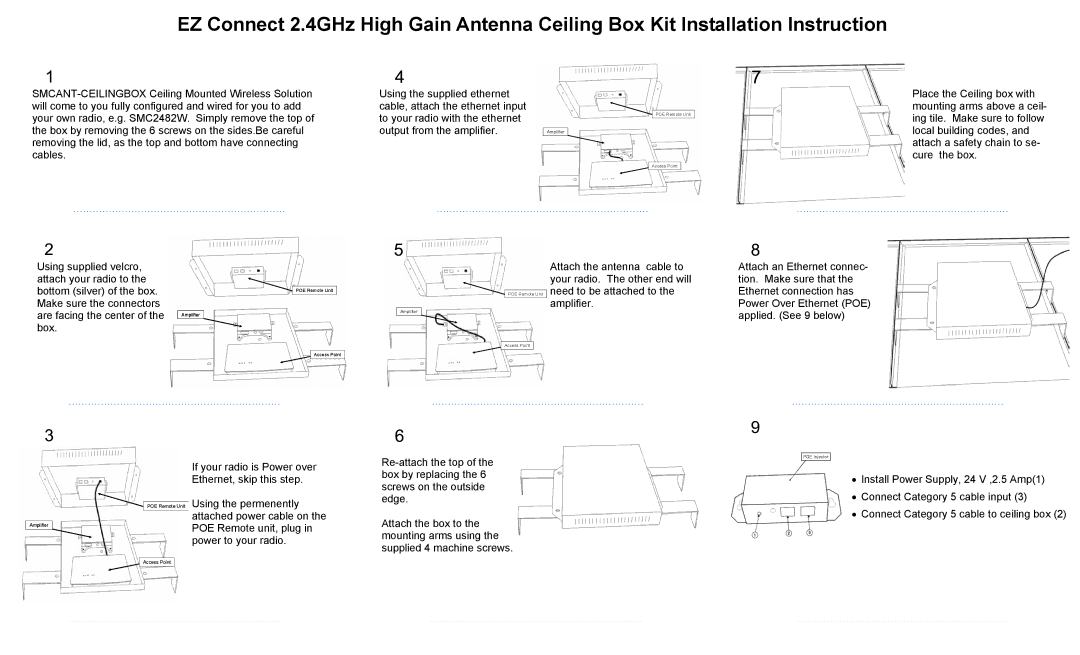
Place the Ceiling box with mounting arms above a ceil- ing tile. Make sure to follow local building codes, and attach a safety chain to se- cure the box.
Using supplied velcro, attach your radio to the bottom (silver) of the box. Make sure the connectors are facing the center of the box.
Amplifier
POE Remote Unit
Amplifier
Access Point
POE Remote Unit
Access Point
Attach the antenna cable to your radio. The other end will need to be attached to the amplifier.
Attach an Ethernet connec- tion. Make sure that the Ethernet connection has Power Over Ethernet (POE) applied. (See 9 below)
Amplifier
POE Remote Unit
Access Point
If your radio is Power over Ethernet, skip this step.
Using the permenently attached power cable on the POE Remote unit, plug in power to your radio.
Attach the box to the mounting arms using the supplied 4 machine screws.
POE Injector
• Install Power Supply, 24 V ,2.5 Amp(1)
•Connect Category 5 cable input (3)
•Connect Category 5 cable to ceiling box (2)