Instructions for the installer
5 FINAL PROCEDURES
Having replaced the injectors, remount the flame spreaders and caps of the burners and the racks.
Once you have adjusted the appliance for use with a different gas from the
5.1Adjusting the minimum setting of hob burners for natural gas
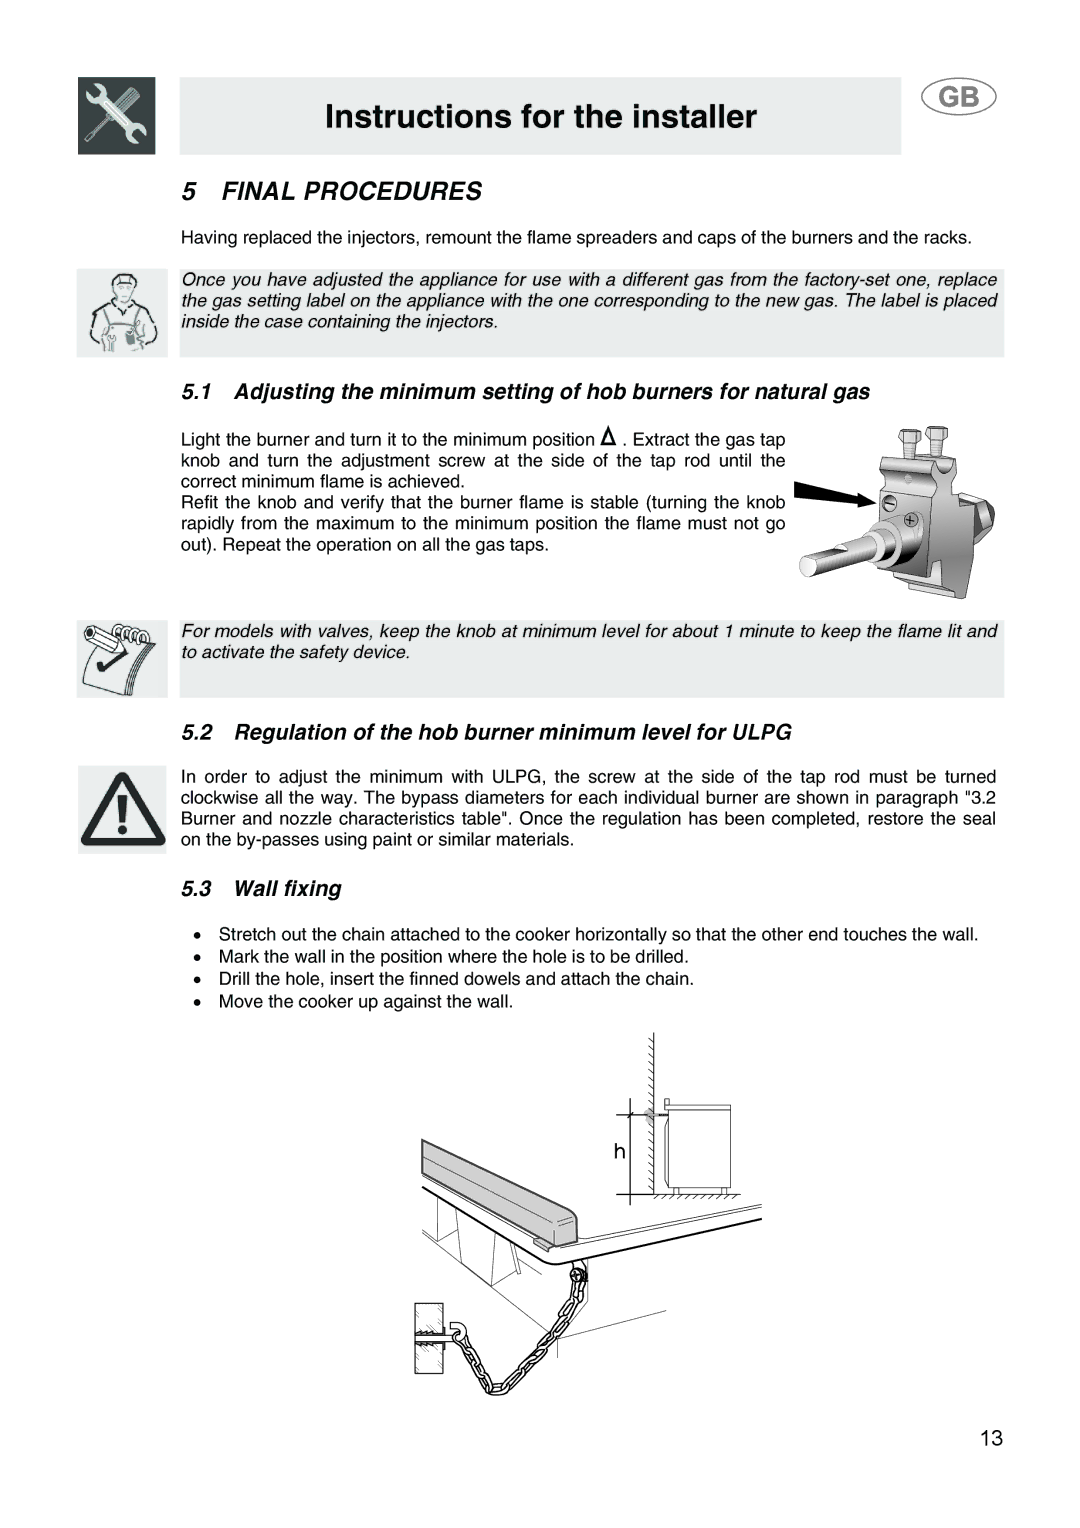
Light the burner and turn it to the minimum position ![]() . Extract the gas tap knob and turn the adjustment screw at the side of the tap rod until the correct minimum flame is achieved.
. Extract the gas tap knob and turn the adjustment screw at the side of the tap rod until the correct minimum flame is achieved.
Refit the knob and verify that the burner flame is stable (turning the knob rapidly from the maximum to the minimum position the flame must not go out). Repeat the operation on all the gas taps.
For models with valves, keep the knob at minimum level for about 1 minute to keep the flame lit and to activate the safety device.
5.2Regulation of the hob burner minimum level for ULPG
In order to adjust the minimum with ULPG, the screw at the side of the tap rod must be turned clockwise all the way. The bypass diameters for each individual burner are shown in paragraph "3.2 Burner and nozzle characteristics table". Once the regulation has been completed, restore the seal on the
5.3 Wall fixing
•Stretch out the chain attached to the cooker horizontally so that the other end touches the wall.
•Mark the wall in the position where the hole is to be drilled.
•Drill the hole, insert the finned dowels and attach the chain.
•Move the cooker up against the wall.
13