Installation Instructions | Mulch Kit |
![]() WARNING
WARNING
Do not remove deflector. When mulch kit is removed from the mower deck, the deflector must cover discharge opening and be properly installed.
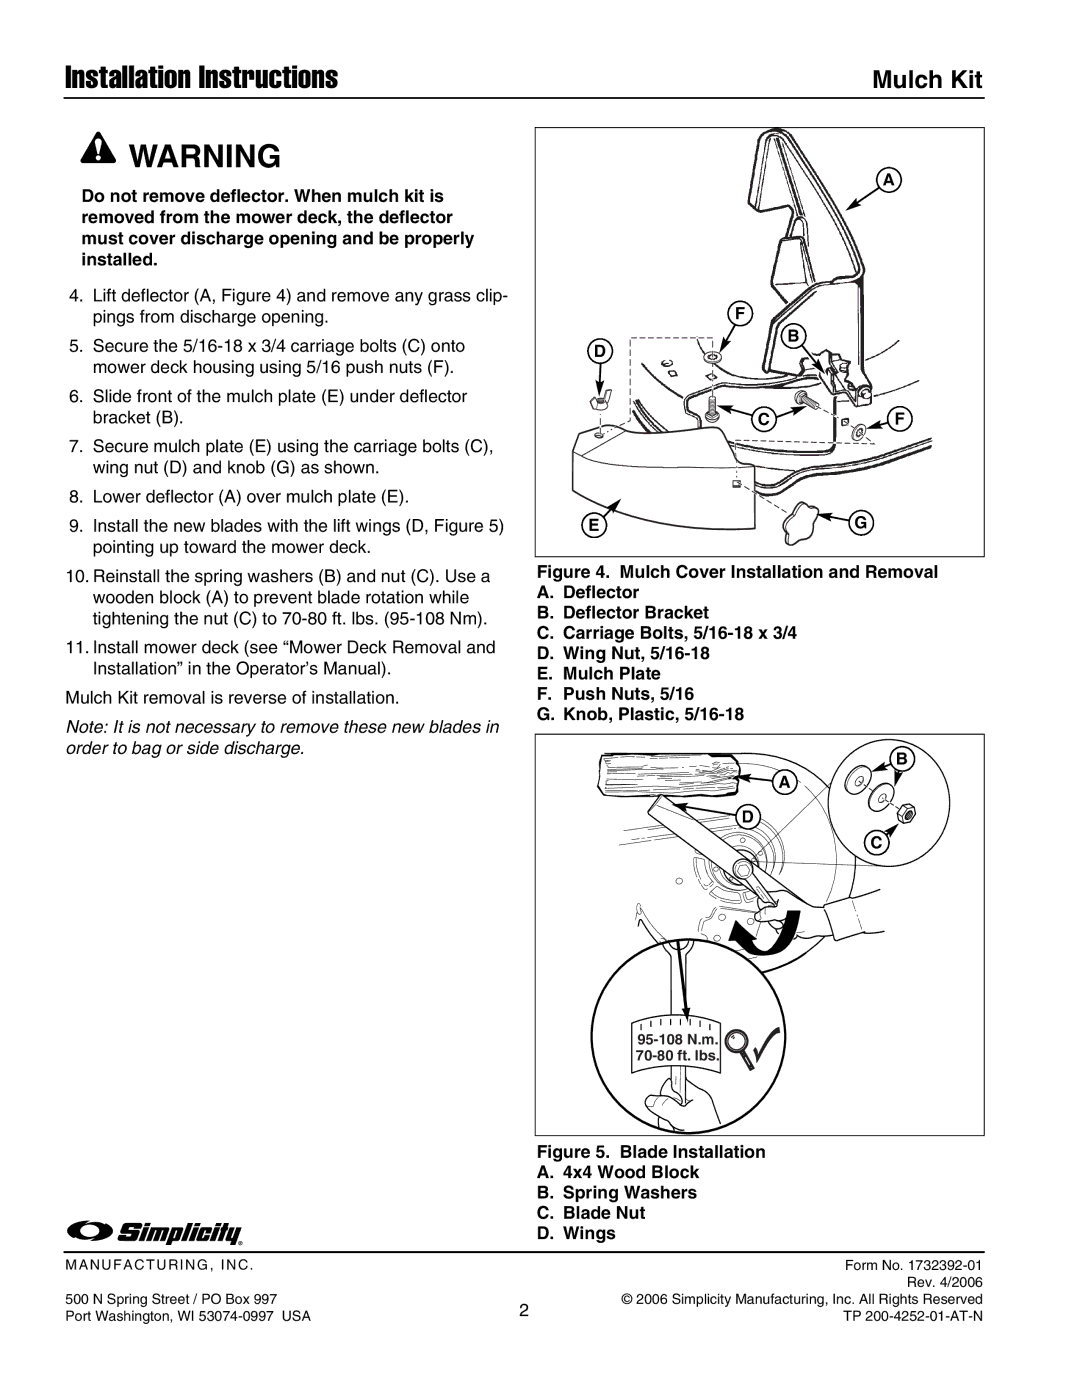
4.Lift deflector (A, Figure 4) and remove any grass clip- pings from discharge opening.
5.Secure the
6.Slide front of the mulch plate (E) under deflector bracket (B).
7.Secure mulch plate (E) using the carriage bolts (C), wing nut (D) and knob (G) as shown.
8.Lower deflector (A) over mulch plate (E).
9.Install the new blades with the lift wings (D, Figure 5) pointing up toward the mower deck.
10.Reinstall the spring washers (B) and nut (C). Use a wooden block (A) to prevent blade rotation while tightening the nut (C) to
11.Install mower deck (see “Mower Deck Removal and Installation” in the Operator’s Manual).
Mulch Kit removal is reverse of installation.
Note: It is not necessary to remove these new blades in order to bag or side discharge.
A
F |
|
D | B |
| |
C | F |
E![]() G
G
Figure 4. Mulch Cover Installation and Removal
A.Deflector
B.Deflector Bracket
C.Carriage Bolts, 5/16-18 x 3/4
D.Wing Nut, 5/16-18
E.Mulch Plate
F.Push Nuts, 5/16
G.Knob, Plastic, 5/16-18
B |
A
D
C
95-108 N.m. 
70-80 ft. lbs.
Figure 5. Blade Installation
A. 4x4 Wood Block
B. Spring Washers
C. Blade Nut
D. Wings
MANUFACTURING, INC . |
| Form No. |
|
| Rev. 4/2006 |
500 N Spring Street / PO Box 997 | 2 | © 2006 Simplicity Manufacturing, Inc. All Rights Reserved |
Port Washington, WI | TP |