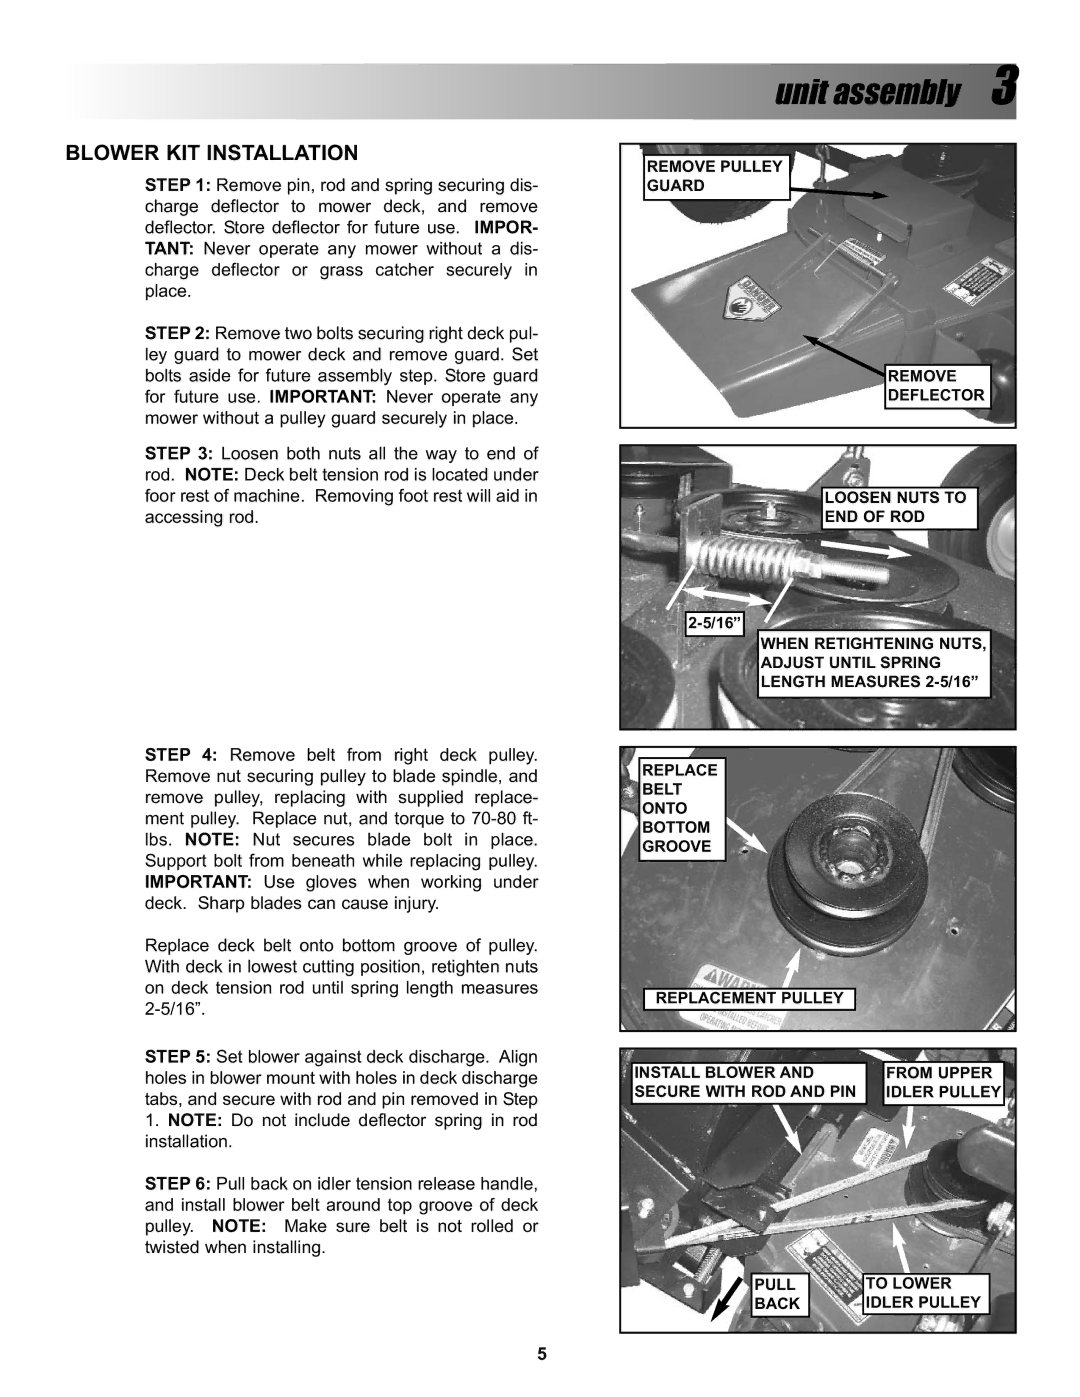
P/N 7078274, BH500 specifications
The Snapper BH500, part number 7078274, is a powerful and versatile piece of equipment designed to meet the needs of both professional landscapers and avid home gardeners. This reliable machine offers a perfect blend of advanced technology and user-friendly features, making it a preferred choice for lawn care.One of the standout features of the Snapper BH500 is its robust 500cc engine. This engine is engineered for performance, providing ample power to handle a variety of mowing tasks efficiently. Its overhead valve design enhances fuel efficiency and reduces emissions, making it more environmentally friendly. The engine is also equipped with an easy-to-start system, ensuring that users can get to work quickly without the frustration of complicated starting procedures.
The BH500 boasts a durable steel cutting deck, which is available in various cutting widths to accommodate different types of lawns and landscapes. This cutting deck is designed for superior maneuverability and cutting efficiency, allowing users to achieve a clean and precise cut every time. The deck is also height-adjustable, providing flexibility for users to select the ideal cutting height based on their lawn’s specific needs.
In terms of technology, the Snapper BH500 is equipped with a patented cutting system that enhances grass discharge, ensuring a cleaner cut and better mulching capabilities. This system helps reduce clumping and makes it easier to maintain a healthy lawn. The machine is designed for ease of use, featuring ergonomic controls and a comfortable grip that minimize user fatigue during extended periods of operation.
Another notable characteristic of the Snapper BH500 is its innovative drive system. It features a self-propelling mechanism that allows users to navigate uneven terrain with ease. This feature is particularly beneficial for larger properties or areas with steep inclines, as it reduces the physical effort required from the operator.
Durability is a key attribute of the Snapper BH500, with high-quality materials used throughout its construction. The machine is built to withstand the rigors of regular use, ensuring longevity and reliability. With easy maintenance access and serviceability, users can keep their BH500 in peak condition with minimal hassle.
In summary, the Snapper BH500, P/N 7078274, is an exceptional lawn mower that combines power, efficiency, and ease of use. Its advanced features, including a robust engine, durable cutting deck, and innovative technologies, make it an ideal choice for anyone looking to maintain a beautiful lawn with minimal effort. Whether you are a professional landscaper or a homeowner, the Snapper BH500 is equipped to meet your mowing needs and exceed your expectations.

