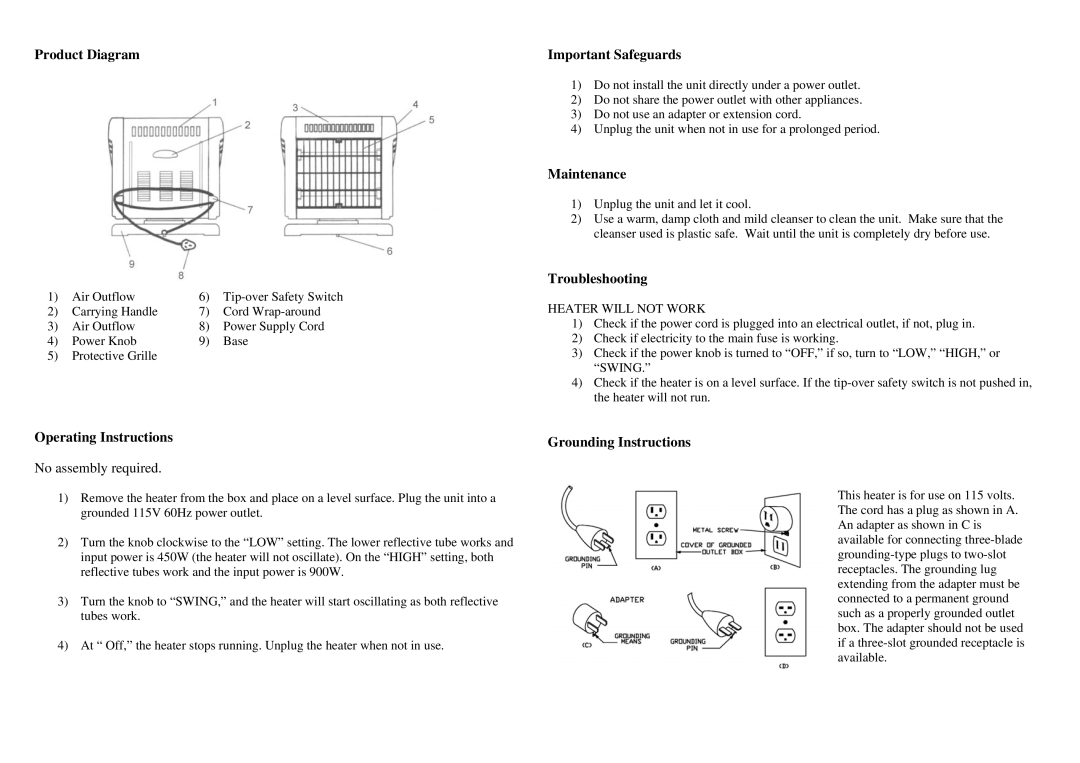
Product Diagram
1) | Air Outflow | 6) | |
2) | Carrying Handle | 7) | Cord |
3) | Air Outflow | 8) | Power Supply Cord |
4) | Power Knob | 9) | Base |
5)Protective Grille
Important Safeguards
1)Do not install the unit directly under a power outlet.
2)Do not share the power outlet with other appliances.
3)Do not use an adapter or extension cord.
4)Unplug the unit when not in use for a prolonged period.
Maintenance
1)Unplug the unit and let it cool.
2)Use a warm, damp cloth and mild cleanser to clean the unit. Make sure that the cleanser used is plastic safe. Wait until the unit is completely dry before use.
Troubleshooting
HEATER WILL NOT WORK
1)Check if the power cord is plugged into an electrical outlet, if not, plug in.
2)Check if electricity to the main fuse is working.
3)Check if the power knob is turned to “OFF,” if so, turn to “LOW,” “HIGH,” or “SWING.”
4)Check if the heater is on a level surface. If the
Operating Instructions | Grounding Instructions |
|
No assembly required.
1)Remove the heater from the box and place on a level surface. Plug the unit into a grounded 115V 60Hz power outlet.
2)Turn the knob clockwise to the “LOW” setting. The lower reflective tube works and input power is 450W (the heater will not oscillate). On the “HIGH” setting, both reflective tubes work and the input power is 900W.
3)Turn the knob to “SWING,” and the heater will start oscillating as both reflective tubes work.
4)At “ Off,” the heater stops running. Unplug the heater when not in use.
This heater is for use on 115 volts. The cord has a plug as shown in A. An adapter as shown in C is available for connecting
