14GB
6Place the spacers (KDL-52/40NX803
only).
~
•When attaching the Table-Top Stand again, be
sure to fasten the four screws (previously
removed) to the original holes on the rear of
the TV (KDL-52/40NX803 only).
7Attach the Mounting Bracket and the
Lock Bracket. (4-3 through 4-7)
Refer to the instruction manual provided
with the Wall-Mount Bracket.
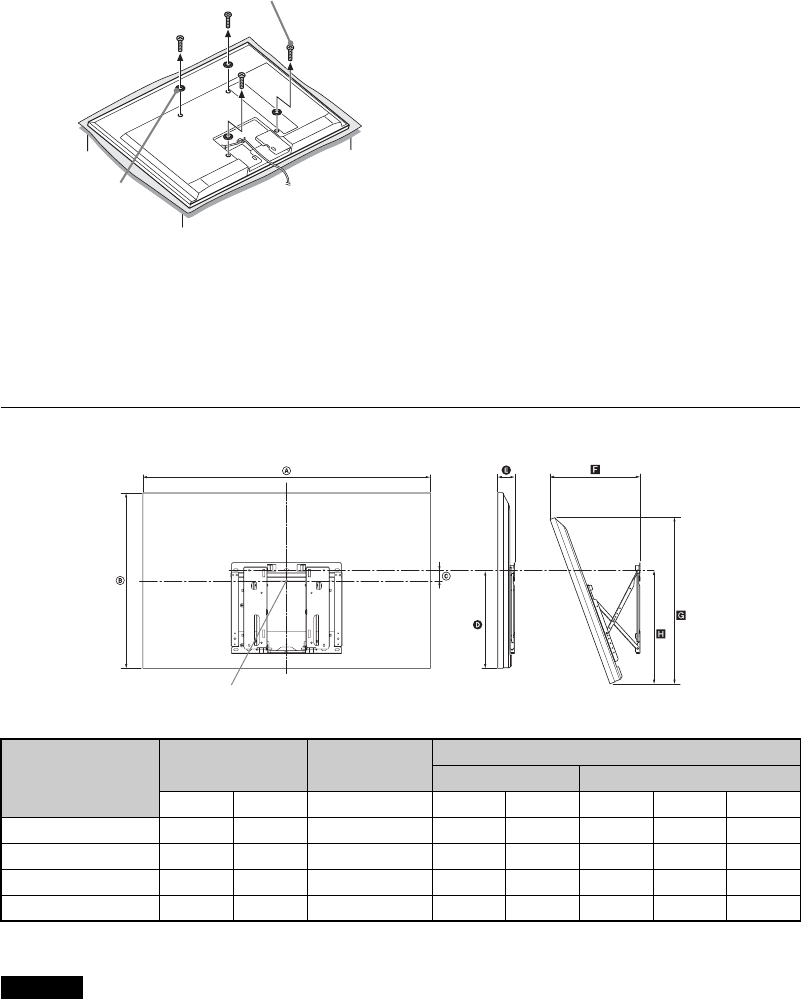
8Prepare the paper template. (5-2)
1. Refer to the following “TV installation
dimensions table” and mark the TV outline
on the template.
2. Tape the template to the wall as
instructed in the manual provided with the
Wall-Mount Bracket.
Follow the instruction manual provided
with the Wall-Mount Bracket to complete
the installation. (5-3 through 6)
TV installation dimensions table
Unit: cm
Figures in the above table may differ slightly depending on the installation.
The wall that the TV will be installed on should be capable of supporting a weight of at least four
times that of the TV. Refer to “Specifications” (page11) for its weight.
1Remove the four screws, and be
sure to store them in a safe place,
keeping them away from children.
2Place the four
spacers (supplied).
Model Name
KDL-
Display
dimensions
Screen centre
dimension
Length for each mounting angle
Angle (0°)Angle (20°)
ABCDEFGH
52NX803 126.1 78.7 1.3 42.1 7.5 38.9 74.5 48.8
46NX703 112.7 71.6 5.2 42.7 7.5 36.2 67.9 49.3
40NX803 99.4 63.5 8.9 42.1 7.5 33.7 60.2 48.8
40NX703 99.4 64.1 8.9 42.7 7.5 33.7 60.8 49.3
Screen centre point
WARNING