CONTROLS AND ADJUSTMENTS
"Picture" Menu
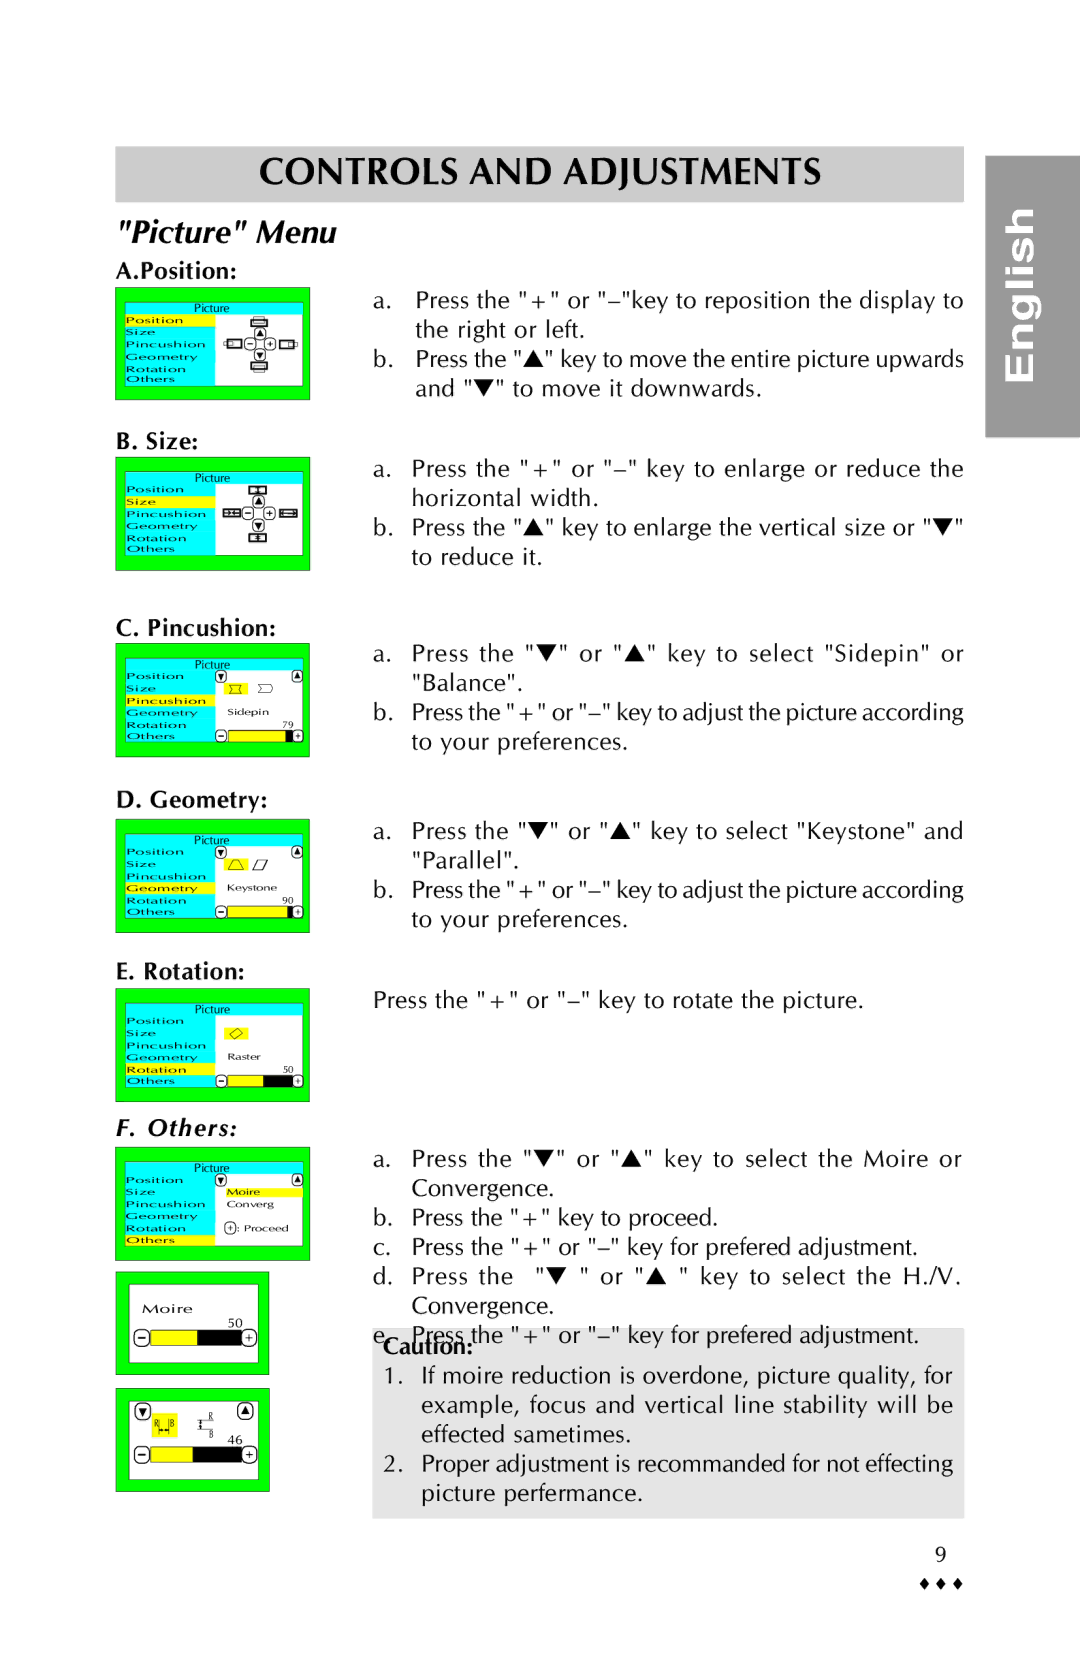
A.Position:
Picture |
Position |
Size |
Pincushion |
Geometry |
Rotation |
Others |
B. Size:
Picture
Position
Size |
Pincushion |
Geometry
Rotation
Others
a.Press the "+" or
b.Press the "▲" key to move the entire picture upwards and "▼" to move it downwards.
a.Press the "+" or
b.Press the "▲" key to enlarge the vertical size or "▼" to reduce it.
English
C. Pincushion: | |
Picture | |
Position |
|
Size |
|
Pincushion |
|
Geometry | Sidepin |
Rotation | 79 |
Others |
|
D. Geometry: | |
Picture
Position
Size
Pincushion
Geometry Keystone
Rotation | 90 |
Others |
|
E. Rotation:
Picture | |
Position |
|
Size |
|
Pincushion |
|
Geometry | Raster |
Rotation | 50 |
Others |
|
a.Press the "▼" or "▲" key to select "Sidepin" or "Balance".
b.Press the "+" or
a.Press the "▼" or "▲" key to select "Keystone" and "Parallel".
b.Press the "+" or
Press the "+" or
F. Others:
Picture | |
Position |
|
Size | Moire |
Pincushion | Converg |
Geometry |
|
Rotation | : Proceed |
Others |
|
Moire |
50 |
| R |
|
R | B |
|
| B | 46 |
a.Press the "▼" or "▲" key to select the Moire or Convergence.
b.Press the "+" key to proceed.
c.Press the "+" or
d.Press the "▼ " or "▲ " key to select the H./V. Convergence.
e.Press the "+" or
1.If moire reduction is overdone, picture quality, for example, focus and vertical line stability will be effected sametimes.
2.Proper adjustment is recommanded for not effecting picture perfermance.
9
♦♦♦