Relocating the connector panel
The connector panel is fitted as standard to the rear of the frame, allowing the mixer to be used as a
1Carefully lay the mixer face down on a flat surface provided with some protective padding. During the following steps take care not to apply excessive pressure or damage the control knobs.
2Using a
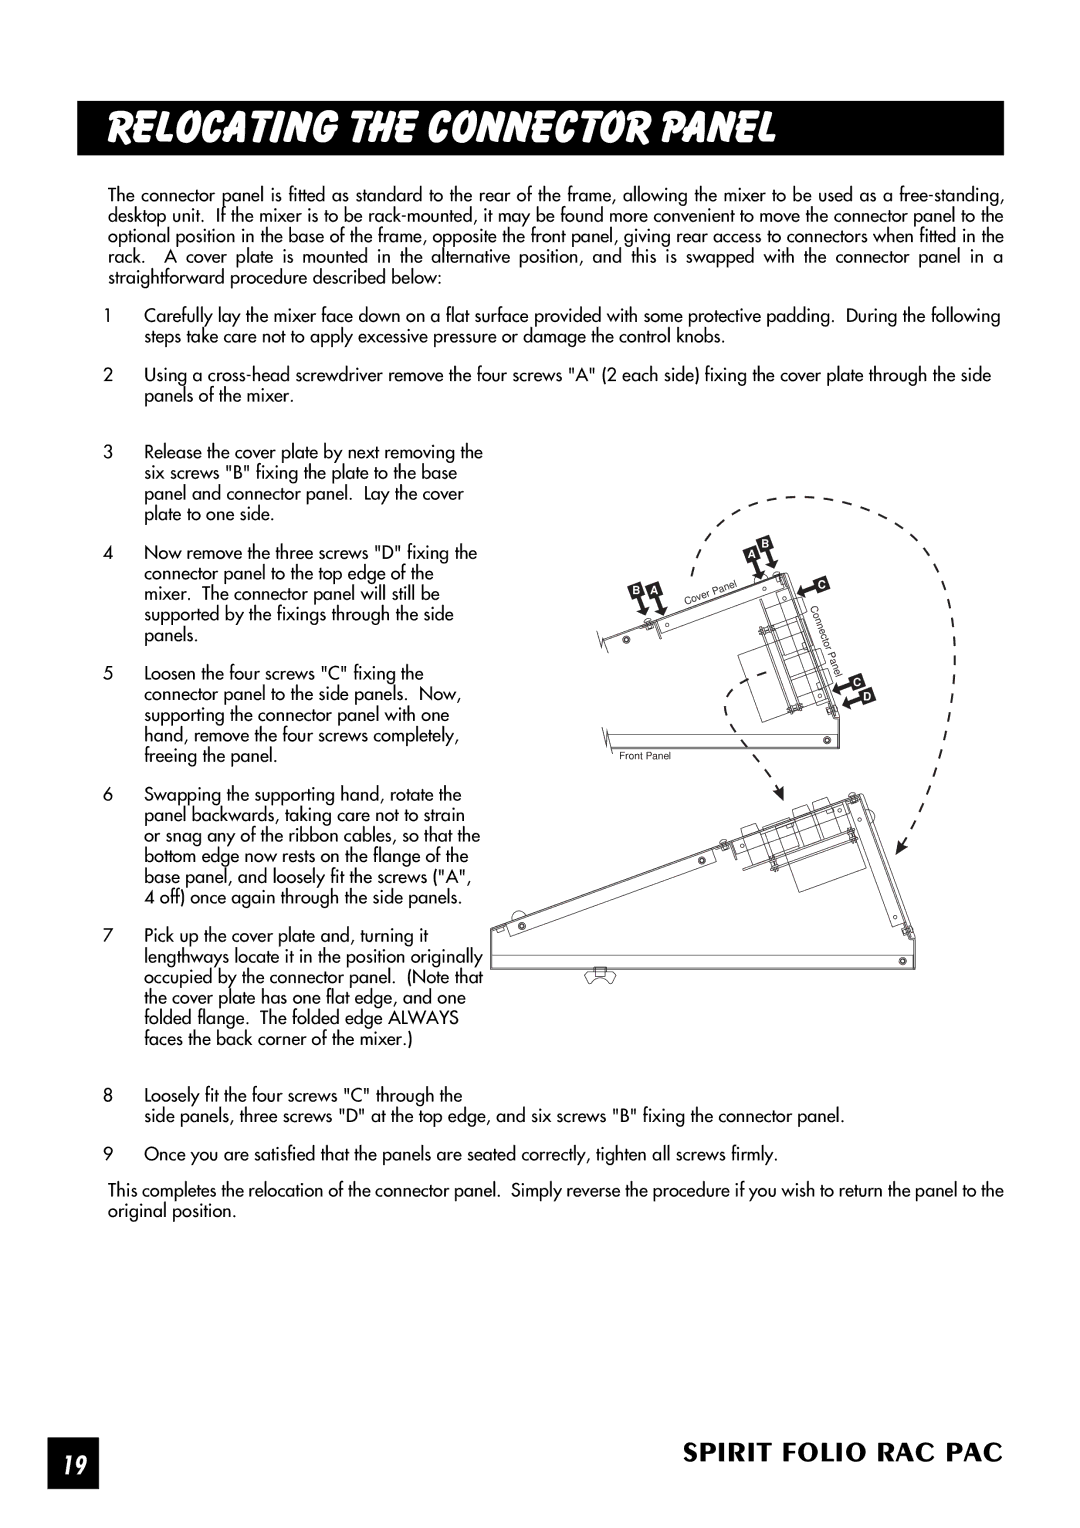
3Release the cover plate by next removing the six screws "B" fixing the plate to the base panel and connector panel. Lay the cover plate to one side.
4 | Now remove the three screws "D" fixing the |
|
| B |
|
| A | ||
| connector panel to the top edge of the | B A |
| C |
| mixer. The connector panel will still be | Cover | ||
|
| Panel |
| |
| supported by the fixings through the side |
|
| Connector |
| panels. |
|
| |
|
|
|
| |
5 | Loosen the four screws "C" fixing the |
|
| Panel |
|
|
| ||
| connector panel to the side panels. Now, |
|
|
|
| supporting the connector panel with one |
|
|
|
| hand, remove the four screws completely, |
|
|
|
| freeing the panel. | Front Panel |
|
|
6Swapping the supporting hand, rotate the panel backwards, taking care not to strain or snag any of the ribbon cables, so that the bottom edge now rests on the flange of the base panel, and loosely fit the screws ("A", 4 off) once again through the side panels.
7Pick up the cover plate and, turning it lengthways locate it in the position originally occupied by the connector panel. (Note that the cover plate has one flat edge, and one folded flange. The folded edge ALWAYS faces the back corner of the mixer.)
8Loosely fit the four screws "C" through the
side panels, three screws "D" at the top edge, and six screws "B" fixing the connector panel.
9Once you are satisfied that the panels are seated correctly, tighten all screws firmly.
C
D
This completes the relocation of the connector panel. Simply reverse the procedure if you wish to return the panel to the original position.
19 | SPIRIT FOLIO RAC PAC |
| |
|
|