
DlOO II, D60 II, D200 II specifications
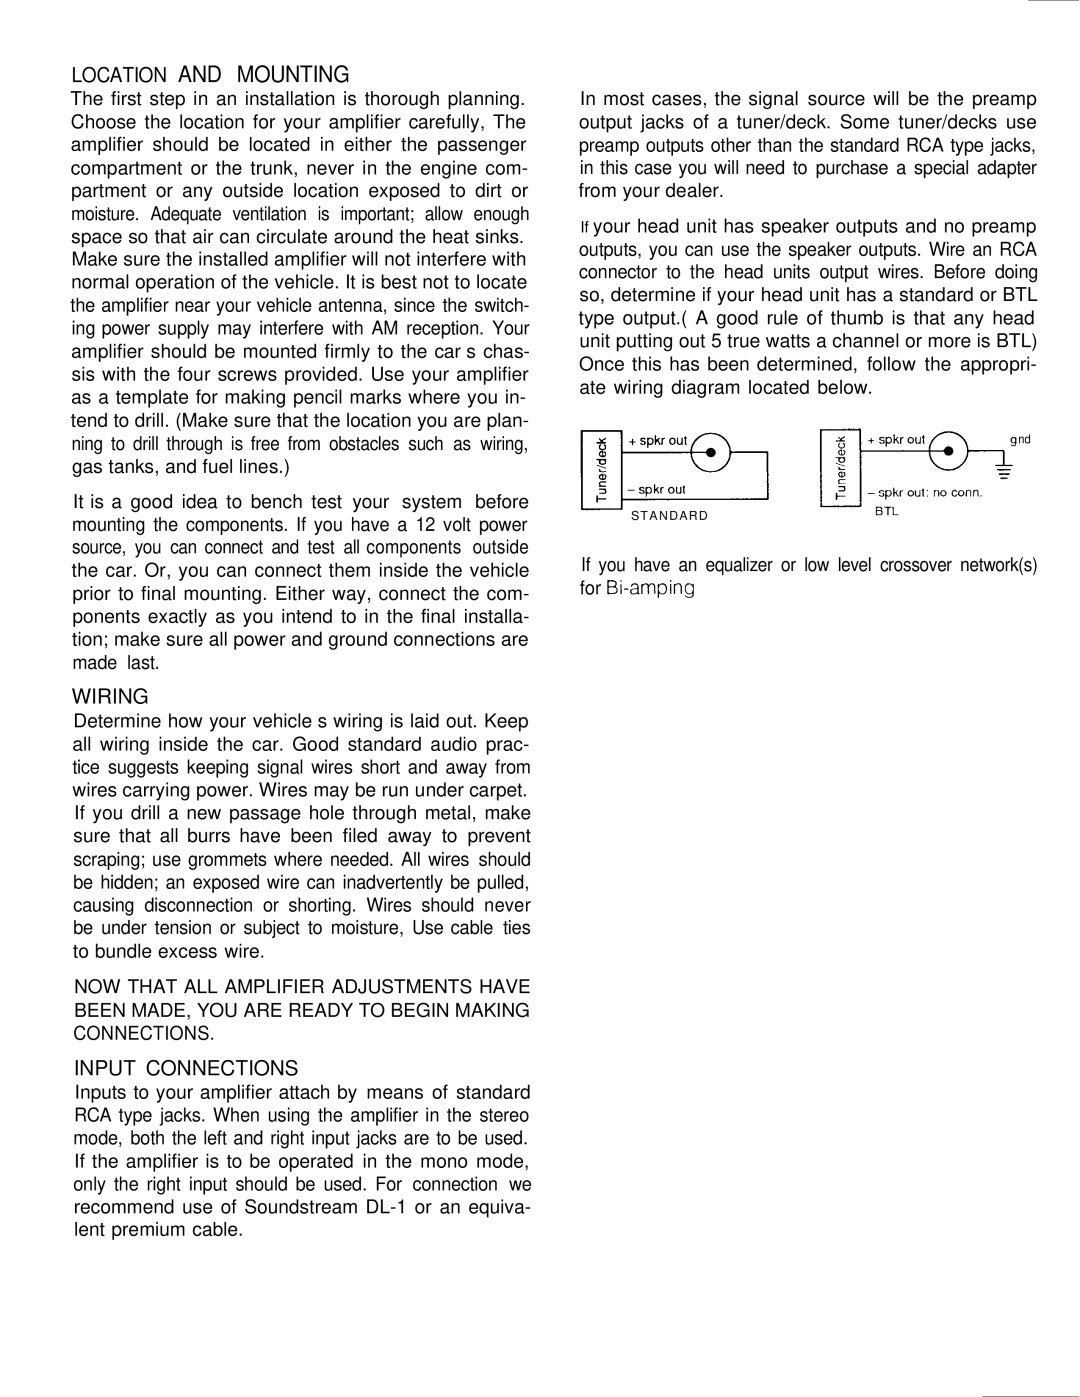
Soundstream Technologies has consistently set a benchmark in the automotive audio industry, and their latest offerings, the D200 II, D60 II, and D100 II, further exemplify their commitment to quality and innovation. These amplifiers are engineered to enhance in-car audio experiences, featuring advanced technologies and robust specifications designed for audiophiles and casual listeners alike.The D200 II is a powerhouse amplifier, capable of delivering 200 watts of RMS power, making it suitable for driving high-performance speakers with ease. It employs a Class D topology, which not only ensures high efficiency but also minimizes heat generation, allowing for a compact design without compromising on performance. One of its standout features is the built-in low-pass filter, allowing users to customize their bass response according to their preferences. Additionally, the D200 II includes a variable gain control, enabling precise adjustment for seamless integration into any audio system.
The D60 II, on the other hand, is designed for those who seek a perfect balance between power and size. With an RMS output of 60 watts, it is ideal for mid-range speakers or as a companion amplifier for subwoofers in smaller setups. It incorporates sophisticated frequency management technology, allowing users to optimize audio output across various frequency ranges. The amplifier’s compact footprint makes it suitable for installation in tight spaces without sacrificing sound quality.
Meanwhile, the D100 II brings versatility to the table, offering an RMS output of 100 watts. It features Soundstream’s proprietary EQ technology, which enhances user experience by allowing for comprehensive sound tuning. This amplifier is particularly noted for its dynamic range capabilities, ensuring that even the most nuanced audio signals are reproduced with clarity. Users can take advantage of its selectable high-pass and low-pass crossover options, making it a versatile choice for diverse audio setups.
All three amplifiers feature robust build quality, ensuring durability and reliability over continuous use. With sleek, modern designs, they are not only performance-focused but also aesthetically pleasing, making them a fitting addition to any car’s interior. Whether you’re a hardcore audiophile or someone looking to elevate their listening experience, Soundstream's D200 II, D60 II, and D100 II provide a compelling combination of power, technology, and sound quality that is hard to beat in today’s competitive market.