
AIM7 DT specifications
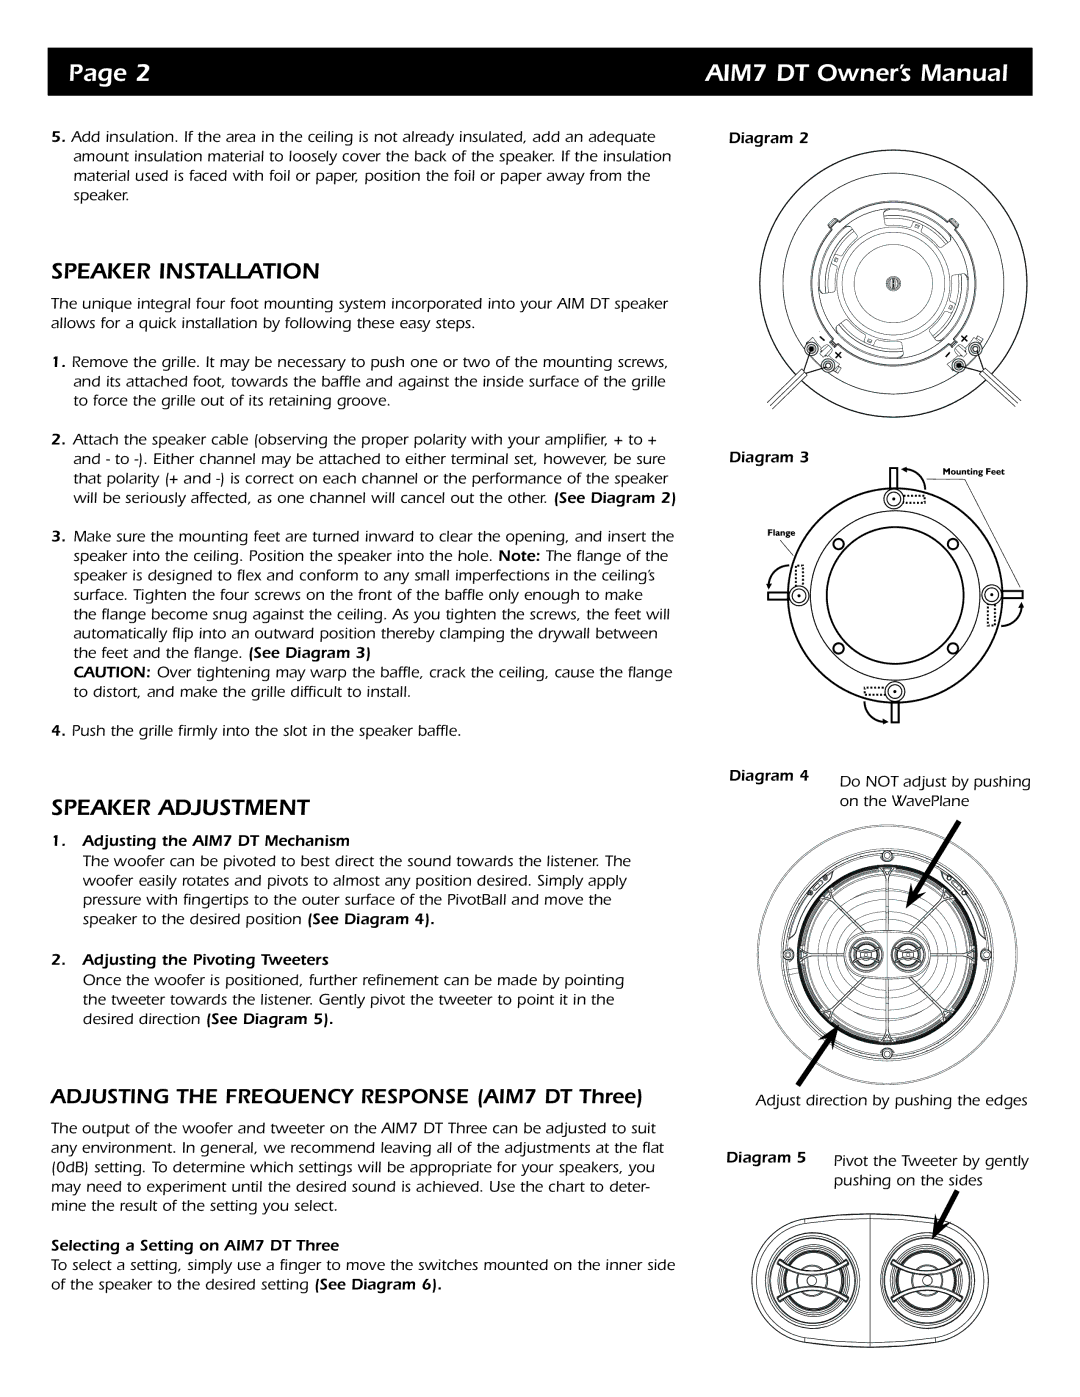
The SpeakerCraft AIM7 DT represents a significant advancement in the realm of in-wall and in-ceiling audio solutions, catering to audiophiles and casual listeners alike. This speaker is designed to seamlessly integrate into any living space, providing an exceptional sound experience while maintaining aesthetic appeal.One of the standout features of the AIM7 DT is its dual tweeter technology. Equipped with two pivoting tweeters, this speaker allows users to direct high-frequency sound where it is needed most, enhancing the audio experience, particularly for home theater setups. This is particularly beneficial in larger rooms or open floor plans where sound distribution can be challenging.
In addition to its dual tweeter system, the AIM7 DT utilizes a 7-inch polypropylene woofer. This material is known for its stiffness and light weight, enabling deep bass responses without distortion. The woofer is engineered to deliver rich, full-bodied sound, ensuring that all audio frequencies are reproduced accurately.
The speaker also integrates advanced design technologies such as the patented EZ mounting system. This innovative feature makes installation straightforward and hassle-free, allowing the speaker to be securely mounted in various wall or ceiling types while ensuring a clean finish. Equally impressive is the speaker's paintable grille, which offers the flexibility to match the decor of any room, virtually disappearing into the environment when not in use.
Another characteristic that sets the AIM7 DT apart is its robust construction. The speaker is built with quality components that ensure durability, making it a long-lasting addition to any audio system. Its weather-resistant design also allows for placement in more challenging environments, such as bathrooms or covered outdoor areas.
Furthermore, the AIM7 DT is compatible with a range of audio systems, making it versatile for both new installations and upgrades. Its impedance and power handling characteristics allow it to fit seamlessly into various setups, from simple stereo systems to complex home theater configurations.
In summary, the SpeakerCraft AIM7 DT combines advanced technologies, high-quality materials, and thoughtful design to deliver an exceptional audio experience. With features like dual tweeter technology, a robust woofer, and easy installation, it stands out as a top choice for anyone looking to elevate their sound without compromising on aesthetics.