REAR SHOCK SETUP
FSRxc Rear Air Shock Setup | Fig.1 | |
| ||
Fox Triad |
| |
|
| |
Sag Setting: Set the sag |
| |
attached pressure chart for starting air pressure. |
| |
Note - the chart is only a starting point, actual sag needs to the |
| |
checked and adjusted on the bike, while riding, and at regular |
| |
intervals. After setting the pressure, push the rubber ring up to | Fig.2 | |
the seal, sit on the bike gently, dismount, and measure sag. | ||
| ||
Set Standard rebound damping adjuster to rider preference. |
| |
Typically a slower rebound for slow speed, bigger hits to |
| |
eliminate kickback, or faster rebound for higher speeds and |
| |
smaller hits, so the suspension does not dive and has time to |
| |
rebound between bumps |
|
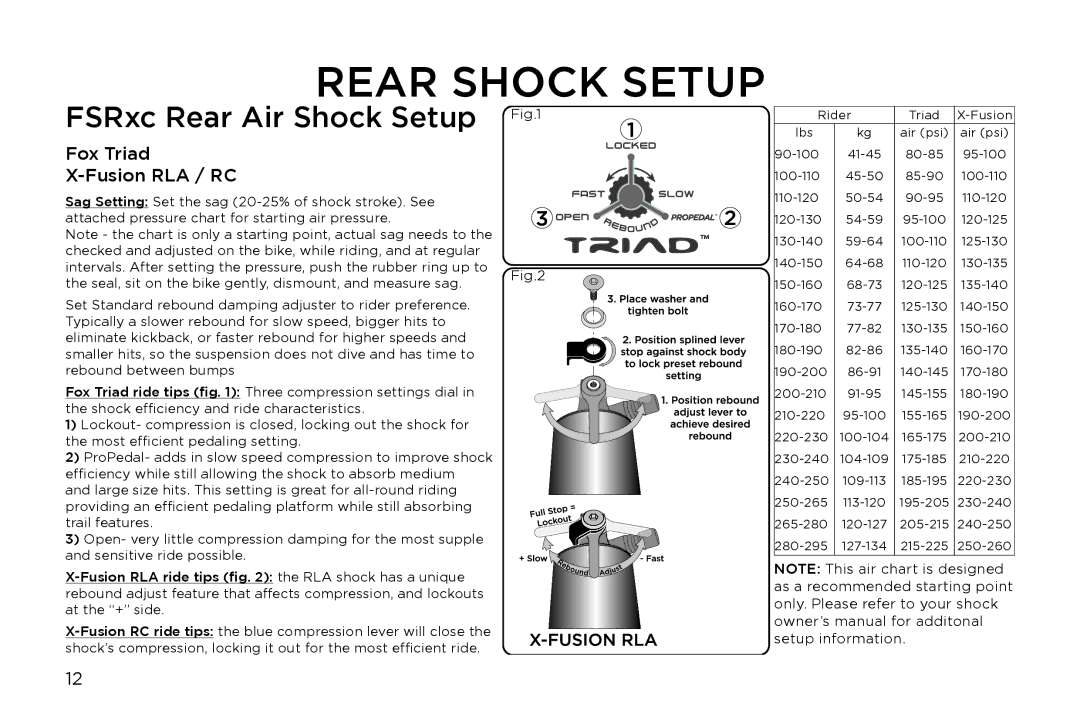
Fox Triad ride tips (fig. 1): Three compression settings dial in the shock efficiency and ride characteristics.
1) Lockout- compression is closed, locking out the shock for the most efficient pedaling setting.
2)ProPedal- adds in slow speed compression to improve shock efficiency while still allowing the shock to absorb medium and large size hits. This setting is great for
providing an efficient pedaling platform while still absorbing trail features.
3) Open- very little compression damping for the most supple and sensitive ride possible.
Rider | Triad | ||
lbs | kg | air (psi) | air (psi) |
NOTE: This air chart is designed as a recommended starting point only. Please refer to your shock owner’s manual for additonal setup information.
12
