
ATXPOWER400 specifications
StarTech.com has made a significant mark in the realm of computer hardware, and the ATXPOWER400 power supply is one of its standout offerings. Designed with functionality and efficiency in mind, the ATXPOWER400 provides a robust and reliable power source for both desktop and custom-built PCs.One of the primary features of the ATXPOWER400 is its 400-watt output capacity. This level of power output is tailored for a variety of systems, including those with multiple drives and components that demand higher energy. With the concurrent rise of high-performance computing, this power supply meets the requirement for systems that call for balanced power distribution among various hardware elements.
A key characteristic of the ATXPOWER400 is its compliance with ATX 12V standards. This ensures that it can seamlessly integrate with different motherboards and components, providing stable and reliable power to the entire system. Additionally, the power supply is equipped with a 120mm fan, which helps in maintaining optimal temperature levels. This fan operates quietly while effectively dissipating heat, thereby extending the lifespan of the power supply and the connected components.
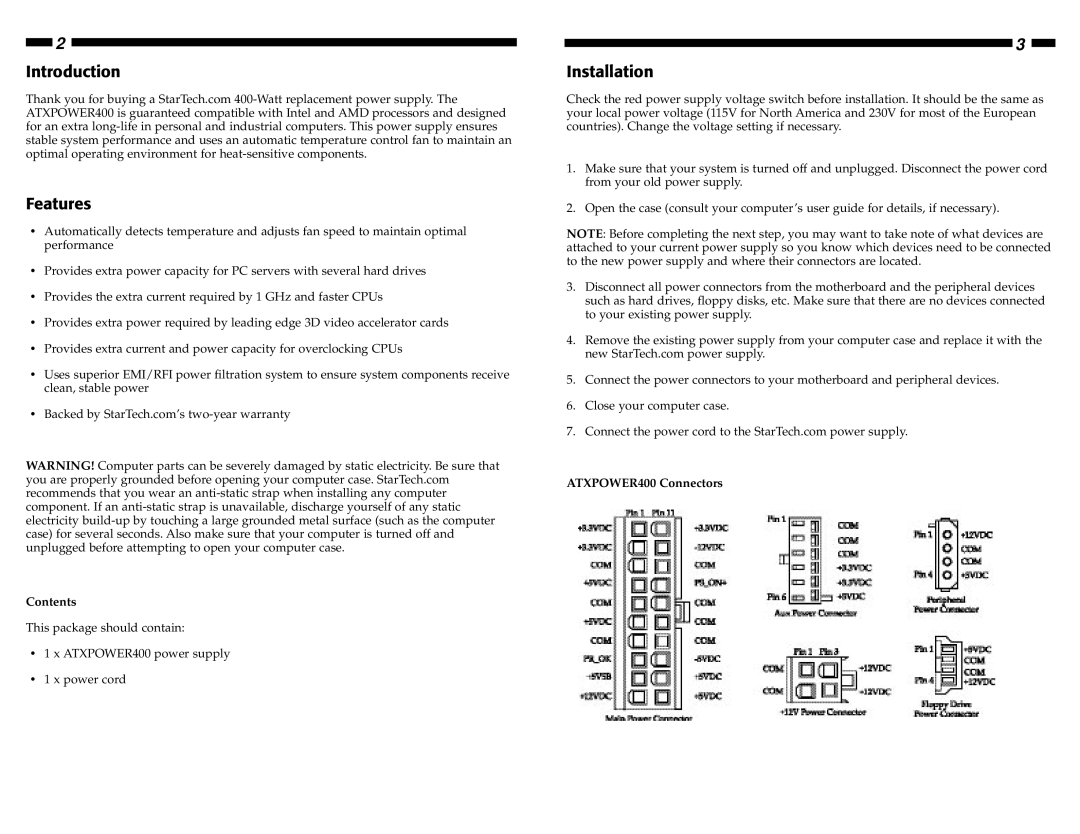
The ATXPOWER400 also includes multiple connectors, such as the 24-pin main power connector and additional 4-pin and 6-pin connectors for peripherals and graphics cards. This versatility allows users to connect a variety of components, accommodating both standard and high-performance setups.
In terms of safety, the ATXPOWER400 is outfitted with several protective features. It comes with over-voltage, over-current, and short-circuit protection mechanisms, ensuring that both the power supply and the connected hardware are safeguarded against potential electric faults.
Moreover, the efficiency of the ATXPOWER400 is in line with the 80 PLUS certification, indicating that it operates at a minimum of 80% efficiency under standard conditions. This not only helps in reducing energy costs but also contributes to lower heat generation, making it an environmentally friendly choice.
Overall, the StarTech.com ATXPOWER400 combines power, efficiency, and reliability, making it an ideal choice for enthusiasts and everyday users seeking a dependable power supply solution for their computing needs. Whether assembling a new system or upgrading an existing one, the ATXPOWER400 provides the necessary features to support a wide range of applications.