Instruction Manual
Connecting Slave Computers
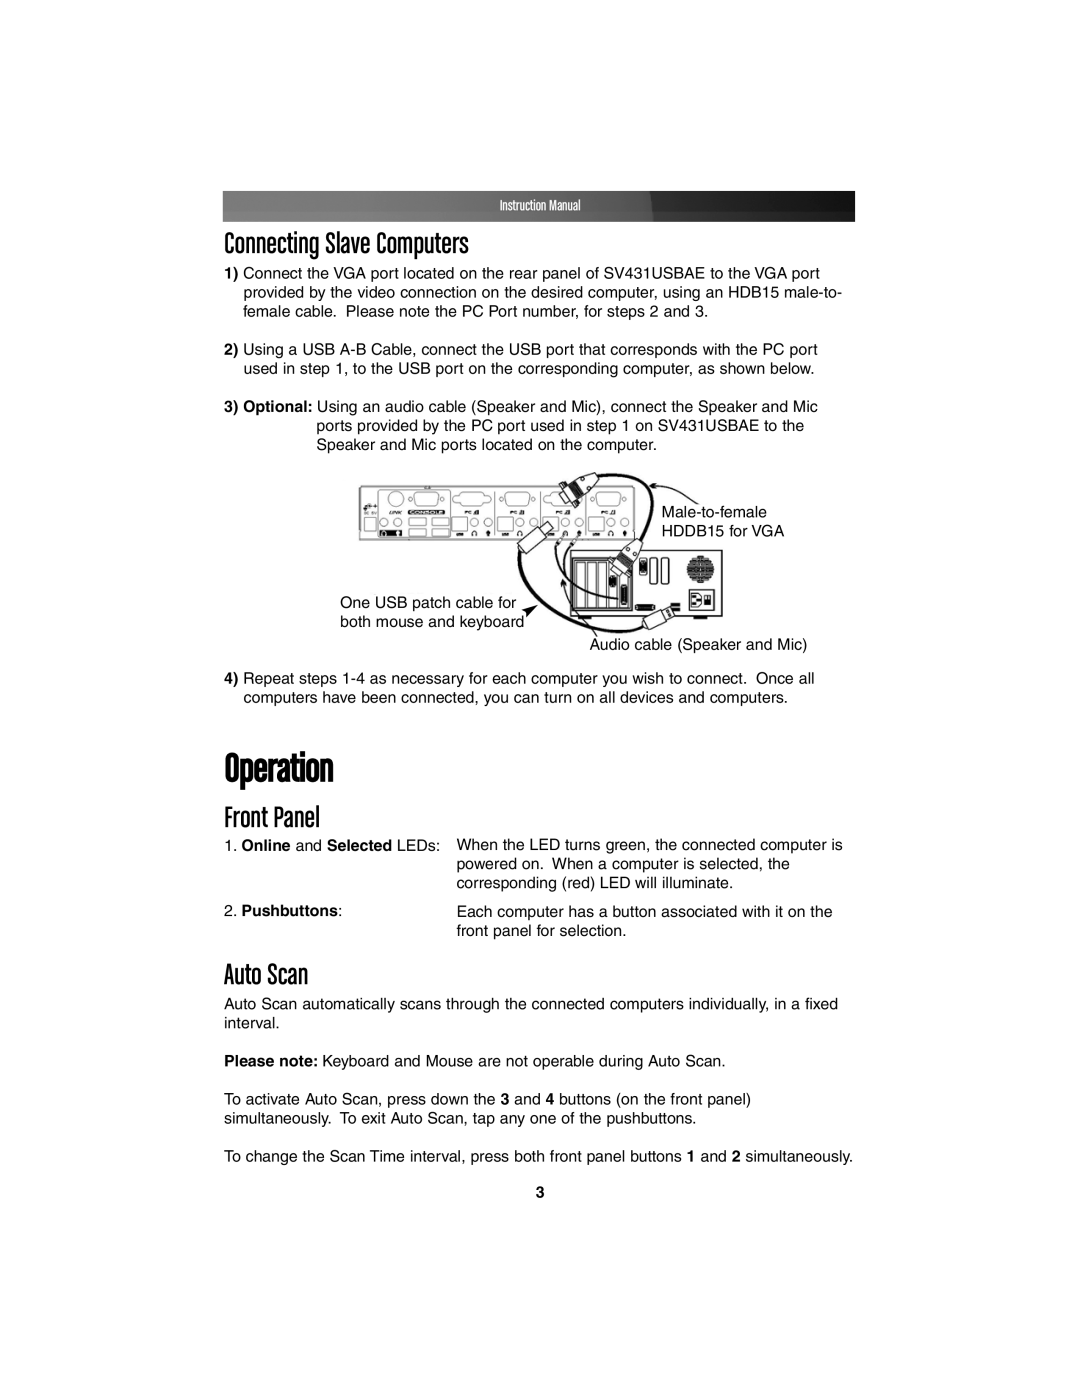
1)Connect the VGA port located on the rear panel of SV431USBAE to the VGA port provided by the video connection on the desired computer, using an HDB15
2)Using a USB
3)Optional: Using an audio cable (Speaker and Mic), connect the Speaker and Mic ports provided by the PC port used in step 1 on SV431USBAE to the Speaker and Mic ports located on the computer.
HDDB15 for VGA
One USB patch cable for both mouse and keyboard
Audio cable (Speaker and Mic)
4)Repeat steps
Operation
Front Panel
1.Online and Selected LEDs:
When the LED turns green, the connected computer is powered on. When a computer is selected, the corresponding (red) LED will illuminate.
2.Pushbuttons:Each computer has a button associated with it on the
front panel for selection.
Auto Scan
Auto Scan automatically scans through the connected computers individually, in a fixed interval.
Please note: Keyboard and Mouse are not operable during Auto Scan.
To activate Auto Scan, press down the 3 and 4 buttons (on the front panel) simultaneously. To exit Auto Scan, tap any one of the pushbuttons.
To change the Scan Time interval, press both front panel buttons 1 and 2 simultaneously.
3