26 | I X . C h a i r B a s i c s | |
A. TO MOUNT & REMOVE REAR WHEELS (OPTIONAL) |
|
|
Do not use this chair UNLESS you are sure both quick- |
|
|
release axles are locked. An unlocked axle may come |
|
|
off during use and cause a fall. |
|
|
NOTE– Axle is not locked until: |
|
|
a. The |
| |
b. The ball bearings are fully visible on the out- | 1. | |
side of the sleeve. (Fig. A) |
| |
| Figure A | |
|
| |
1. To Install Wheel:
X . S e t - U p & A d j u s t m e n t | 27 |
NOTE– Setting the wheelchair on a flat surface, such as a table or a workbench, helps make these procedures easier.
NOTE ON TORQUE SETTING– A torque setting is the optimum tightening which should be made on a particular fastener. A torque wrench which measures
a. Depress
b. Insert axle through hub of rear wheel.
c. Keep pressure on button (1) as you slide axle (2) into axle sleeve (3).
d. Release button to lock axle in sleeve. Adjust axle if it does not lock.
e. Repeat steps on other side.
2.To Remove Wheel:
a.Depress
b.Remove wheel by sliding axle (2) out of axle sleeve (3).
c.Repeat steps on other side.
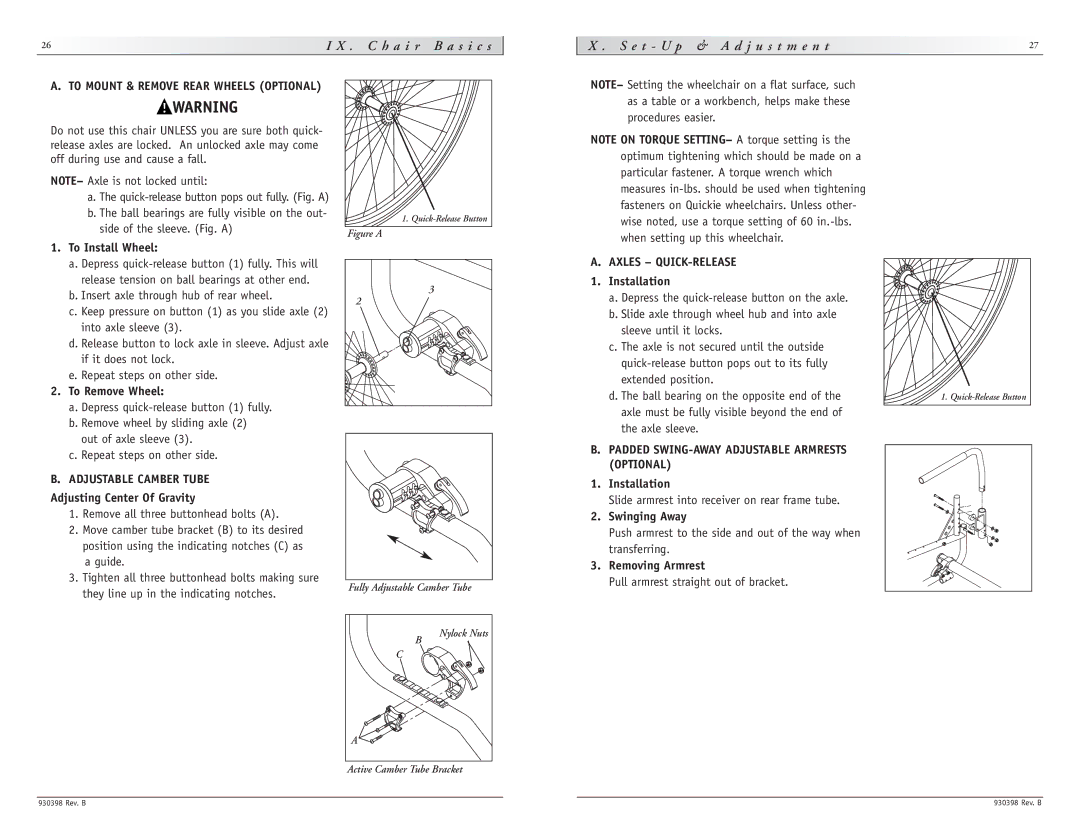
B. ADJUSTABLE CAMBER TUBE
Adjusting Center Of Gravity
1.Remove all three buttonhead bolts (A).
2.Move camber tube bracket (B) to its desired position using the indicating notches (C) as a guide.
3.Tighten all three buttonhead bolts making sure they line up in the indicating notches.
3 |
2 |
Fully Adjustable Camber Tube
A. AXLES – QUICK-RELEASE
1.Installation
a.Depress the
b.Slide axle through wheel hub and into axle sleeve until it locks.
c.The axle is not secured until the outside
d.The ball bearing on the opposite end of the axle must be fully visible beyond the end of the axle sleeve.
B.PADDED SWING-AWAY ADJUSTABLE ARMRESTS (OPTIONAL)
1.Installation
Slide armrest into receiver on rear frame tube.
2.Swinging Away
Push armrest to the side and out of the way when transferring.
3.Removing Armrest
Pull armrest straight out of bracket.
1. |
B | Nylock Nuts |
| |
C |
|
A |
|
Active Camber Tube Bracket | |
930398 Rev. B | 930398 Rev. B |