SV Sound SV Sound
Page 7
More Setup, calibrating and integration
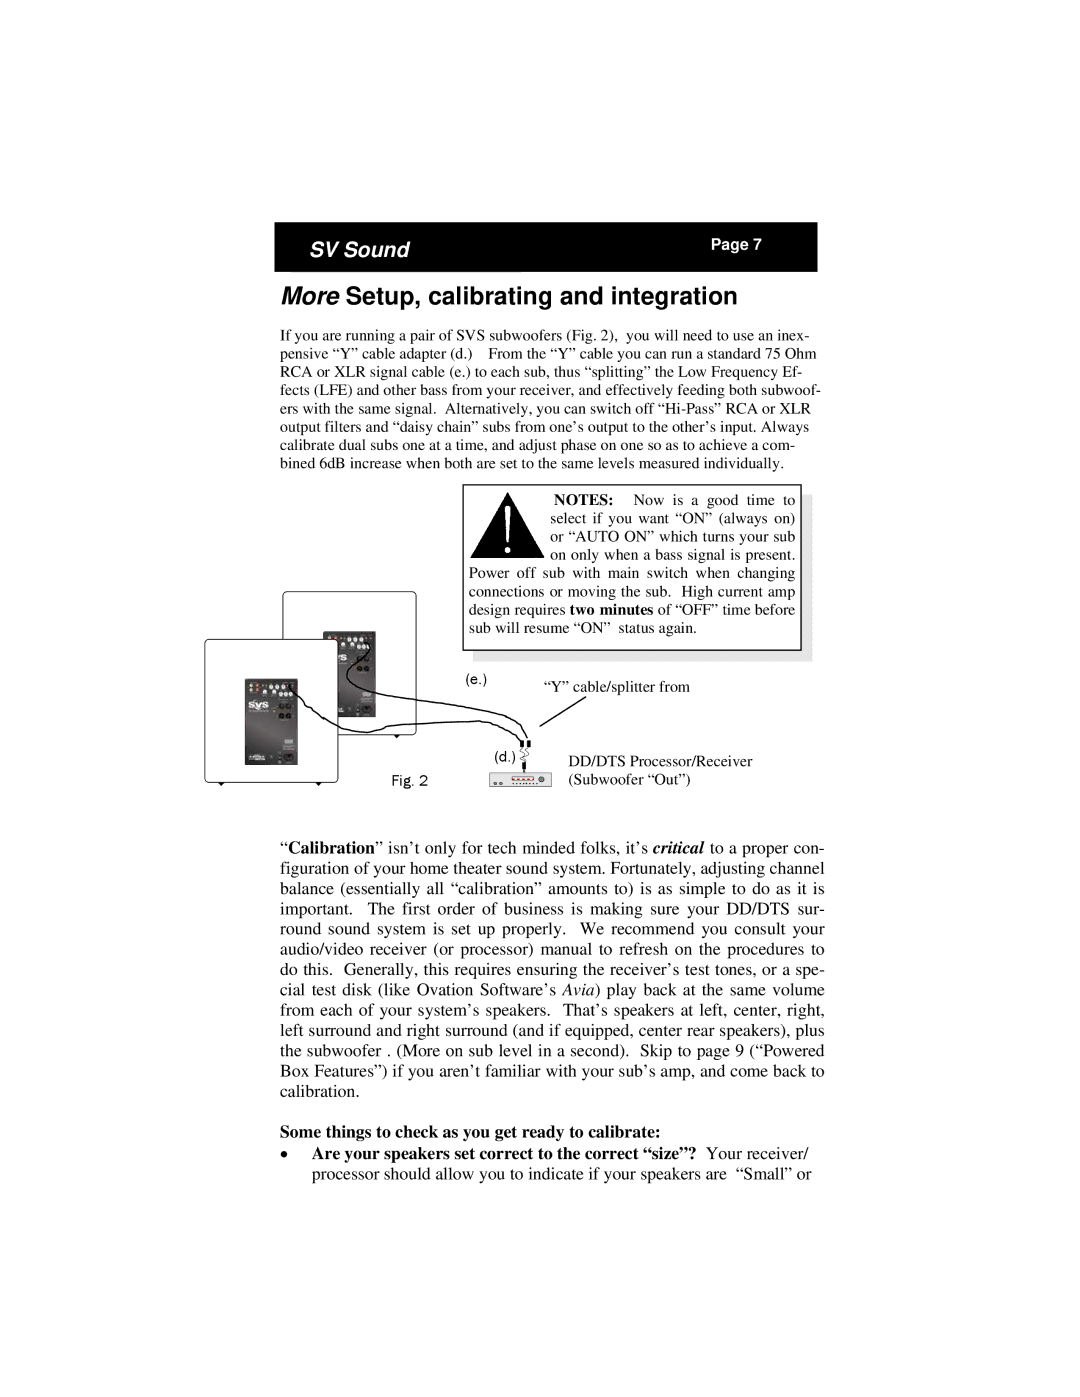
If you are running a pair of SVS subwoofers (Fig. 2), you will need to use an inex- pensive “Y” cable adapter (d.) From the “Y” cable you can run a standard 75 Ohm RCA or XLR signal cable (e.) to each sub, thus “splitting” the Low Frequency Ef- fects (LFE) and other bass from your receiver, and effectively feeding both subwoof- ers with the same signal. Alternatively, you can switch off
NOTES: Now is a good time to select if you want “ON” (always on) or “AUTO ON” which turns your sub on only when a bass signal is present.
Power off sub with main switch when changing connections or moving the sub. High current amp design requires two minutes of “OFF” time before sub will resume “ON” status again.
(e.) | “Y” cable/splitter from |
|
Fig. 2
(d.) | DD/DTS Processor/Receiver |
| (Subwoofer “Out”) |
“Calibration” isn’t only for tech minded folks, it’s critical to a proper con- figuration of your home theater sound system. Fortunately, adjusting channel balance (essentially all “calibration” amounts to) is as simple to do as it is important. The first order of business is making sure your DD/DTS sur- round sound system is set up properly. We recommend you consult your audio/video receiver (or processor) manual to refresh on the procedures to do this. Generally, this requires ensuring the receiver’s test tones, or a spe- cial test disk (like Ovation Software’s Avia) play back at the same volume from each of your system’s speakers. That’s speakers at left, center, right, left surround and right surround (and if equipped, center rear speakers), plus the subwoofer . (More on sub level in a second). Skip to page 9 (“Powered Box Features”) if you aren’t familiar with your sub’s amp, and come back to calibration.
Some things to check as you get ready to calibrate:
•Are your speakers set correct to the correct “size”? Your receiver/ processor should allow you to indicate if your speakers are “Small” or
