Installation Instructions
The Bulldog camera is designed for use with any DVR, VCR, Security Monitor, TV or computer with a video capture card. The camera can be used indoors or outdoors. The Bulldog camera can be used for a variety of purposes including monitoring callers at the door, keeping your car, yard, shop or warehouse under observation or used as a camera to monitor your children’s play area.
Contents and Parts Identification
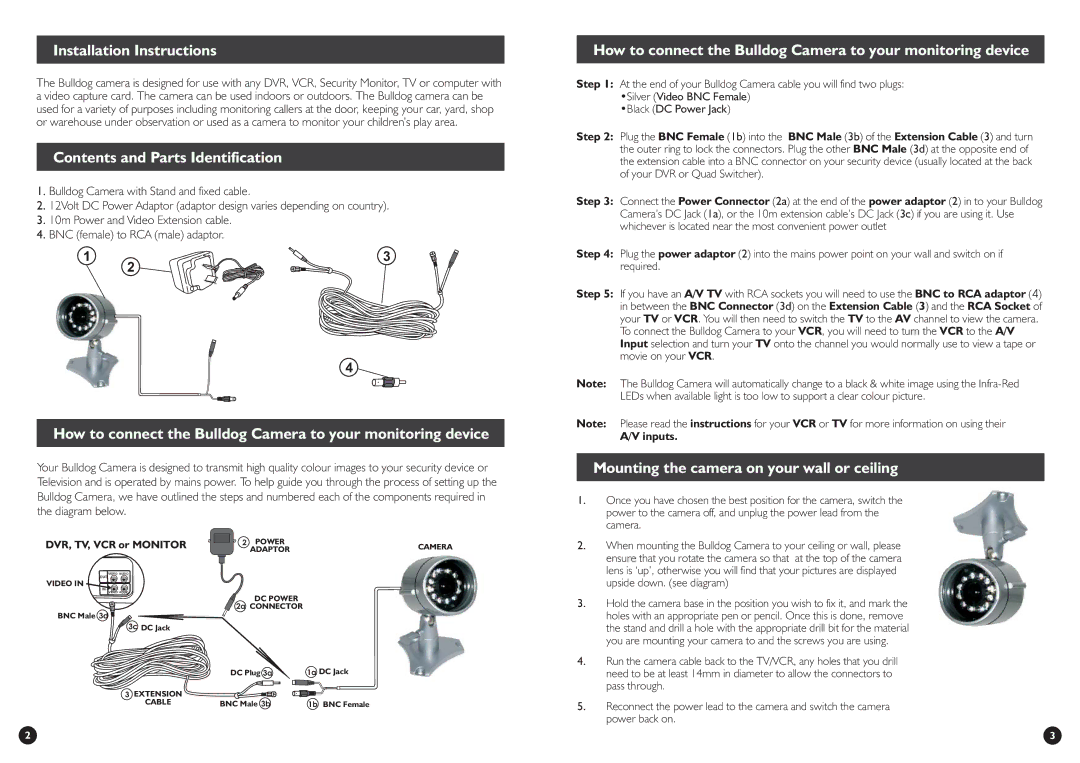
1.Bulldog Camera with Stand and fixed cable.
2.12Volt DC Power Adaptor (adaptor design varies depending on country).
3.10m Power and Video Extension cable.
4.BNC (female) to RCA (male) adaptor.
1 | 3 |
2 ![]()
4
How to connect the Bulldog Camera to your monitoring device
Your Bulldog Camera is designed to transmit high quality colour images to your security device or Television and is operated by mains power. To help guide you through the process of setting up the Bulldog Camera, we have outlined the steps and numbered each of the components required in the diagram below.
How to connect the Bulldog Camera to your monitoring device
Step 1: At the end of your Bulldog Camera cable you will find two plugs: •Silver (Video BNC Female)
•Black (DC Power Jack)
Step 2: Plug the BNC Female (1b) into the BNC Male (3b) of the Extension Cable (3) and turn the outer ring to lock the connectors. Plug the other BNC Male (3d) at the opposite end of the extension cable into a BNC connector on your security device (usually located at the back of your DVR or Quad Switcher).
Step 3: Connect the Power Connector (2a) at the end of the power adaptor (2) in to your Bulldog Camera’s DC Jack (1a), or the 10m extension cable’s DC Jack (3c) if you are using it. Use whichever is located near the most convenient power outlet
Step 4: Plug the power adaptor (2) into the mains power point on your wall and switch on if required.
Step 5: If you have an A/V TV with RCA sockets you will need to use the BNC to RCA adaptor (4) in between the BNC Connector (3d) on the Extension Cable (3) and the RCA Socket of your TV or VCR. You will then need to switch the TV to the AV channel to view the camera. To connect the Bulldog Camera to your VCR, you will need to turn the VCR to the A/V Input selection and turn your TV onto the channel you would normally use to view a tape or movie on your VCR.
Note: The Bulldog Camera will automatically change to a black & white image using the
Note: Please read the instructions for your VCR or TV for more information on using their
A/V inputs.
Mounting the camera on your wall or ceiling
1. | Once you have chosen the best position for the camera, switch the |
| power to the camera off, and unplug the power lead from the |
| camera. |
DVR, TV, VCR or MONITOR
VIDEO AUDIO
OUT
VIDEO IN ![]()
VIDEO AUDIO
BNC Male 3d ![]()
3c DC Jack
3 EXTENSION CABLE
2 | POWER | CAMERA |
| ADAPTOR | |
|
|
DC POWER 2a CONNECTOR
DC Plug 3a | 1a DC Jack |
BNC Male 3b | 1b BNC Female |
2. | When mounting the Bulldog Camera to your ceiling or wall, please |
| ensure that you rotate the camera so that at the top of the camera |
| lens is ‘up’, otherwise you will find that your pictures are displayed |
| upside down. (see diagram) |
3. | Hold the camera base in the position you wish to fix it, and mark the |
| holes with an appropriate pen or pencil. Once this is done, remove |
| the stand and drill a hole with the appropriate drill bit for the material |
| you are mounting your camera to and the screws you are using. |
4. | Run the camera cable back to the TV/VCR, any holes that you drill |
| need to be at least 14mm in diameter to allow the connectors to |
| pass through. |
5. | Reconnect the power lead to the camera and switch the camera |
| power back on. |
2
3