DRIVE CONTROL ADJUSTMENTS
LEFT SIDE SHOWN
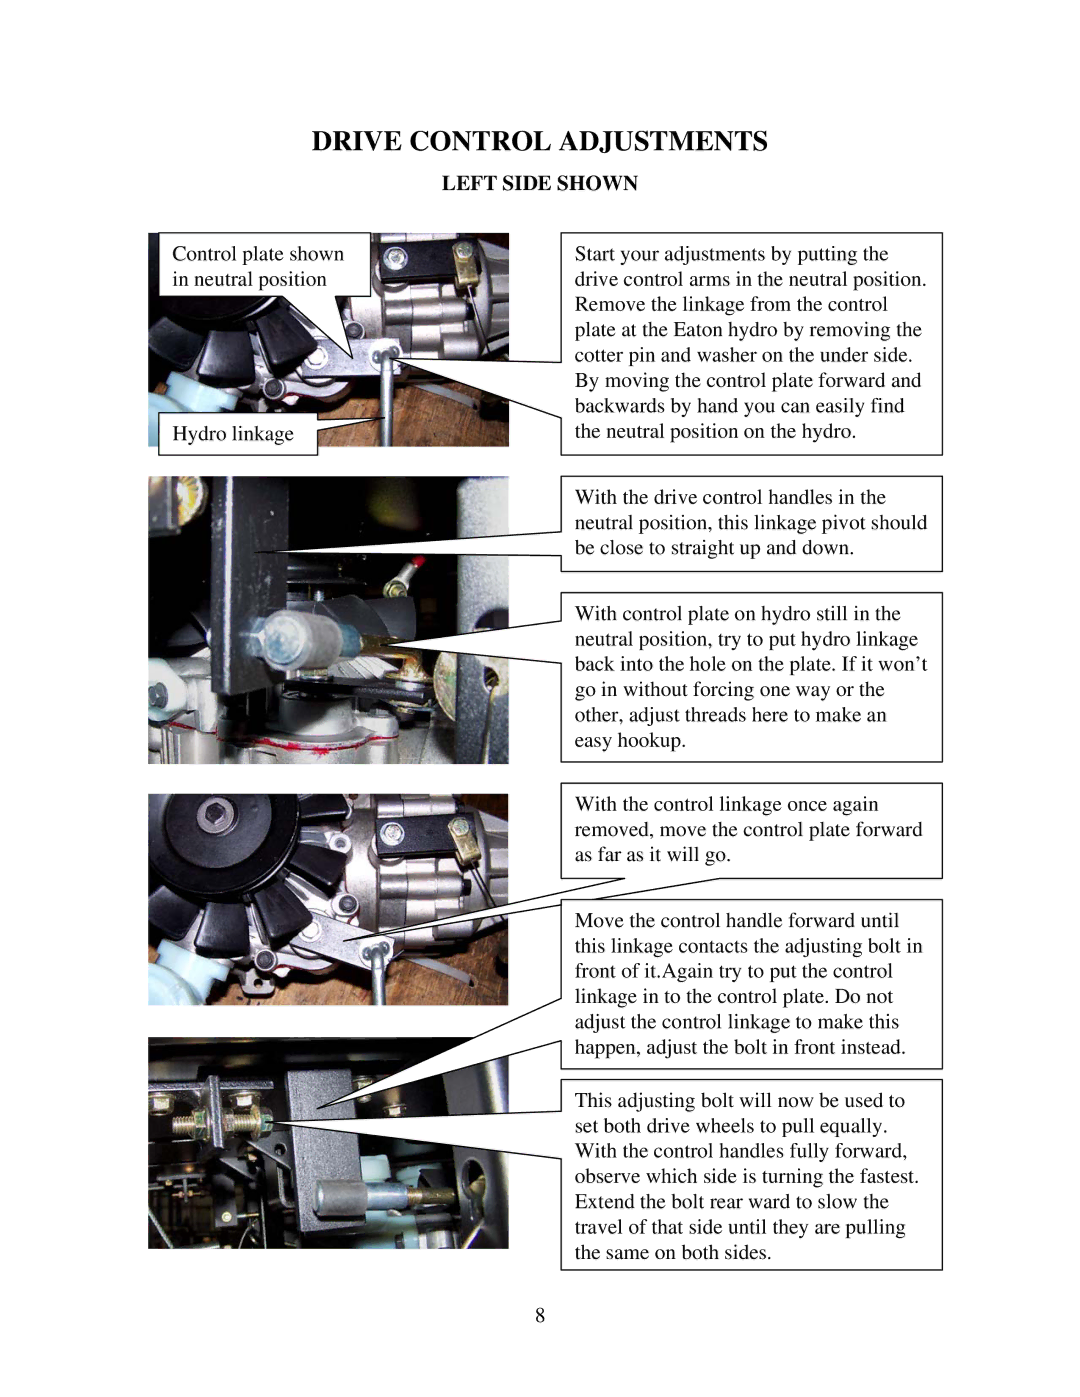
Control plate shown | Start your adjustments by putting the |
in neutral position | drive control arms in the neutral position. |
| Remove the linkage from the control |
| plate at the Eaton hydro by removing the |
| cotter pin and washer on the under side. |
| By moving the control plate forward and |
| backwards by hand you can easily find |
Hydro linkage | the neutral position on the hydro. |
| With the drive control handles in the |
| neutral position, this linkage pivot should |
| be close to straight up and down. |
| With control plate on hydro still in the |
| neutral position, try to put hydro linkage |
| back into the hole on the plate. If it won’t |
| go in without forcing one way or the |
| other, adjust threads here to make an |
| easy hookup. |
| With the control linkage once again |
| removed, move the control plate forward |
| as far as it will go. |
| Move the control handle forward until |
| this linkage contacts the adjusting bolt in |
| front of it.Again try to put the control |
| linkage in to the control plate. Do not |
| adjust the control linkage to make this |
| happen, adjust the bolt in front instead. |
| This adjusting bolt will now be used to |
| set both drive wheels to pull equally. |
| With the control handles fully forward, |
| observe which side is turning the fastest. |
| Extend the bolt rear ward to slow the |
| travel of that side until they are pulling |
| the same on both sides. |
8