5Control Panel
VIDEO | L - AUDIO - R | MENU | VOLUME | CHANNEL | POWER |
 1 2 3 4 5
6
7
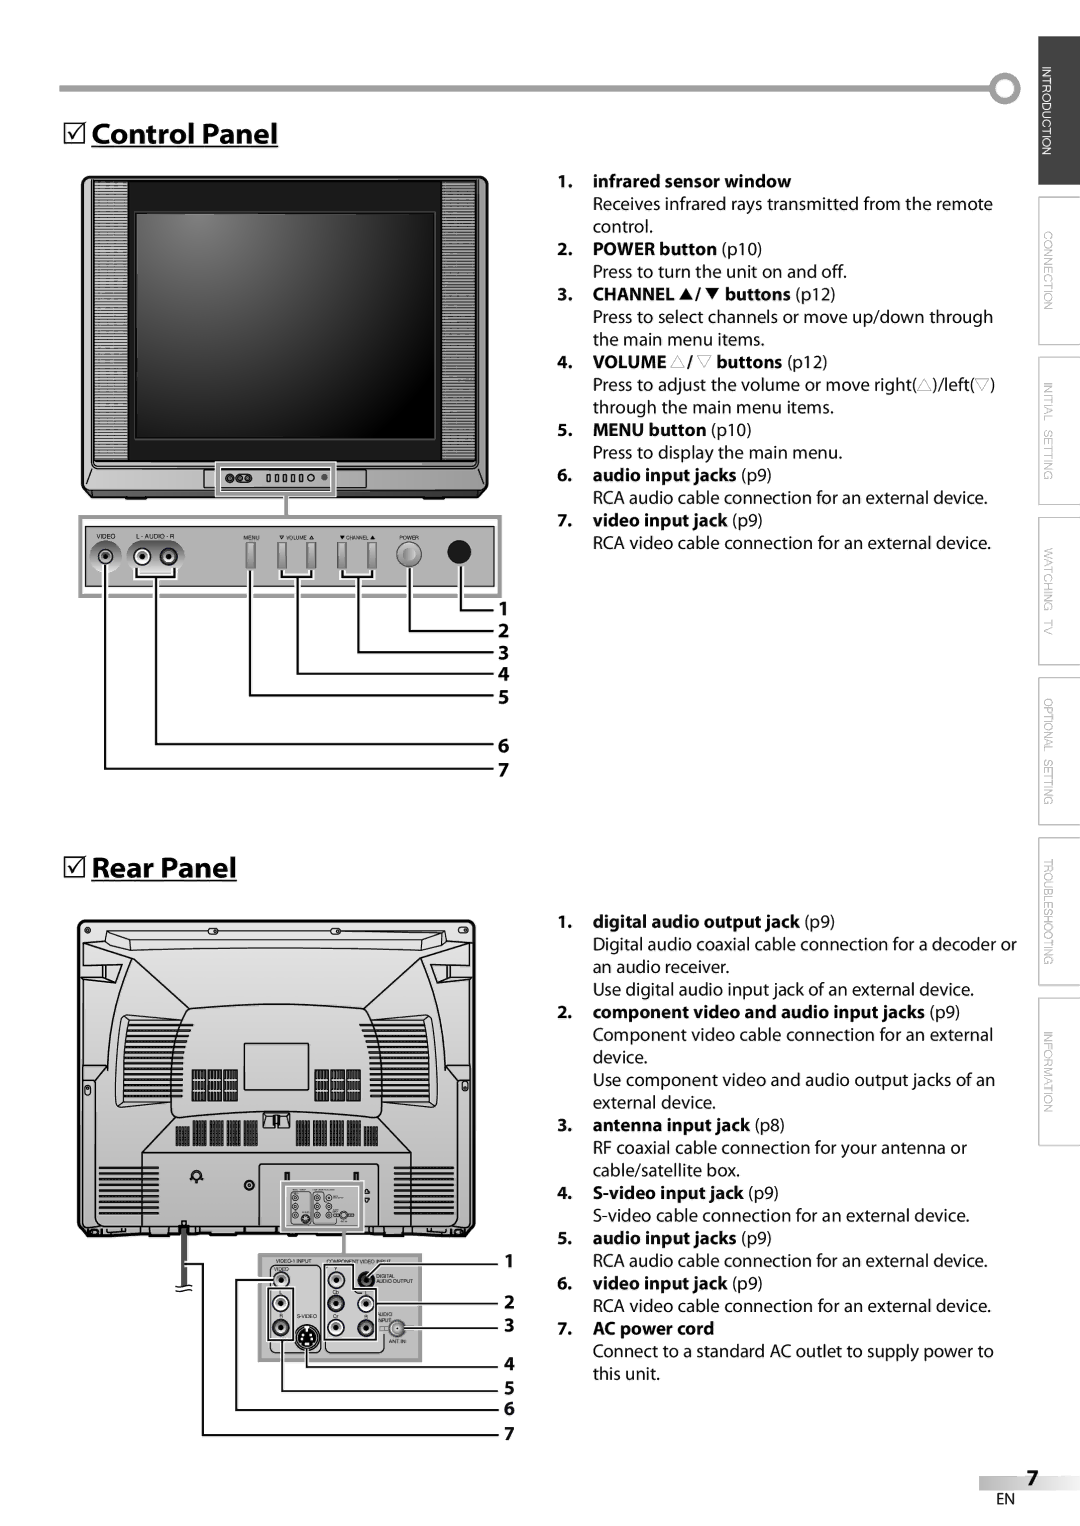
1.infrared sensor window
Receives infrared rays transmitted from the remote control.
2.POWER button (p10)
Press to turn the unit on and off.
3.CHANNEL K/ L buttons (p12)
Press to select channels or move up/down through the main menu items.
4.VOLUME X/ Y buttons (p12)
Press to adjust the volume or move right(X)/left(Y) through the main menu items.
5.MENU button (p10)
Press to display the main menu.
6.audio input jacks (p9)
RCA audio cable connection for an external device.
7.video input jack (p9)
RCA video cable connection for an external device.
![]() INTRODUCTION CONNECTION INITIAL SETTING WATCHING TV OPTIONAL SETTING
INTRODUCTION CONNECTION INITIAL SETTING WATCHING TV OPTIONAL SETTING
5Rear Panel
|
|
|
|
|
| 1. | digital audio output jack (p9) | |
|
|
|
|
|
|
| Digital audio coaxial cable connection for a decoder or | |
|
|
|
|
|
|
| an audio receiver. | |
|
|
|
|
|
|
| Use digital audio input jack of an external device. | |
|
|
|
|
|
| 2. | component video and audio input jacks (p9) | |
|
|
|
|
|
|
| Component video cable connection for an external | |
|
|
|
|
|
|
| device. | |
|
|
|
|
|
|
| Use component video and audio output jacks of an | |
|
|
|
|
|
|
| external device. | |
|
|
|
|
|
| 3. | antenna input jack (p8) | |
|
|
|
|
|
|
| RF coaxial cable connection for your antenna or | |
|
|
|
|
|
|
| cable/satellite box. | |
|
|
|
|
|
| 4. | ||
|
|
|
|
|
|
| ||
|
|
|
|
| 1 | 5. | audio input jacks (p9) | |
VIDEO |
| Y |
|
|
| RCA audio cable connection for an external device. | ||
COMPONENT VIDEO INPUT |
|
|
| |||||
L |
| Cb | L | DIGITAL |
| 6. | video input jack (p9) | |
| AUDIO OUTPUT |
| ||||||
R | Cr | R | AUDIO | 2 |
| RCA video cable connection for an external device. | ||
INPUT | 3 | 7. | AC power cord | |||||
|
|
|
| |||||
|
|
|
| ANT. IN | ||||
|
|
|
|
|
| Connect to a standard AC outlet to supply power to | ||
|
|
|
|
| 4 |
| ||
|
|
|
|
|
| this unit. | ||
|
|
|
|
| 5 |
| ||
|
|
|
|
|
|
| ||
|
|
|
|
| 6 |
|
| |
|
|
|
|
| 7 |
|
| |
![]() TROUBLESHOOTING INFORMATION
TROUBLESHOOTING INFORMATION
7
EN