HINTS FOR TIMER RECORDING

If there is a power failure or the VCR is unplugged for more than 30 seconds, the clock setting and all timer settings will be lost.

If the tape runs out before the end time, the VCR will switch to the Stop mode immediately, eject the tape and the VCR power will be turned off. The TIMER indicator will flash.

If a tape is not in the VCR or does not have the safety tab, the TIMER indicator flashes and timer recording cannot be performed. Please insert a recordable tape.

TO STOP AN AUTOMATIC TIMER PROGRAM ALREADY STARTED

Press [STOP/EJECT] on the VCR.

TO CHECK, CORRECT, OR CANCEL AN AUTOMATIC TIMER PROGRAM

1 Turn the power on by pressing [POWER].

2 Select main menu by pressing [MENU].

3 Select "TIMER PROGRAMMING" by pressing [PLAY] or [STOP]. Then, press [F.FWD].

4 Select the program number which you want to check by pressing [PLAY] or [STOP]. The details of

the selected program appears on the TV screen.

Go to the digit you want to change by pressing [F.FWD] or [REW]. Then, enter correct numbers by pressing [PLAY] or [STOP].

You may cancel the entire program by pressing [REW] during the program number flashes.

5 Press [EXIT/RESET] to exit.

6 Press [POWER] to return to timer stand-by mode.

COUNTER MEMORY FUNCTION

Use this feature to memorize the beginning of recording start point.

1) Press [COUNTER RESET] on

REC


the remote control to reset the


counter.


2) Press [COUNTER MEMORY]


on the remote control so that

SP

M0:00:00

“M” appears on the TV screen.

3)Record the program.

4)After recording, press [STOP] then [REW].

When “0:00:00” is reached, rewinding operation goes to stop. And you can view the recording program.

[COUNTER MEMORY] does not function if the Auto repeat mode is set to [ON]. In this case, set the Auto repeat mode to [OFF].

To cancel the Counter memory mode, press [COUNTER MEMORY] so that “M” disappears from the TV screen.

SPECIAL FEATURES

COPYING A VIDEO TAPE

MTS (Multi-Channel Television Sound) SYSTEM

FUNCTION

RECORDING

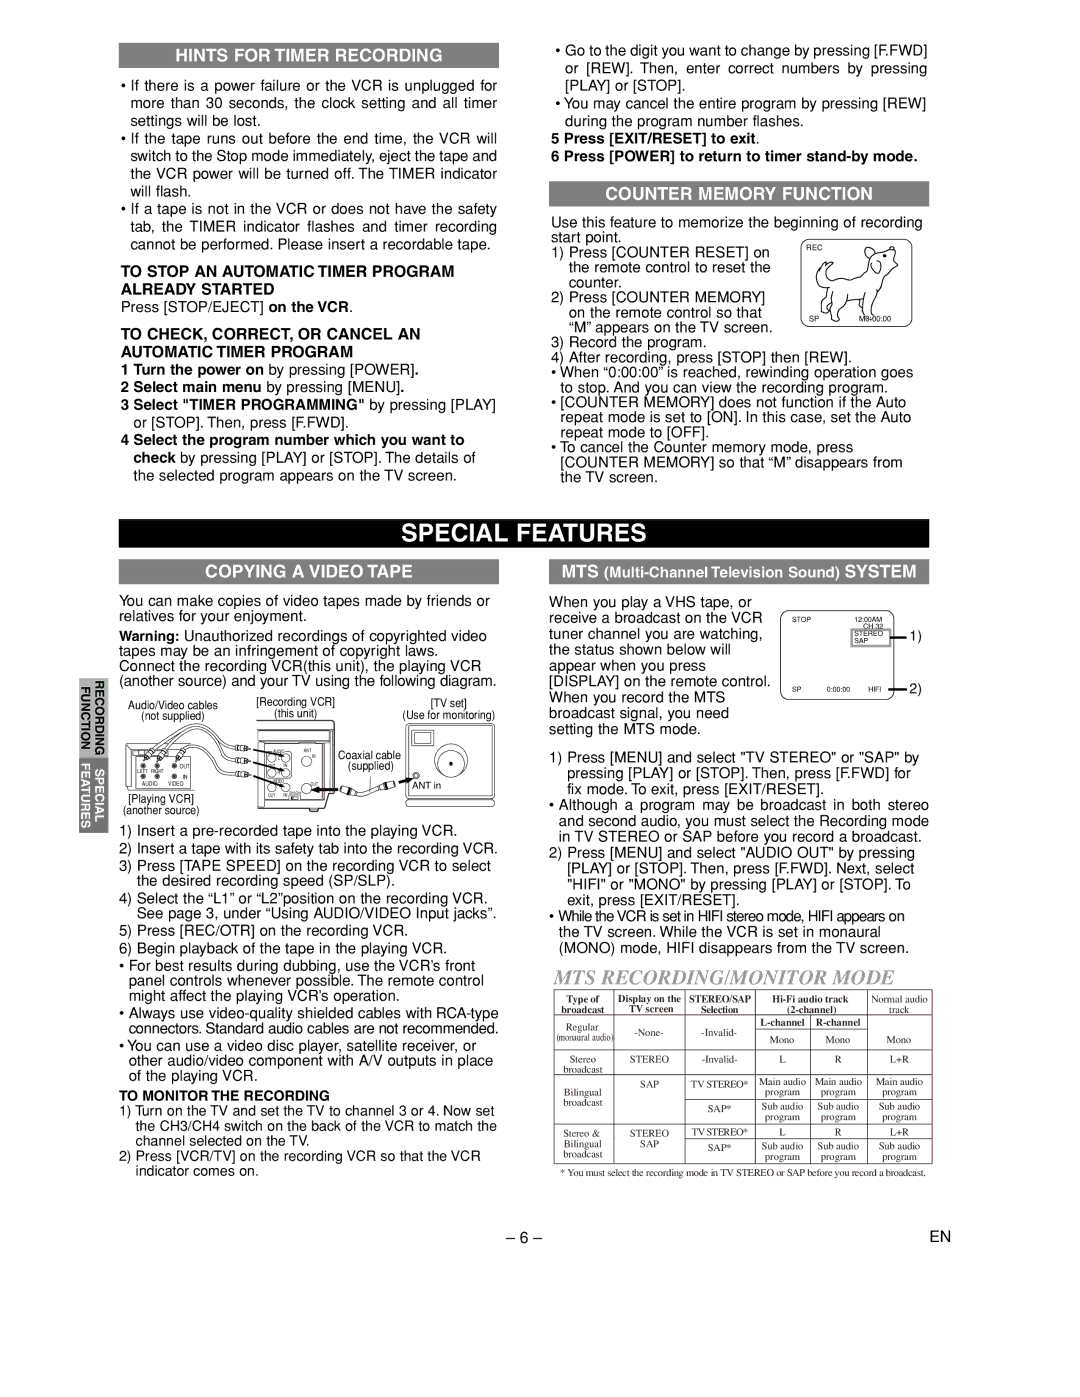
You can make copies of video tapes made by friends or relatives for your enjoyment.

Warning: Unauthorized recordings of copyrighted video tapes may be an infringement of copyright laws. Connect the recording VCR(this unit), the playing VCR (another source) and your TV using the following diagram.

Audio/Video cables

[Recording VCR]

[TV set]

(not supplied)

(this unit)

(Use for monitoring)


AUDIO

ANT


When you play a VHS tape, or receive a broadcast on the VCR tuner channel you are watching, the status shown below will appear when you press [DISPLAY] on the remote control. When you record the MTS broadcast signal, you need setting the MTS mode.

STOP

12:00AM


CH 32


STEREO


SAP

SP 0:00:00 HIFI

1)

2)

FEATURES

SPECIAL


L

IN

Coaxial cable

OUT

IN


(supplied)

LEFT RIGHT

R


IN


ANT in

AUDIO VIDEO


OUT


[Playing VCR]

OUT IN CH3 CH4


(another source)


1)Insert a pre-recorded tape into the playing VCR.

2)Insert a tape with its safety tab into the recording VCR.

3)Press [TAPE SPEED] on the recording VCR to select the desired recording speed (SP/SLP).

4)Select the “L1” or “L2”position on the recording VCR. See page 3, under “Using AUDIO/VIDEO Input jacks”.

5)Press [REC/OTR] on the recording VCR.

6)Begin playback of the tape in the playing VCR.

For best results during dubbing, use the VCR’s front panel controls whenever possible. The remote control might affect the playing VCR’s operation.

Always use video-quality shielded cables with RCA-type connectors. Standard audio cables are not recommended.

You can use a video disc player, satellite receiver, or other audio/video component with A/V outputs in place of the playing VCR.

TO MONITOR THE RECORDING

1)Turn on the TV and set the TV to channel 3 or 4. Now set the CH3/CH4 switch on the back of the VCR to match the channel selected on the TV.

2)Press [VCR/TV] on the recording VCR so that the VCR indicator comes on.

1) Press [MENU] and select "TV STEREO" or "SAP" by pressing [PLAY] or [STOP]. Then, press [F.FWD] for fix mode. To exit, press [EXIT/RESET].

Although a program may be broadcast in both stereo and second audio, you must select the Recording mode in TV STEREO or SAP before you record a broadcast.

2)Press [MENU] and select "AUDIO OUT" by pressing [PLAY] or [STOP]. Then, press [F.FWD]. Next, select "HIFI" or "MONO" by pressing [PLAY] or [STOP]. To exit, press [EXIT/RESET].

While the VCR is set in HIFI stereo mode, HIFI appears on the TV screen. While the VCR is set in monaural (MONO) mode, HIFI disappears from the TV screen.

MTS RECORDING/MONITOR MODE

Type of

Display on the

STEREO/SAP

Hi-Fi audio track

Normal audio

broadcast

TV screen

Selection

(2-channel)

track

Regular

-None-

-Invalid-

L-channel

R-channel


(monaural audio)

Mono

Mono

Mono


Stereo

STEREO

-Invalid-

L

R

L+R

broadcast


Bilingual

SAP

TV STEREO*

Main audio

Main audio

Main audio


program

program

program

broadcast


SAP*

Sub audio

Sub audio

Sub audio


program

program

program

Stereo &

STEREO

TV STEREO*

L

R

L+R

Bilingual

SAP

SAP*

Sub audio

Sub audio

Sub audio

broadcast


program

program

program

* You must select the recording mode in TV STEREO or SAP before you record a broadcast.

– 6 –

EN

Page 6
Image 6
Sylvania 6265FC owner manual Special Features, Hints for Timer Recording, Counter Memory Function, Copying a Video Tape

6265FC specifications

The Sylvania 6265FC is a versatile and efficient lighting solution that integrates modern technology with practical design, making it ideal for various applications, from residential to commercial use. This compact fluorescent lamp is particularly known for its energy efficiency and longevity, offering an excellent balance between performance and cost-effectiveness.

One of the standout features of the Sylvania 6265FC is its energy-saving capabilities. Consuming fewer watts than traditional incandescent bulbs, it helps reduce electricity consumption significantly, resulting in lower energy bills. This makes it an environmentally friendly choice, aligning with the growing trend towards sustainable living.

The Sylvania 6265FC also boasts an impressive lifespan, providing around 10,000 hours of use. This extended duration means less frequent replacements, reducing waste and contributing to enhanced convenience for users. The durability of the bulb is complemented by its robust construction, ensuring it can withstand typical wear and tear in various conditions.

In terms of lighting quality, the Sylvania 6265FC produces a bright and consistent light output, which is essential for spaces that require adequate illumination. It features a color temperature of approximately 2700K, emitting a warm white light that creates a welcoming atmosphere. This makes it a popular choice for residential areas, as well as for settings that require a cozy ambiance.

The bulb's design incorporates innovative technologies such as rapid start and a compact form factor. The rapid start technology ensures that the light turns on instantly without any delay, providing immediate brightness when needed most. The compact design allows it to fit into standard fixtures, making installation straightforward and hassle-free.

Furthermore, the Sylvania 6265FC is compatible with various dimming systems, enabling users to adjust the brightness according to their preferences and needs. This flexibility enhances the overall user experience, allowing for customizable lighting solutions that can adapt to different activities or moods.

In summary, the Sylvania 6265FC stands out in the lighting market for its energy efficiency, long lifespan, and quality lighting output. With features that cater to both functionality and aesthetics, this compact fluorescent lamp is an excellent choice for anyone looking to upgrade their lighting solution while being mindful of energy use and environmental impact.