Sylvania 6719DF Timer Program Extension, To Correct a Program, To Cancel AN Automatic Timer

Models: 6719DF

1 56
Download 56 pages 63.66 Kb
Page 31
Image 31

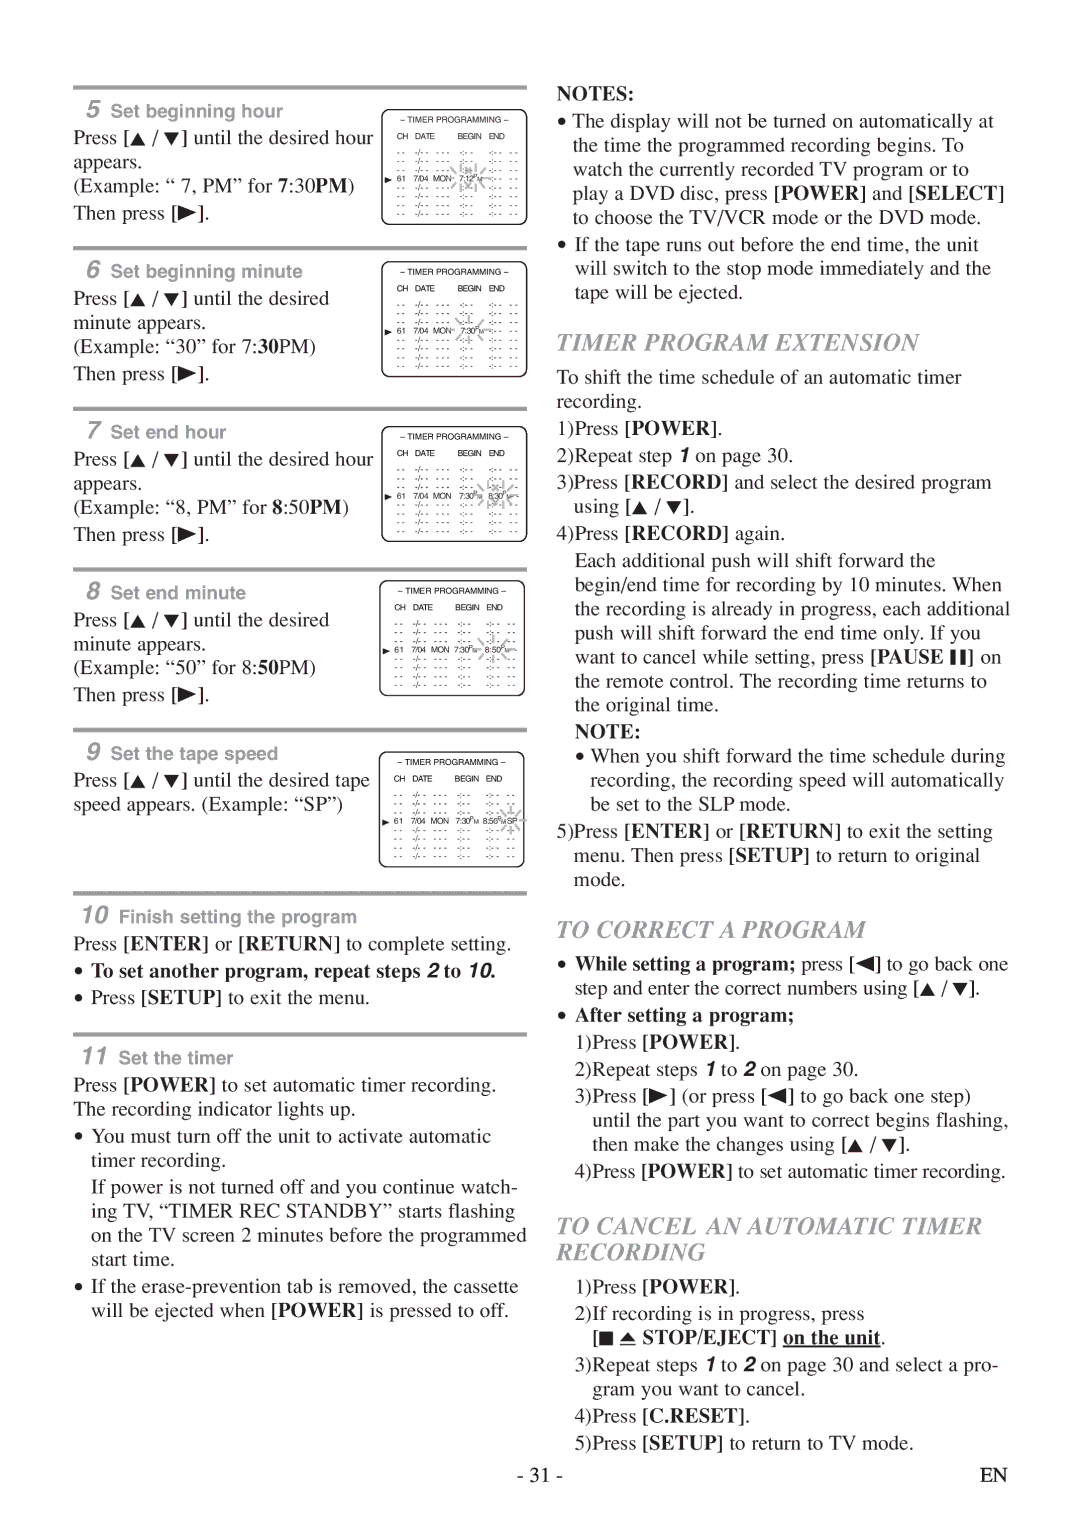
5 Set beginning hour

– TIMER PROGRAMMING –

Press [K / L] until the desired hour

CH DATE

BEGIN END

appears.

- -

-/- -

- - -

-:- -

-:- - - -

- -

-/- -

- - -

-:- -

-:- - - -


- -

-/- -

- - -

-:- -

-:- - - -

(Example: “ 7, PM” for 7:30PM)

B 61

7/04

MON

7:12PM -:- - - -

- -

-/- -

- - -

-:- -

-:- - - -

Then press [B].

- -

-/- -

- - -

-:- -

-:- - - -

- -

-/- -

- - -

-:- -

-:- - - -


- -

-/- -

- - -

--:-

-:- - - -


6 Set beginning minute

– TIMER PROGRAMMING –

Press [K / L] until the desired

CH DATE

BEGIN END

- -

-/- -

- - -

-:- -

-:- - - -

minute appears.

- -

-/- -

MON- - -

-:- -

-:- - - -

B 61

7/04

7:30PM -:- - - -


- -

-/- -

- - -

-:- -

-:- - - -

(Example: “30” for 7:30PM)

- -

-/- -

- - -

-:- -

-:- - - -

- -

-/- -

- - -

-:- -

-:- - - -

Then press [B].

- -

-/- -

- - -

-:- -

-:- - - -

- -

-/- -

- - -

-:- -

-:- - - -


NOTES:

The display will not be turned on automatically at the time the programmed recording begins. To watch the currently recorded TV program or to play a DVD disc, press [POWER] and [SELECT] to choose the TV/VCR mode or the DVD mode.

If the tape runs out before the end time, the unit will switch to the stop mode immediately and the tape will be ejected.

TIMER PROGRAM EXTENSION

To shift the time schedule of an automatic timer recording.

7 Set end hour

– TIMER PROGRAMMING –

Press [K / L] until the desired hour

CH DATE

BEGIN END

- -

-/- -

-:- -

-:- - - -

appears.

- -

-/- - - - -

-:- -

-:- - - -

- -

-/- - - - -

-:- -

-:- - - -

(Example: “8, PM” for 8:50PM)

B 61

7/04 MON 7:30PM 8:30PM- -

- -

-/- - - - -

-:- -

-:- - - -


- -

-/- - - - -

-:- -

-:- - - -

Then press [B].

- -

-/- - - - -

-:- -

-:- - - -

- -

-/- - - - -

-:- -

-:- - - -


8 Set end minute

– TIMER PROGRAMMING –

Press [K / L] until the desired

CH

DATE

BEGIN END

- -

-/- - - - -

-:- -

-:- - - -

minute appears.

- -

-/- - - - -

-:- -

-:- - - -

B 61

7/04 MON 7:30PM

8:50PM- -


- -

-/- - - - -

-:- -

-:- - - -

(Example: “50” for 8:50PM)

- -

-/- - - - -

-:- -

-:- - - -

- -

-/- - - - -

-:- -

-:- - - -


- -

-/- - - - -

-:- -

-:- - - -

Then press [B].

- -

-/- - - - -

-:- -

-:- - - -


9 Set the tape speed

– TIMER PROGRAMMING –

Press [K / L] until the desired tape

CH

DATE

BEGIN END

speed appears. (Example: “SP”)

- -

-/- - - - -

-:- -

-:- - - -

- -

-/- - - - -

-:- -

-:- - - -


- -

-/- - - - -

-:- -

-:- - - -


B 61

7/04 MON 7:30PM 8:50PMSP


- -

-/- - - - -

-:- -

-:- - - -


- -

-/- - - - -

-:- -

-:- - - -


- -

-/- - - - -

-:- -

-:- - - -


- -

-/- - - - -

-:- -

-:- - - -

1)Press [POWER]. 2)Repeat step 1 on page 30.

3)Press [RECORD] and select the desired program using [K / L].

4)Press [RECORD] again.

Each additional push will shift forward the begin/end time for recording by 10 minutes. When the recording is already in progress, each additional push will shift forward the end time only. If you want to cancel while setting, press [PAUSE F] on the remote control. The recording time returns to the original time.

NOTE:

When you shift forward the time schedule during recording, the recording speed will automatically be set to the SLP mode.

5)Press [ENTER] or [RETURN] to exit the setting menu. Then press [SETUP] to return to original mode.

10 Finish setting the program

TO CORRECT A PROGRAM

Press [ENTER] or [RETURN] to complete setting.

While setting a program; press [s] to go back one

To set another program, repeat steps 2 to 10.

Press [SETUP] to exit the menu.


step and enter the correct numbers using [K / L].

After setting a program;


11 Set the timer


1)Press [POWER].


2)Repeat steps 1 to 2 on page 30.

Press [POWER] to set automatic timer recording.


3)Press [B] (or press [s] to go back one step)

The recording indicator lights up.


until the part you want to correct begins flashing,

You must turn off the unit to activate automatic


then make the changes using [K / L].

timer recording.


4)Press [POWER] to set automatic timer recording.

If power is not turned off and you continue watch-


ing TV, “TIMER REC STANDBY” starts flashing

TO CANCEL AN AUTOMATIC TIMER

on the TV screen 2 minutes before the programmed

RECORDING

start time.

If the erase-prevention tab is removed, the cassette


1)Press [POWER].

will be ejected when [POWER] is pressed to off.


2)If recording is in progress, press


[C A STOP/EJECT] on the unit.


3)Repeat steps 1 to 2 on page 30 and select a pro-


gram you want to cancel.


4)Press [C.RESET].


5)Press [SETUP] to return to TV mode.

- 31 -

EN

Page 31
Image 31
Sylvania 6719DF owner manual Timer Program Extension, To Correct a Program, To Cancel AN Automatic Timer, Recording

6719DF specifications

The Sylvania 6719DF is a versatile and energy-efficient lighting solution designed to meet the needs of modern residential and commercial spaces. This advanced fluorescent lighting fixture stands out due to its innovative design, remarkable performance characteristics, and user-friendly technologies, making it an excellent choice for anyone looking to enhance their environment with high-quality illumination.

One of the key features of the Sylvania 6719DF is its twin-tube fluorescent technology. This enables the fixture to provide bright, uniform lighting with minimal flicker, which is crucial for workspaces where clarity and focus are essential. Its design allows for easy installation and maintenance, providing users with added convenience. The fixture is compatible with various dimming systems, granting users the flexibility to adjust the brightness to suit different moods and tasks.

The Sylvania 6719DF supports energy efficiency, which is a significant consideration in today’s environmentally conscious society. Utilizing fluorescent technology, the fixture operates at a lower wattage compared to traditional incandescent bulbs while delivering superior illumination. This not only helps in reducing energy bills but also contributes to a smaller carbon footprint. By choosing the Sylvania 6719DF, users can enjoy the benefits of high-quality lighting without compromising on energy conservation.

Another notable characteristic of the Sylvania 6719DF is its longevity. With a lifespan that exceeds 10,000 hours, this fixture significantly reduces the frequency of replacements. This durability is an essential factor for both commercial and residential users, as it minimizes maintenance costs and disruptions. Furthermore, the fixture operates with minimal heat output, which adds to its safety and efficiency attributes.

Available in various color temperatures, the Sylvania 6719DF caters to different lighting preferences. Whether you require cool white light for a workspace or a warmer tone for residential areas, there’s an option that can meet your specific needs. Additionally, the fixture is designed with an aesthetically pleasing appearance, blending seamlessly into various decors.

In summary, the Sylvania 6719DF is a superior lighting option that combines cutting-edge technology, energy efficiency, and a sleek design. Its advanced features, long lifespan, and flexibility make it an ideal choice for those seeking quality lighting solutions that cater to both functional and aesthetic needs. Embracing this fixture not only enhances overall illumination but also supports sustainable living.