F075615 specifications
The Sylvania F075615 is a highly efficient and versatile commercial lighting solution designed to enhance visibility while reducing energy costs. This lighting fixture is particularly noted for its application in retail and office environments, where both illumination quality and energy savings are paramount.One of the standout features of the Sylvania F075615 is its LED technology. LEDs are known for their longevity and low power consumption, making them ideal for businesses looking to minimize their operating expenses. The F075615 boasts a lifespan of up to 50,000 hours, which significantly reduces the need for frequent replacements. This long lifespan is complemented by a low energy usage, translating to lower electricity bills, a critical advantage for businesses aiming to operate sustainably.
In terms of light output, the Sylvania F075615 provides a bright, uniform illumination that enhances the visibility of products and spaces. With a color temperature of approximately 4000K to 5000K, it offers a neutral white light that is known to improve concentration and mood, making it well-suited for workspaces and retail settings alike. The fixture also ensures high color rendering, showcasing colors accurately, which is particularly beneficial in environments where accurate color perception is important.
Another notable characteristic of the F075615 is its versatility in installation. It is designed to be easily integrated into various types of ceilings, including drop ceilings and recessed applications. This adaptability ensures that businesses can implement the lighting solutions that best suit their spatial configurations and aesthetic preferences.
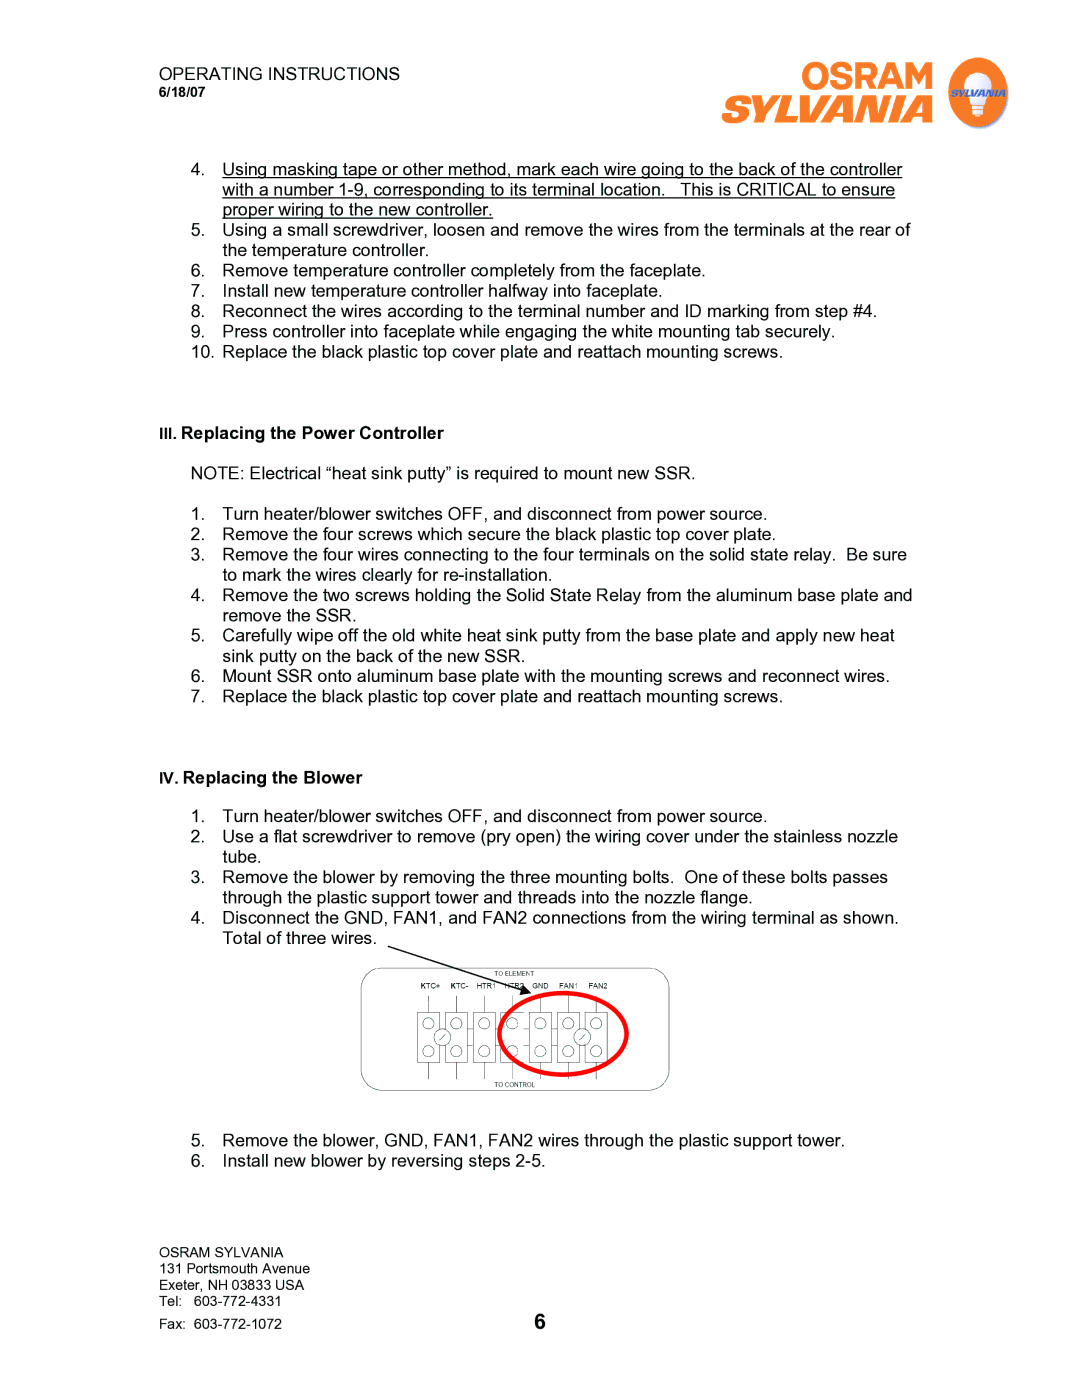
Moreover, the Sylvania F075615 incorporates advanced thermal management technologies, which help to sustain optimal performance and extend the lifespan of the fixture. By effectively dissipating heat, the fixture reduces wear and tear on its components, contributing to its durability and reliability.
In conclusion, the Sylvania F075615 is an exemplary lighting fixture that combines efficiency, longevity, and versatility. Its advanced LED technology, impressive light output, and easy installation make it a valuable addition to any commercial setting. By adopting the F075615, businesses can achieve significant energy savings while creating a bright, welcoming environment for employees and customers alike.