the number(s) that appear on the screen. These are the auto clock station(s) in your area. See item 4 below.
• If no number(s) appear on the TV screen, there are |
no stations in your area which contain the Auto |
Clock signal. Auto Clock Setting is not possible. |
Please use Manual Clock Setting on page 11. |
CHANNEL SET UP AGAIN
Make sure ...
•Press the POWER button to turn on the TV/VCR.
Press the MENU button to exit the screen. NOTE: During Auto Clock CH Search, the picture may be distorted. This is normal.
4Enter the channel number that contains the Automatic Clock Setting Signal
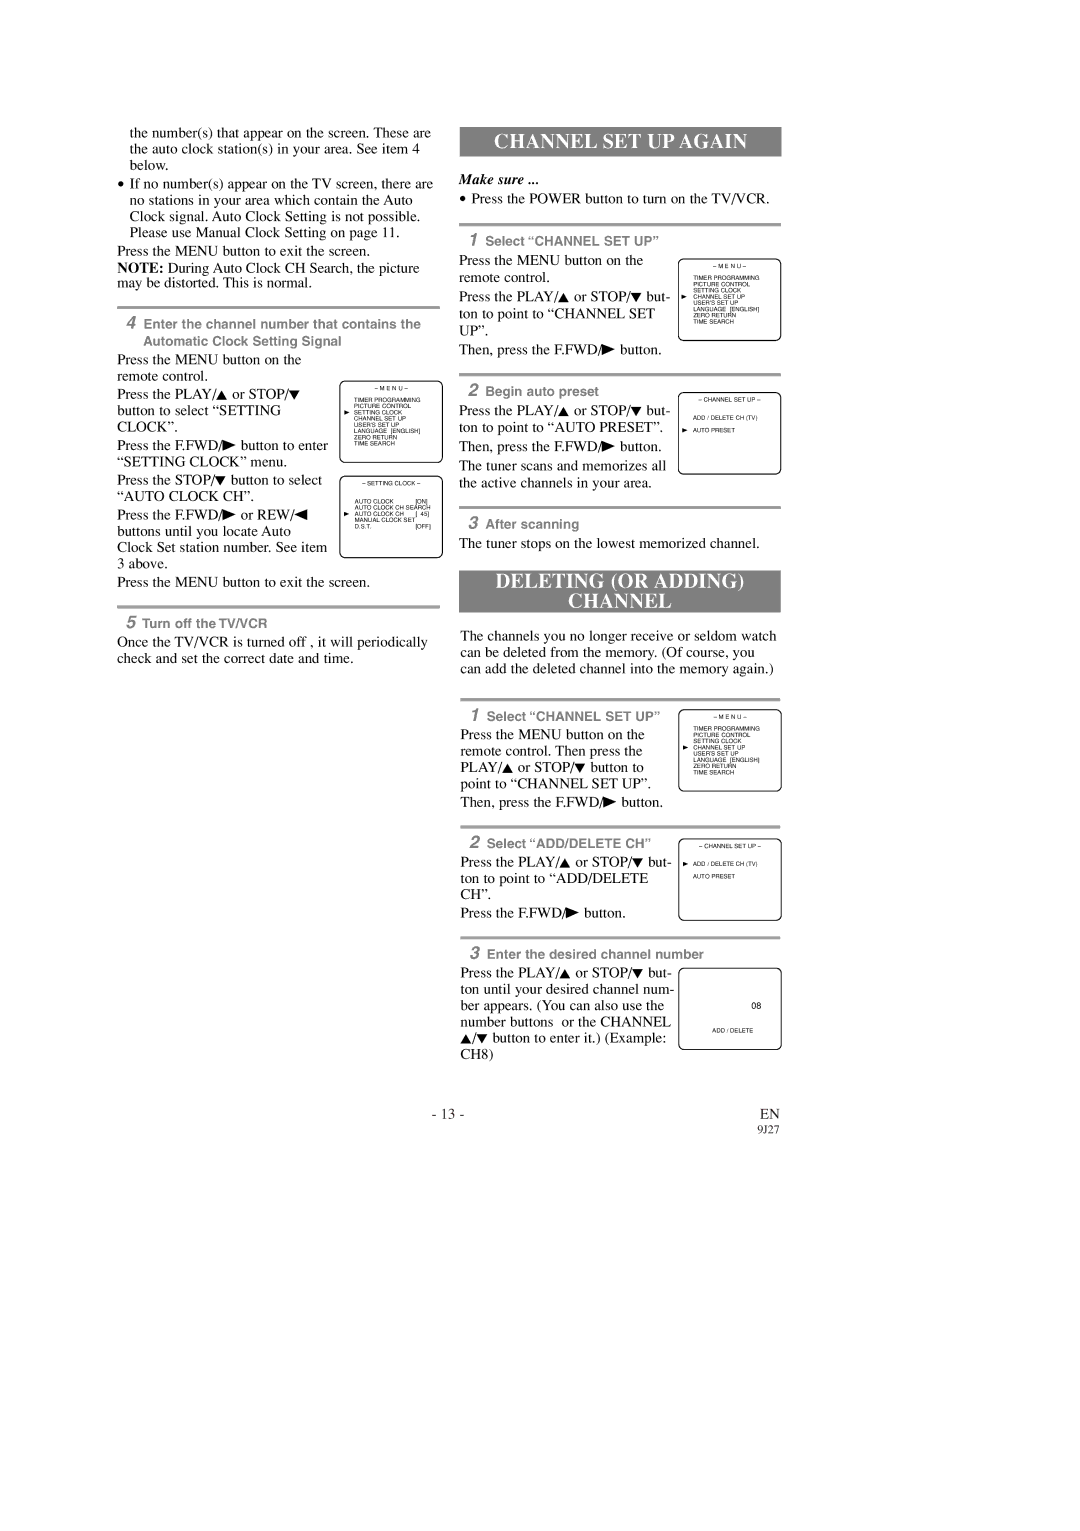
1 Select “CHANNEL SET UP” |
Press the MENU button on the |
remote control. |
Press the PLAY/K or STOP/L but- |
ton to point to “CHANNEL SET |
UP”. |
Then, press the F.FWD/B button. |
– M E N U –
TIMER PROGRAMMING PICTURE CONTROL SETTING CLOCK
BCHANNEL SET UP USER’S SET UP LANGUAGE [ENGLISH] ZERO RETURN
TIME SEARCH
Press the MENU button on the remote control.
Press the PLAY/K or STOP/L button to select “SETTING CLOCK”.
Press the F.FWD/B button to enter “SETTING CLOCK” menu.
– M E N U –
TIMER PROGRAMMING PICTURE CONTROL
BSETTING CLOCK CHANNEL SET UP USER’S SET UP LANGUAGE [ENGLISH] ZERO RETURN
TIME SEARCH
2Begin auto preset
– CHANNEL SET UP –
Press the PLAY/K or STOP/L but-
ADD / DELETE CH (TV)
ton to point to “AUTO PRESET”. B AUTO PRESET Then, press the F.FWD/B button.
The tuner scans and memorizes all
Press the STOP/L button to select | – SETTING CLOCK – | |
“AUTO CLOCK CH”. | AUTO CLOCK | [ON] |
Press the F.FWD/B or REW/s | AUTO CLOCK CH SEARCH | |
MANUAL CLOCK SET | [ 45] | |
| B AUTO CLOCK CH | |
buttons until you locate Auto | D.S.T. | [OFF] |
|
| |
Clock Set station number. See item 3 above.
Press the MENU button to exit the screen.
5Turn off the TV/VCR
Once the TV/VCR is turned off , it will periodically check and set the correct date and time.
the active channels in your area.
3After scanning
The tuner stops on the lowest memorized channel.
DELETING (OR ADDING)
CHANNEL
The channels you no longer receive or seldom watch can be deleted from the memory. (Of course, you can add the deleted channel into the memory again.)
1 Select “CHANNEL SET UP” | – M E N U – |
Press the MENU button on the | TIMER PROGRAMMING |
PICTURE CONTROL | |
remote control. Then press the | SETTING CLOCK |
B CHANNEL SET UP | |
USER’S SET UP | |
PLAY/K or STOP/L button to | LANGUAGE [ENGLISH] |
TIME SEARCH | |
| ZERO RETURN |
point to “CHANNEL SET UP”. |
|
Then, press the F.FWD/B button. |
|
|
|
2 Select “ADD/DELETE CH” | – CHANNEL SET UP – |
Press the PLAY/K or STOP/L but- | B ADD / DELETE CH (TV) |
ton to point to “ADD/DELETE | AUTO PRESET |
CH”. |
|
Press the F.FWD/B button. |
|
3Enter the desired channel number
Press the PLAY/K or STOP/L but- ton until your desired channel num- ber appears. (You can also use the number buttons or the CHANNEL K/L button to enter it.) (Example: CH8)
08
ADD / DELETE
- 13 - | EN |
