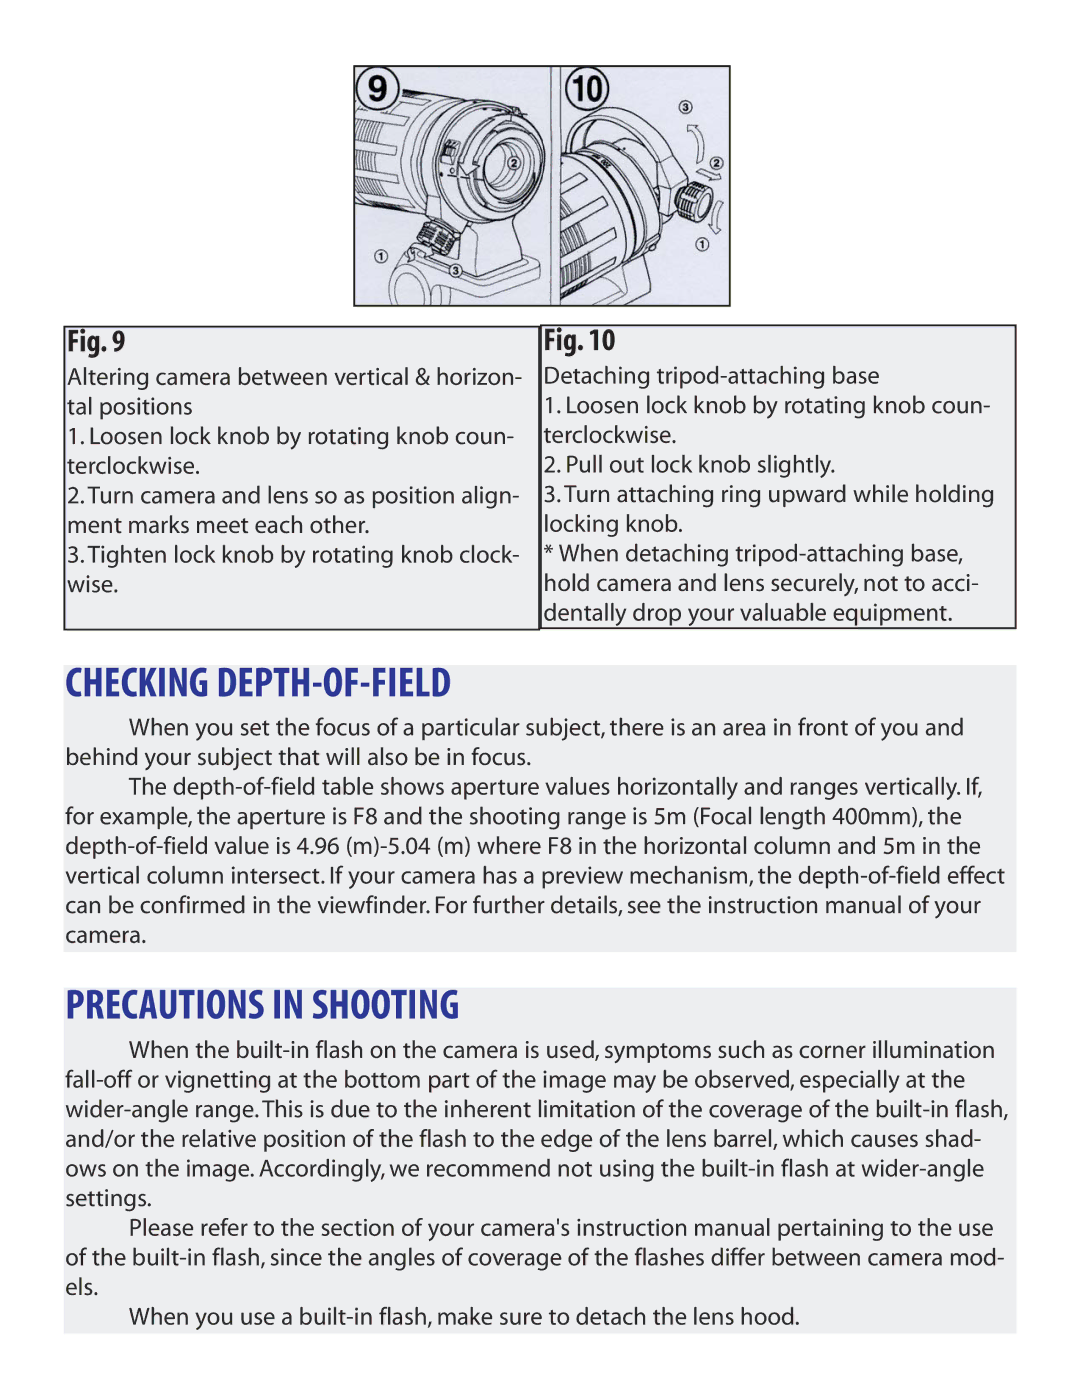
Fig. 9
Altering camera between vertical & horizon- tal positions
1.Loosen lock knob by rotating knob coun- terclockwise.
2.Turn camera and lens so as position align- ment marks meet each other.
3.Tighten lock knob by rotating knob clock- wise.
Fig. 10
Detaching tripod-attaching base
1.Loosen lock knob by rotating knob coun- terclockwise.
2.Pull out lock knob slightly.
3.Turn attaching ring upward while holding locking knob.
* When detaching tripod-attaching base, hold camera and lens securely, not to acci- dentally drop your valuable equipment.
CHECKING DEPTH-OF-FIELD
When you set the focus of a particular subject, there is an area in front of you and behind your subject that will also be in focus.
The depth-of-field table shows aperture values horizontally and ranges vertically. If, for example, the aperture is F8 and the shooting range is 5m (Focal length 400mm), the depth-of-field value is 4.96 (m)-5.04 (m) where F8 in the horizontal column and 5m in the vertical column intersect. If your camera has a preview mechanism, the depth-of-field effect can be confirmed in the viewfinder. For further details, see the instruction manual of your camera.
PRECAUTIONS IN SHOOTING
When the built-in flash on the camera is used, symptoms such as corner illumination fall-off or vignetting at the bottom part of the image may be observed, especially at the wider-angle range. This is due to the inherent limitation of the coverage of the built-in flash, and/or the relative position of the flash to the edge of the lens barrel, which causes shad- ows on the image. Accordingly, we recommend not using the built-in flash at wider-angle settings.
Please refer to the section of your camera's instruction manual pertaining to the use of the built-in flash, since the angles of coverage of the flashes differ between camera mod- els.
When you use a built-in flash, make sure to detach the lens hood.