DE50 specifications
The TANDBERG DE50 is a highly regarded video conferencing endpoint designed to enhance collaboration in a corporate setting. It is particularly known for its user-friendly interface, advanced technology, and superior performance, making it a popular choice for businesses seeking reliable communication solutions.One of the primary features of the DE50 is its exceptional video quality. It supports high-definition video resolutions up to 1080p at 60 frames per second. This ensures that users can experience clear and lifelike images during meetings, which is critical for effective communication. The DE50 also incorporates advanced video processing capabilities that enhance image quality in varying light conditions, ensuring consistent performance regardless of the meeting environment.
Audio quality is another significant aspect of the DE50. It utilizes advanced audio technologies such as echo cancellation and noise suppression. This allows for crystal clear sound and ensures that every participant can be heard without distractions from background noise. The system also supports multiple audio formats, making it compatible with a wide range of audio conferencing systems.
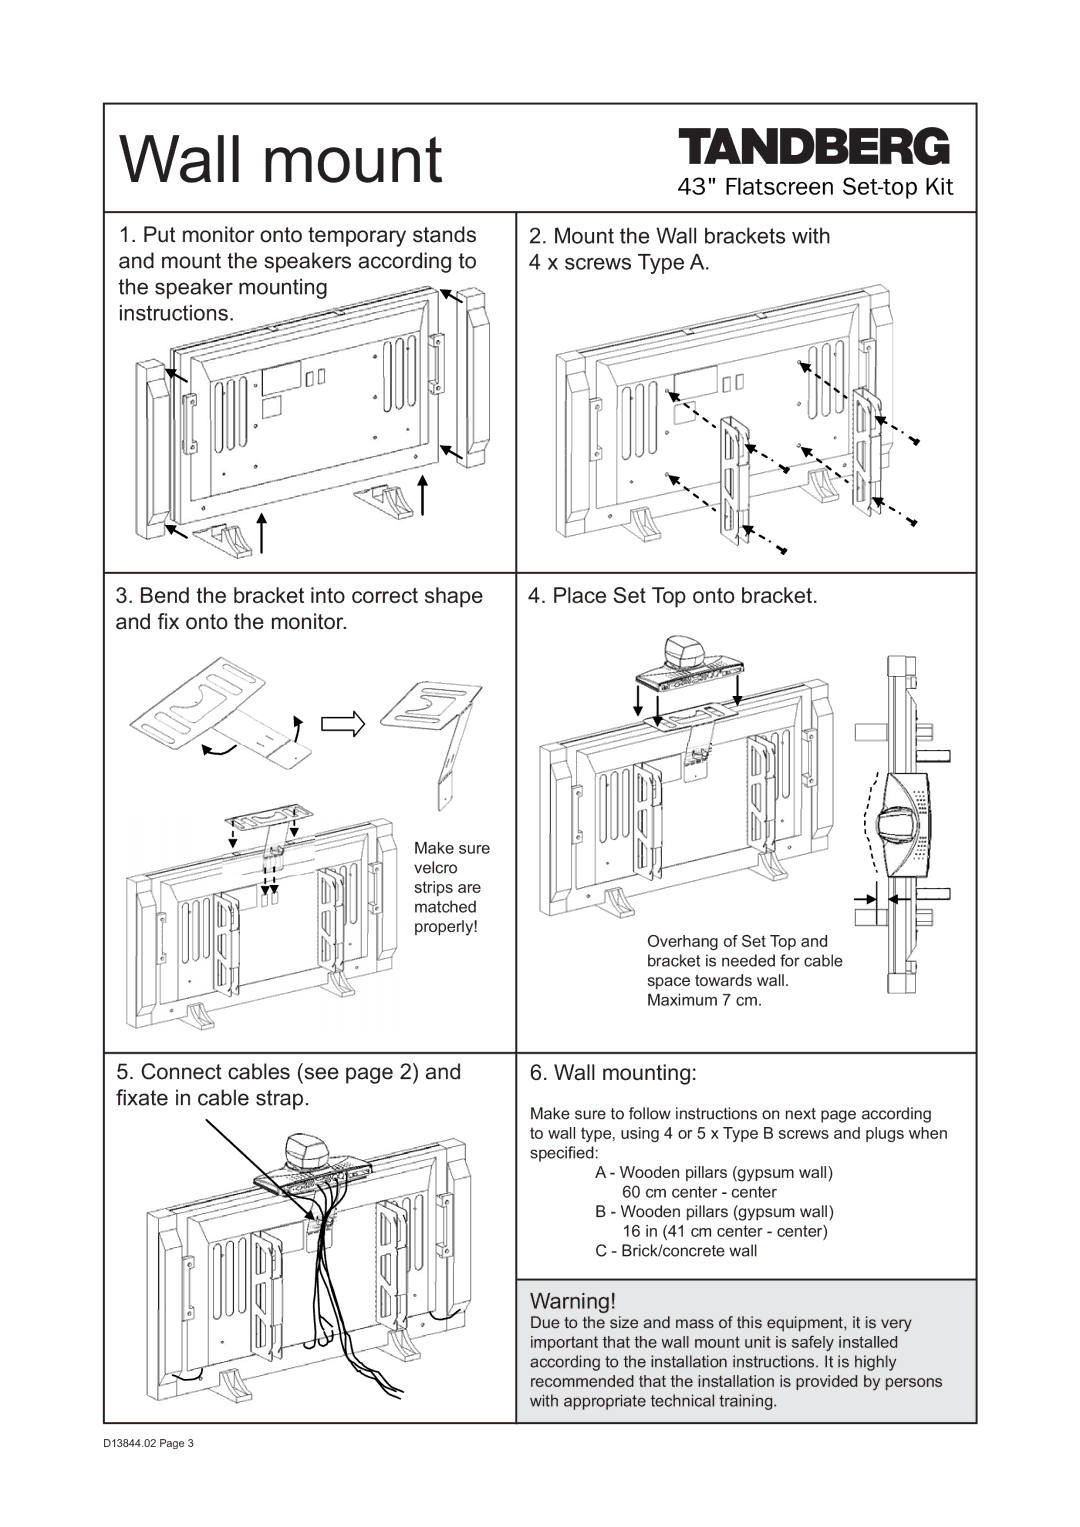
The DE50 is designed to be easy to install and configure, which is crucial for organizations with varying levels of technical expertise. Its plug-and-play capabilities allow for quick setup, enabling businesses to focus on productivity rather than complicated installations. The intuitive user interface further enhances usability, making it simple for users to join calls and navigate settings without requiring extensive training.
Another noteworthy characteristic of the TANDBERG DE50 is its interoperability with various video conferencing platforms. It is compatible with industry-standard solutions, allowing organizations to connect seamlessly with partners and clients using different systems. This flexibility is vital in today’s global business environment, where remote collaboration is increasingly common.
The DE50 also incorporates robust security features, ensuring that communications remain private and secure. It supports the latest encryption protocols, protecting sensitive information during video calls.
In summary, the TANDBERG DE50 is an advanced video conferencing solution that excels in delivering high-quality audio and video. Its ease of use, interoperability, and security features make it an ideal choice for businesses looking to improve their communication capabilities in an increasingly digital world.

