
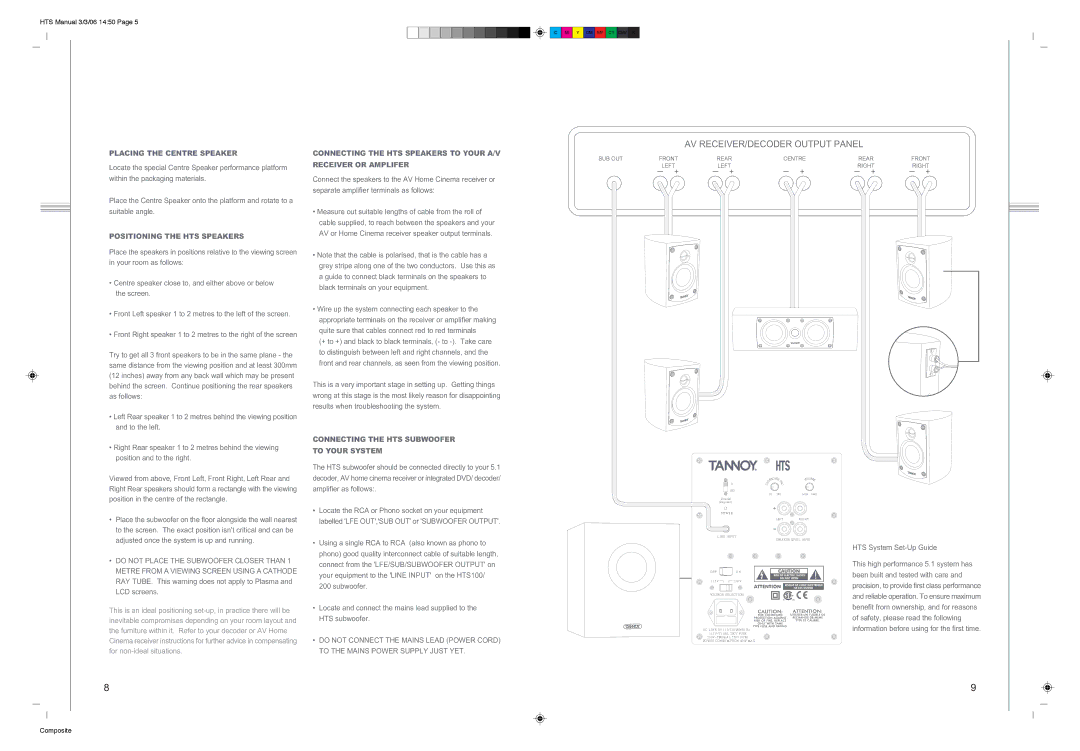
HITS200, HITS100 specifications
Tannoy, a renowned name in the audio industry, has introduced its latest range of products with the HITS100 and HITS200 models, designed to cater to professionals and enthusiasts alike. These speakers are engineered to deliver exceptional sound quality, making them a valuable addition to any audio setup.The Tannoy HITS100 is equipped with a robust 10-inch dual concentric driver, which ensures superior sound reproduction across a wide frequency range. This driver technology is a signature feature of Tannoy, allowing for accurate sound staging and imaging. The HITS100's compact design makes it suitable for smaller venues or home studios while still delivering a powerful audio experience.
On the other hand, the HITS200 features a larger 12-inch dual concentric driver, designed for those who require a more dynamic range and increased power handling capabilities. This model is ideal for larger spaces and events, offering deeper bass and clearer high-frequency response. Both models integrate advanced passive crossover technology, ensuring seamless integration between the woofer and tweeter.
One of the standout features of the HITS series is their built-in protection circuitry. This technology prevents overheating and distortion, allowing for long hours of operation without compromising sound quality. Additionally, both models come with a versatile range of connectivity options, including XLR and TRS inputs, enabling them to connect easily with various professional audio equipment.
The HITS series also emphasizes durability and ease of use. The cabinets are constructed from high-quality materials, designed to withstand the rigors of touring and gigging. Their lightweight yet sturdy build makes them portable, ensuring that users can transport them with minimal effort.
In terms of aesthetics, the HITS100 and HITS200 boast a sleek and modern design, fitting seamlessly into any setting, whether it’s a live performance, studio environment, or home audio system. These speakers not only perform exceptionally well but also add a touch of sophistication to the audio landscape.
In conclusion, the Tannoy HITS100 and HITS200 are a remarkable combination of innovative technology and user-friendly features. With their impressive sound capabilities, robust construction, and thoughtful design, they stand out as excellent choices for anyone looking to enhance their audio experience. Whether you're a sound engineer, a musician, or an audiophile, these models promise to deliver the quality and reliability that Tannoy is known for.