Manuals
/
Targus
/
Computer Equipment
/
Mouse
Targus
Wireless Optical Stow-N-GoTM Notebook Mouse 30
specifications
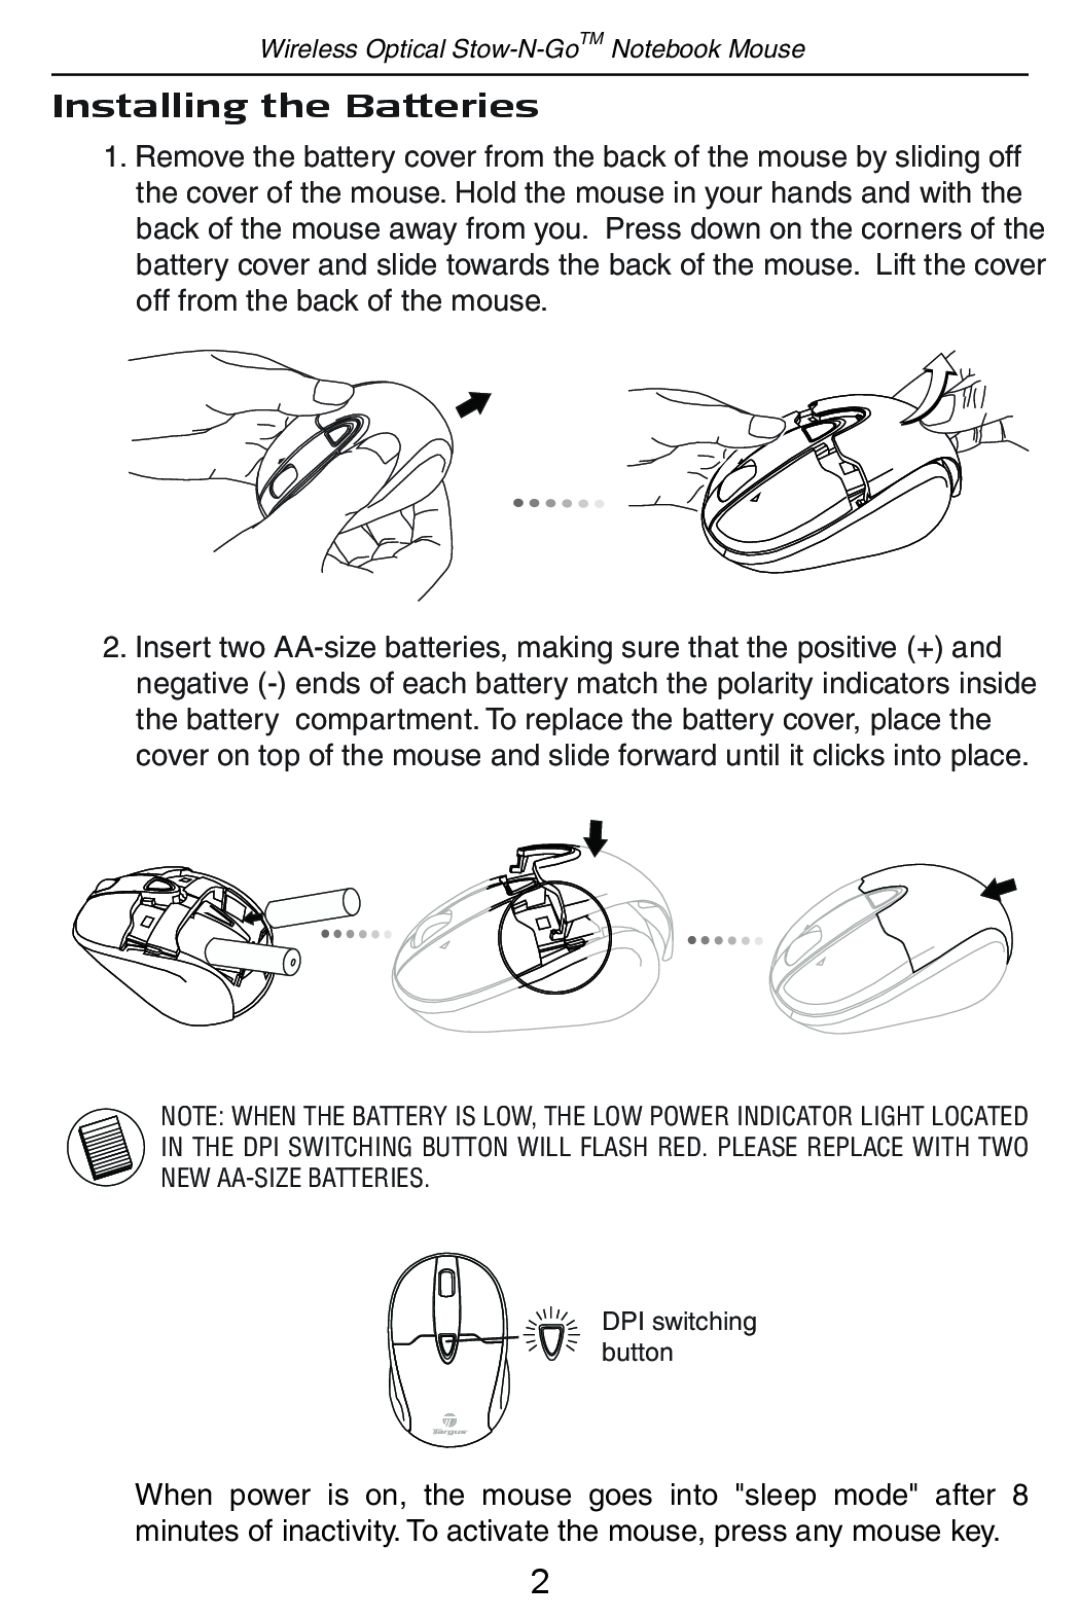
Installing the Batteries
Models:
Wireless Optical Stow-N-GoTM Notebook Mouse 30
1
3
10
10
Download
10 pages
6.4 Kb
1
2
3
4
5
6
7
8
Specification
Install
Warranty
Adjusting the DPI Setting
Page 3
Image 3
Page 2
Page 4
Page 3
Image 3
Page 2
Page 4
Contents
AMW25US / 410-1098-001A
Wireless Optical Stow-N-GoTM Notebook Mouse
USER GUIDE
2007 Targus Group International, Inc. and Targus, Inc
Introduction
System Requirements
WIRELESS OPTICAL STOW-N-GOTM NOTEBOOK MOUSE
Installing the Batteries
Establishing the Connection
Installing the tilt-wheel software driver
Adjusting the DPI Setting
Using the 4-way scrolling tilt-wheel
Mac OS
Windows XP
Product Specification
Transmitter
Receiver
Regulatory Compliance
Warranty
Technical Support
Product Registration
Declaration of Conformity
FCC Statement Tested to Comply
Top
Page
Image
Contents