Note: In most cases these two types of connection give similar results; the only difference lies in the type of cable used and the cost of these cables, the coaxial cable being the least expensive one to buy. However it sometimes happens that some coaxial cables are parasitised by high frequency interference caused by household electrical appliances, high voltage electric cables or radio transmitters.
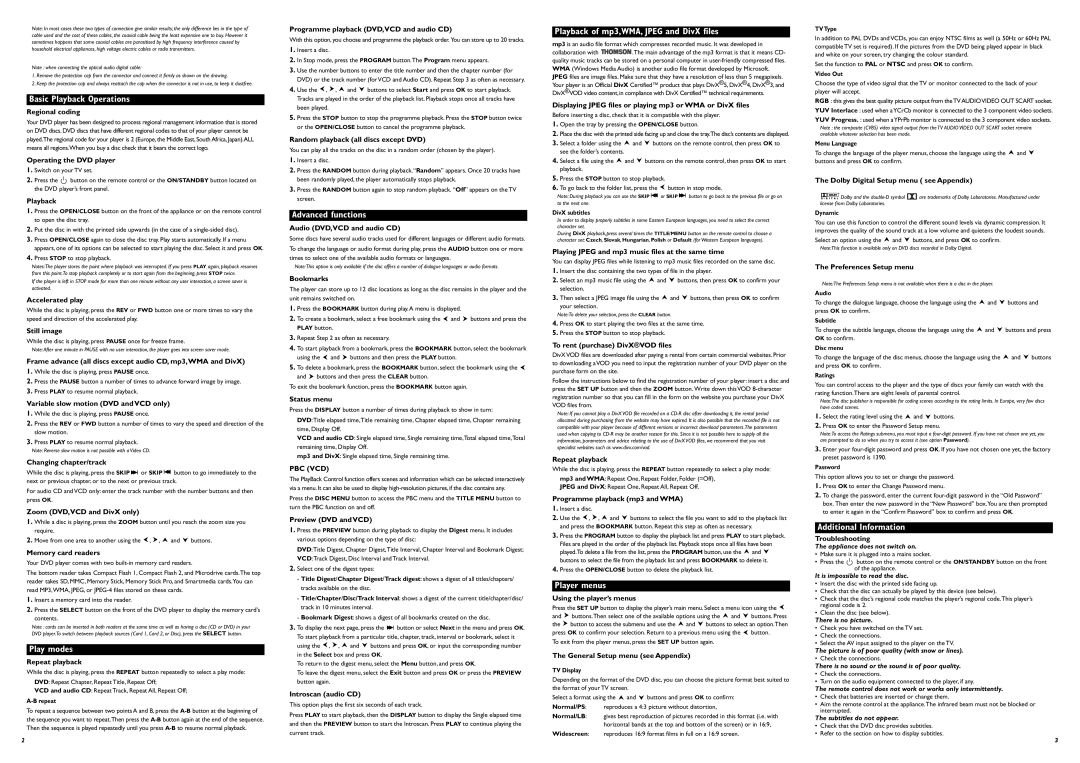
Note : when connecting the optical audio digital cable:
1.Remove the protection cap from the connector and connect it firmly as shown on the drawing.
2.Keep the protection cap and always reattach the cap when the connector is not in use, to keep it dustfree.
Basic Playback Operations
Regional coding
Your DVD player has been designed to process regional management information that is stored on DVD discs. DVD discs that have different regional codes to that of your player cannot be played.The regional code for your player is 2 (Europe, the Middle East, South Africa, Japan).ALL means all regions.When you buy a disc check that it bears the correct logo.
Operating the DVD player
1.Switch on your TV set.
2.Press the  button on the remote control or the ON/STANDBY button located on the DVD player’s front panel.
Playback
1.Press the OPEN/CLOSE button on the front of the appliance or on the remote control to open the disc tray.
2.Put the disc in with the printed side upwards (in the case of a single-sided disc).
3.Press OPEN/CLOSE again to close the disc tray. Play starts automatically. If a menu appears, one of its options can be selected to start playing the disc. Select it and press OK.
4.Press STOP to stop playback.
Notes:The player stores the point where playback was interrupted. If you press PLAY again, playback resumes from this point.To stop playback completely or to start again from the beginning, press STOP twice.
If the player is left in STOP mode for more than one minute without any user interaction, a screen saver is activated.
Accelerated play
While the disc is playing, press the REV or FWD button one or more times to vary the speed and direction of the accelerated play.
Still image
While the disc is playing, press PAUSE once for freeze frame.
Note:After one minute in PAUSE with no user interaction, the player goes into screen saver mode.
Frame advance (all discs except audio CD, mp3,WMA and DivX)
1.While the disc is playing, press PAUSE once.
2.Press the PAUSE button a number of times to advance forward image by image.
3.Press PLAY to resume normal playback.
Variable slow motion (DVD and VCD only)
1.While the disc is playing, press PAUSE once.
2.Press the REV or FWD button a number of times to vary the speed and direction of the slow motion.
3.Press PLAY to resume normal playback.
Note: Reverse slow motion is not possible with a Video CD.
Changing chapter/track
While the disc is playing, press the SKIP  or SKIP
  button to go immediately to the next or previous chapter, or to the next or previous track.
For audio CD and VCD only: enter the track number with the number buttons and then press OK.
Zoom (DVD,VCD and DivX only)
1.While a disc is playing, press the ZOOM button until you reach the zoom size you require.
2.Move from one area to another using the  ,
,  ,
,  and
and  buttons.
Memory card readers
Your DVD player comes with two built-in memory card readers.
The bottom reader takes Compact Flash 1, Compact Flash 2, and Microdrive cards.The top reader takes SD, MMC, Memory Stick, Memory Stick Pro, and Smartmedia cards.You can read MP3,WMA, JPEG, or JPEG-4 files stored on these cards.
1.Insert a memory card into the reader.
2.Press the SELECT button on the front of the DVD player to display the memory card's
contents.
Note : cards can be inserted in both readers at the same time as well as having a disc (CD or DVD) in your DVD player.To switch between playback sources (Card 1, Card 2, or Disc), press the SELECT button.
Play modes
Repeat playback
While the disc is playing, press the REPEAT button repeatedly to select a play mode:
DVD: Repeat Chapter, Repeat Title, Repeat Off;
VCD and audio CD: Repeat Track, Repeat All, Repeat Off;
A-B repeat
To repeat a sequence between two points A and B, press the A-Bbutton at the beginning of the sequence you want to repeat.Then press the A-Bbutton again at the end of the sequence. Then the sequence is played repeatedly until you press A-Bto resume normal playback.
Programme playback (DVD,VCD and audio CD)
With this option, you choose and programme the playback order. You can store up to 20 tracks.
1.Insert a disc.
2.In Stop mode, press the PROGRAM button.The Program menu appears.
3.Use the number buttons to enter the title number and then the chapter number (for DVD) or the track number (for VCD and Audio CD). Repeat Step 3 as often as necessary.
4.Use the  ,
,  ,
,  and
and  buttons to select Start and press OK to start playback. Tracks are played in the order of the playback list. Playback stops once all tracks have been played.
5.Press the STOP button to stop the programme playback. Press the STOP button twice or the OPEN/CLOSE button to cancel the programme playback.
Random playback (all discs except DVD)
You can play all the tracks on the disc in a random order (chosen by the player).
1.Insert a disc.
2.Press the RANDOM button during playback.“Random” appears. Once 20 tracks have been randomly played, the player automatically stops playback.
3.Press the RANDOM button again to stop random playback. “Off” appears on the TV screen.
Advanced functions
Audio (DVD,VCD and audio CD)
Some discs have several audio tracks used for different languages or different audio formats. To change the language or audio format during play, press the AUDIO button one or more times to select one of the available audio formats or languages.
Note:This option is only available if the disc offers a number of dialogue languages or audio formats.
Bookmarks
The player can store up to 12 disc locations as long as the disc remains in the player and the unit remains switched on.
1.Press the BOOKMARK button during play.A menu is displayed.
2.To create a bookmark, select a free bookmark using the  and
and  buttons and press the PLAY button.
3.Repeat Step 2 as often as necessary.
4.To start playback from a bookmark, press the BOOKMARK button, select the bookmark using the  and
and  buttons and then press the PLAY button.
5.To delete a bookmark, press the BOOKMARK button, select the bookmark using the  and
and  buttons and then press the CLEAR button.
To exit the bookmark function, press the BOOKMARK button again.
Status menu
Press the DISPLAY button a number of times during playback to show in turn: DVD:Title elapsed time,Title remaining time, Chapter elapsed time, Chapter remaining time, Display Off.
VCD and audio CD: Single elapsed time, Single remaining time,Total elapsed time,Total remaining time, Display Off.
mp3 and DivX: Single elapsed time, Single remaining time.
PBC (VCD)
The PlayBack Control function offers scenes and information which can be selected interactively via a menu. It can also be used to display high-resolution pictures, if the disc contains any.
Press the DISC MENU button to access the PBC menu and the TITLE MENU button to turn the PBC function on and off.
Preview (DVD and VCD)
1.Press the PREVIEW button during playback to display the Digest menu. It includes various options depending on the type of disc:
DVD:Title Digest, Chapter Digest,Title Interval, Chapter Interval and Bookmark Digest; VCD:Track Digest, Disc Interval and Track Interval.
2.Select one of the digest types:
-Title Digest/Chapter Digest/Track digest: shows a digest of all titles/chapters/ tracks available on the disc.
-Title/Chapter/Disc/Track Interval: shows a digest of the current title/chapter/disc/ track in 10 minutes interval.
-Bookmark Digest: shows a digest of all bookmarks created on the disc.
3.To display the next page, press the  button or select Next in the menu and press OK. To start playback from a particular title, chapter, track, interval or bookmark, select it
using the  ,
,  ,
,  and
and  buttons and press OK, or input the corresponding number in the Select box and press OK.
To return to the digest menu, select the Menu button, and press OK.
To leave the digest menu, select the Exit button and press OK or press the PREVIEW button again.
Introscan (audio CD)
This option plays the first six seconds of each track.
Press PLAY to start playback, then the DISPLAY button to display the Single elapsed time and then the PREVIEW button to start the Introscan. Press PLAY to continue playing the current track.
Playback of mp3,WMA, JPEG and DivX files
mp3 is an audio file format which compresses recorded music. It was developed in
collaboration with 


 .The main advantage of the mp3 format is that it means CD- quality music tracks can be stored on a personal computer in user-friendly compressed files. WMA (Windows Media Audio) is another audio file format developed by Microsoft.
JPEG files are image files. Make sure that they have a resolution of less than 5 megapixels. Your player is an Official DivX Certified™ product that plays DivX®5, DivX®4, DivX®3, and DivX®VOD video content, in compliance with DivX Certified™ technical requirements.
Displaying JPEG files or playing mp3 or WMA or DivX files
Before inserting a disc, check that it is compatible with the player.
1.Open the tray by pressing the OPEN/CLOSE button.
2.Place the disc with the printed side facing up and close the tray.The disc’s contents are displayed.
3.Select a folder using the  and
and  buttons on the remote control, then press OK to see the folder’s contents.
4.Select a file using the  and
and  buttons on the remote control, then press OK to start playback.
5.Press the STOP button to stop playback.
6.To go back to the folder list, press the  button in stop mode.
Note: During playback you can use the SKIP  or SKIP
  button to go back to the previous file or go on to the next one.
DivX subtitles
In order to display properly subtitles in some Eastern European languages, you need to select the correct character set.
During DivX playback,press several times the TITLE/MENU button on the remote control to choose a character set: Czech, Slovak, Hungarian, Polish or Default (for Western European languages).
Playing JPEG and mp3 music files at the same time
You can display JPEG files while listening to mp3 music files recorded on the same disc.
1.Insert the disc containing the two types of file in the player.
2.Select an mp3 music file using the  and
and  buttons, then press OK to confirm your selection.
3.Then select a JPEG image file using the  and
and  buttons, then press OK to confirm
your selection.
Note:To delete your selection, press the CLEAR button.
4.Press OK to start playing the two files at the same time.
5.Press the STOP button to stop playback.
To rent (purchase) DivX®VOD files
DivX VOD files are downloaded after paying a rental from certain commercial websites. Prior to downloading a VOD you need to input the registration number of your DVD player on the purchase form on the site.
Follow the instructions below to find the registration number of your player: insert a disc and press the SET UP button and then the ZOOM button. Write down this VOD 8-character registration number so that you can fill in the form on the website you purchase your DivX VOD files from.
Note: If you cannot play a DivX VOD file recorded on a CD-R disc after downloading it, the rental period allocated during purchasing from the website may have expired. It is also possible that the recorded file is not compatible with your player because of different versions or incorrect download parameters.The parameters used when copying to CD-R may be another reason for this. Since it is not possible here to supply all the information, parameters and advice relating to the use of DivX VOD files, we recommend that you visit specialist websites such as www.divx.com/vod.
Repeat playback
While the disc is playing, press the REPEAT button repeatedly to select a play mode:
mp3 and WMA: Repeat One, Repeat Folder, Folder (=Off),
JPEG and DivX: Repeat One, Repeat All, Repeat Off.
Programme playback (mp3 and WMA)
1.Insert a disc.
2.Use the  ,
,  ,
,  and
and  buttons to select the file you want to add to the playback list and press the BOOKMARK button. Repeat this step as often as necessary.
3.Press the PROGRAM button to display the playback list and press PLAY to start playback. Files are played in the order of the playback list. Playback stops once all files have been played.To delete a file from the list, press the PROGRAM button, use the  and
and  buttons to select the file from the playback list and press BOOKMARK to delete it.
4.Press the OPEN/CLOSE button to delete the playback list.
Player menus
Using the player’s menus
Press the SET UP button to display the player’s main menu. Select a menu icon using the 
and  buttons.Then select one of the available options using the
  and
and  buttons. Press the
  button to access the submenu and use the
  and
and  buttons to select an option.Then press OK to confirm your selection. Return to a previous menu using the
  button.
To exit from the player menus, press the SET UP button again.
The General Setup menu (see Appendix)
TV Display
Depending on the format of the DVD disc, you can choose the picture format best suited to the format of your TV screen.
Select a format using the  and
and  buttons and press OK to confirm:
Normal/PS: reproduces a 4:3 picture without distortion,
Normal/LB: gives best reproduction of pictures recorded in this format (i.e. with horizontal bands at the top and bottom of the screen) or in 16:9,
Widescreen: reproduces 16:9 format films in full on a 16:9 screen.
TV Type
In addition to PAL DVDs and VCDs, you can enjoy NTSC films as well (a 50Hz or 60Hz PAL compatible TV set is required). If the pictures from the DVD being played appear in black and white on your screen, try changing the colour standard.
Set the function to PAL or NTSC and press OK to confirm.
Video Out
Choose the type of video signal that the TV or monitor connected to the back of your player will accept.
RGB : this gives the best quality picture output from the TV AUDIOVIDEO OUT SCART socket.
YUV Interlace : used when aYCrCb monitor is connected to the 3 component video sockets.
YUV Progress. : used when aYPrPb monitor is connected to the 3 component video sockets.
Note : the composite (CVBS) video signal output from the TV AUDIO VIDEO OUT SCART socket remains available whatever selection has been made.
Menu Language
To change the language of the player menus, choose the language using the  and
and  buttons and press OK to confirm.
The Dolby Digital Setup menu ( see Appendix)


 Dolby and the double-D symbol
 are trademarks of Dolby Laboratories. Manufactured under license from Dolby Laboratories.
Dynamic
You can use this function to control the different sound levels via dynamic compression. It improves the quality of the sound track at a low volume and quietens the loudest sounds.
Select an option using the  and
and  buttons, and press OK to confirm.
Note:This function is available only on DVD discs recorded in Dolby Digital.
The Preferences Setup menu
Note:The Preferences Setup menu is not available when there is a disc in the player.
Audio
To change the dialogue language, choose the language using the  and
and  buttons and press OK to confirm.
Subtitle
To change the subtitle language, choose the language using the  and
and  buttons and press OK to confirm.
Disc menu
To change the language of the disc menus, choose the language using the  and
and  buttons and press OK to confirm.
Ratings
You can control access to the player and the type of discs your family can watch with the rating function.There are eight levels of parental control.
Note:The disc publisher is responsible for coding scenes according to the rating limits. In Europe, very few discs have coded scenes.
1.Select the rating level using the  and
and  buttons.
2.Press OK to enter the Password Setup menu.
Note:To access the Ratings submenu, you must input a four-digit password. If you have not chosen one yet, you are prompted to do so when you try to access it (see option Password).
3.Enter your four-digit password and press OK. If you have not chosen one yet, the factory preset password is 1390.
Password
This option allows you to set or change the password.
1.Press OK to enter the Change Password menu.
2.To change the password, enter the current four-digit password in the “Old Password” box. Then enter the new password in the “New Password” box.You are then prompted to enter it again in the “Confirm Password” box to confirm and press OK.
Additional Information
Troubleshooting
The appliance does not switch on.
•Make sure it is plugged into a mains socket.
•Press the  button on the remote control or the ON/STANDBY button on the front of the appliance.
It is impossible to read the disc.
•Insert the disc with the printed side facing up.
•Check that the disc can actually be played by this device (see below).
•Check that the disc’s regional code matches the player’s regional code.This player’s regional code is 2.
•Clean the disc (see below).
There is no picture.
•Check you have switched on the TV set.
•Check the connections.
•Select the AV input assigned to the player on the TV.
The picture is of poor quality (with snow or lines).
•Check the connections.
There is no sound or the sound is of poor quality.
•Check the connections.
•Turn on the audio equipment connected to the player, if any.
The remote control does not work or works only intermittently.
•Check that batteries are inserted or change them.
•Aim the remote control at the appliance.The infrared beam must not be blocked or interrupted.
The subtitles do not appear.
•Check that the DVD disc provides subtitles.
•Refer to the section on how to display subtitles.