Do not use duct smaller than the transition.
Wiring:
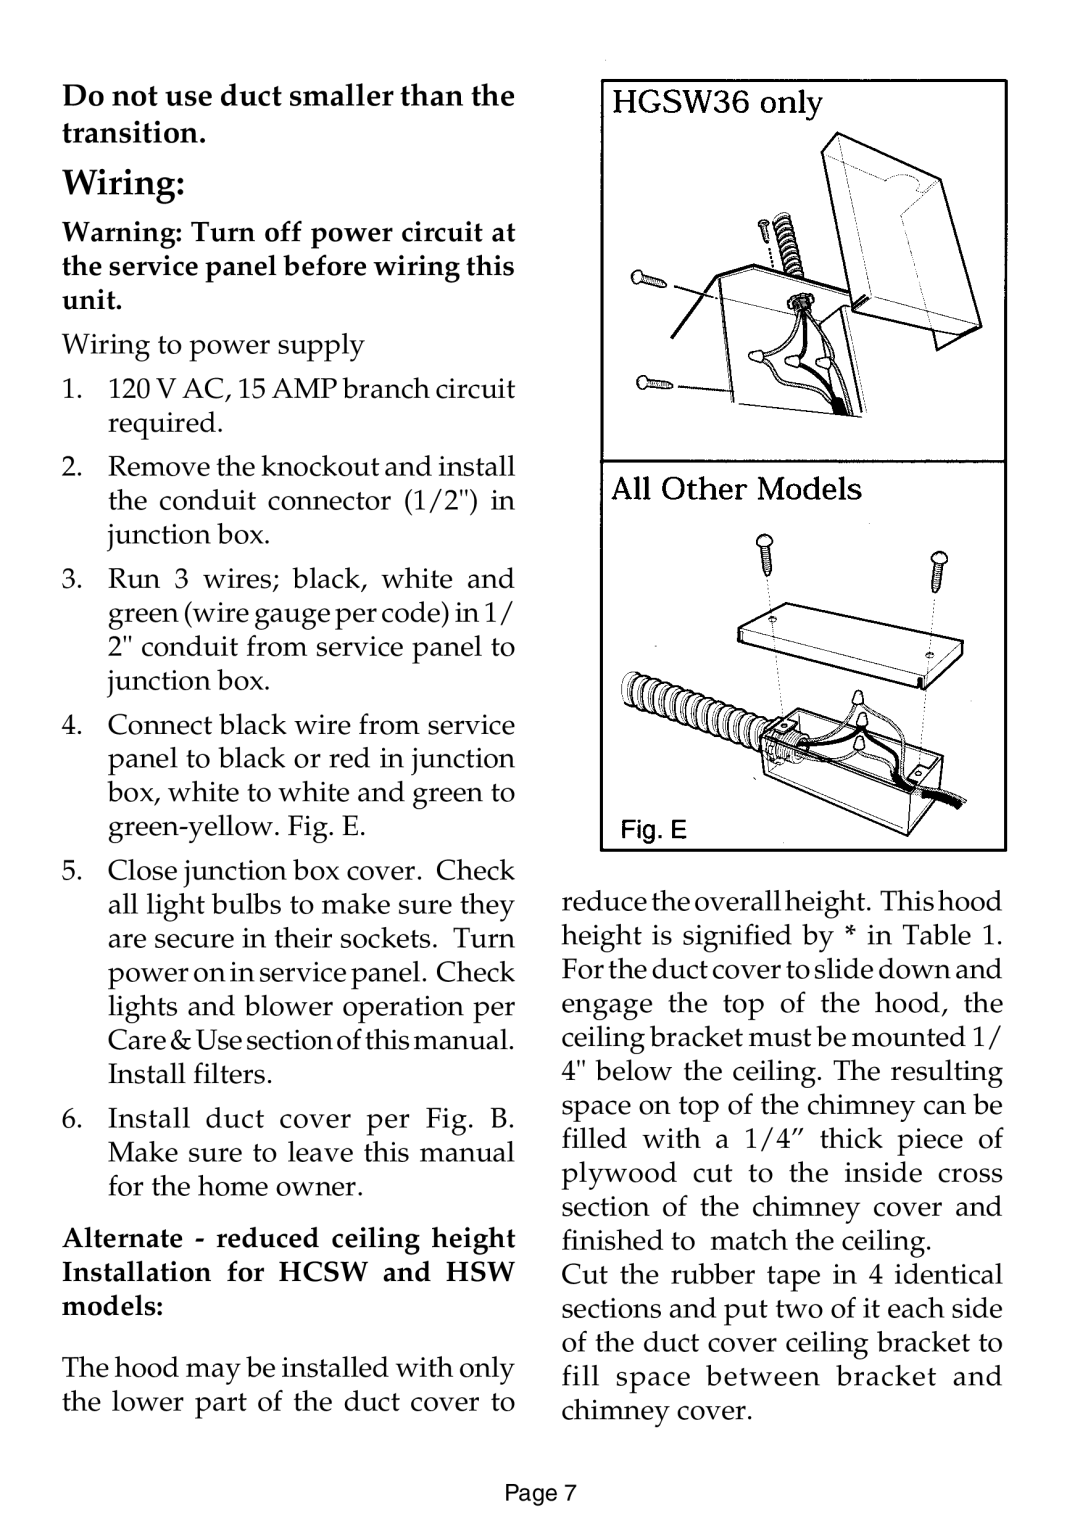
Warning: Turn off power circuit at the service panel before wiring this unit.
Wiring to power supply
1.120 V AC, 15 AMP branch circuit required.
2.Remove the knockout and install the conduit connector (1/2") in junction box.
3.Run 3 wires; black, white and green (wire gauge per code) in 1/ 2" conduit from service panel to junction box.
4.Connect black wire from service panel to black or red in junction box, white to white and green to
5.Close junction box cover. Check all light bulbs to make sure they are secure in their sockets. Turn power on in service panel. Check lights and blower operation per Care & Use section of this manual. Install filters.
6.Install duct cover per Fig. B. Make sure to leave this manual for the home owner.
Alternate - reduced ceiling height Installation for HCSW and HSW models:
The hood may be installed with only the lower part of the duct cover to
reduce the overall height. This hood height is signified by * in Table 1. For the duct cover to slide down and engage the top of the hood, the ceiling bracket must be mounted 1/ 4" below the ceiling. The resulting space on top of the chimney can be filled with a 1/4” thick piece of plywood cut to the inside cross section of the chimney cover and finished to match the ceiling.
Cut the rubber tape in 4 identical sections and put two of it each side of the duct cover ceiling bracket to fill space between bracket and chimney cover.
Page 7