EPW specifications
Thomas & Betts, a leader in electrical components and solutions, offers a range of products designed for various applications in the electrical industry. One of their notable offerings is the EPW (Electrical Power Wiring) series, which showcases the company's commitment to innovation, quality, and efficiency in electrical wiring.The EPW series is characterized by its robust construction and versatility, making it suitable for a wide array of environments, including industrial, commercial, and residential applications. The key features of the EPW system include its high degree of durability and reliability, which are essential for ensuring long-lasting performance under demanding conditions.
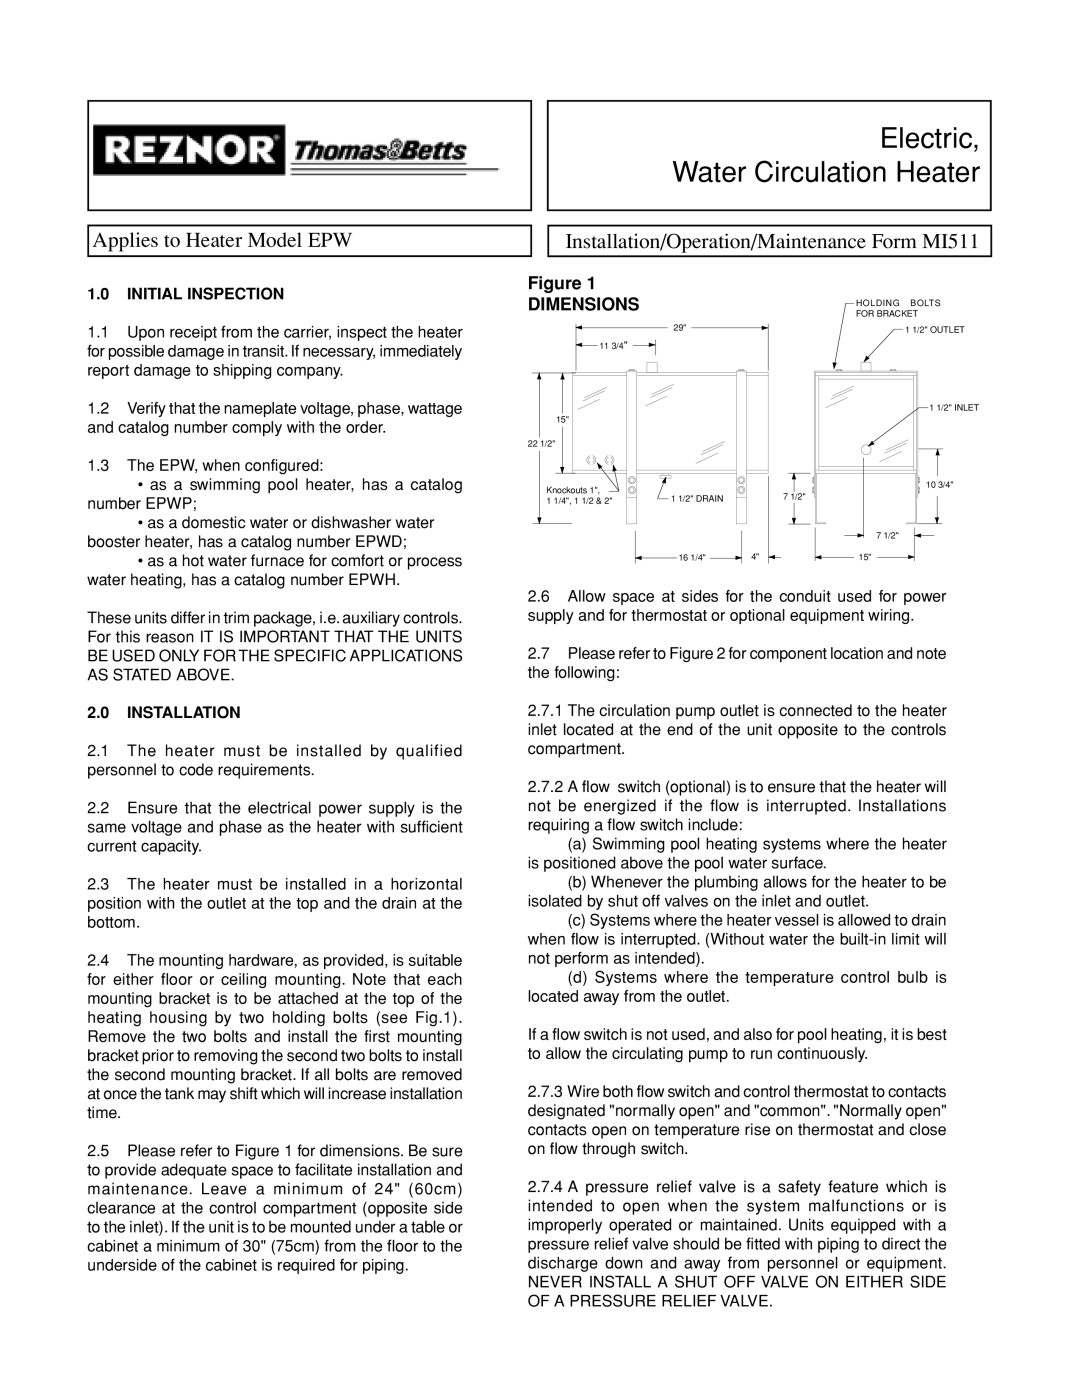
One of the standout technologies integrated into the EPW series is its advanced insulation and jacketing materials. These materials are engineered to withstand extreme temperatures, chemicals, and physical abrasions, addressing the common challenges faced in electrical installations. The cables are designed to reduce the risk of corrosion and wear, ultimately extending their lifespan and reducing maintenance requirements.
Moreover, the EPW series employs a user-friendly design, which simplifies installation processes. The cables are often pre-assembled and color-coded, facilitating easier identification and connection during installation. This feature significantly cuts down on labor time and enhances efficiency on job sites, which is a crucial consideration for contractors and electricians.
Safety is another paramount aspect of the EPW series. The products are designed adhering to stringent safety standards and undergo rigorous testing to ensure they provide reliable protection against electrical hazards. Features such as flame resistance and low smoke emissions are incorporated to enhance firefighter safety and minimize the impact of potential electrical failures.
In conclusion, Thomas & Betts EPW series exemplifies modernization in electrical wiring solutions with its focus on durability, efficiency, and safety. Its cutting-edge materials and user-friendly design make it a preferred choice among professionals in the electrical field. Whether for new installations or retrofitting existing systems, the EPW series continues to prove its worth in various applications, highlighting Thomas & Betts’ dedication to quality craftsmanship and innovative technologies.