| For Ages 6 & UP |
| TM |
| WARNING: |
Instruction Manual | CHOKING |
NOT FOR CHILDREN UNDER 3 YEARS |
MEASURE THE STRING:
Rest the
Tie a slip knot approximately 3 1/2" above your waist.
Rocking the Baby |
|
|
|
It is best to first practice this trick without spinning |
|
|
|
Let |
|
|
|
hold the string about 15" down from the top of the string. |
|
|
|
Now use the thumb and forefinger from your |
|
|
|
the string 15" down from your other hand. Your |
|
|
|
your other hand is at the bottom. Swing | 1 | 2 | 3 |
With | |||
flick your wrist up to return |
|
|
|
Around the World |
|
| 3 |
Toss |
|
|
|
When |
|
|
|
to the palm of your hand. |
|
| 2 |
|
|
| |
WARNING: Watch carefully as |
| 1 |
|
or objects around you. It is strongly recommended that you do this trick in |
|
| 4 |
a |
|
|
|
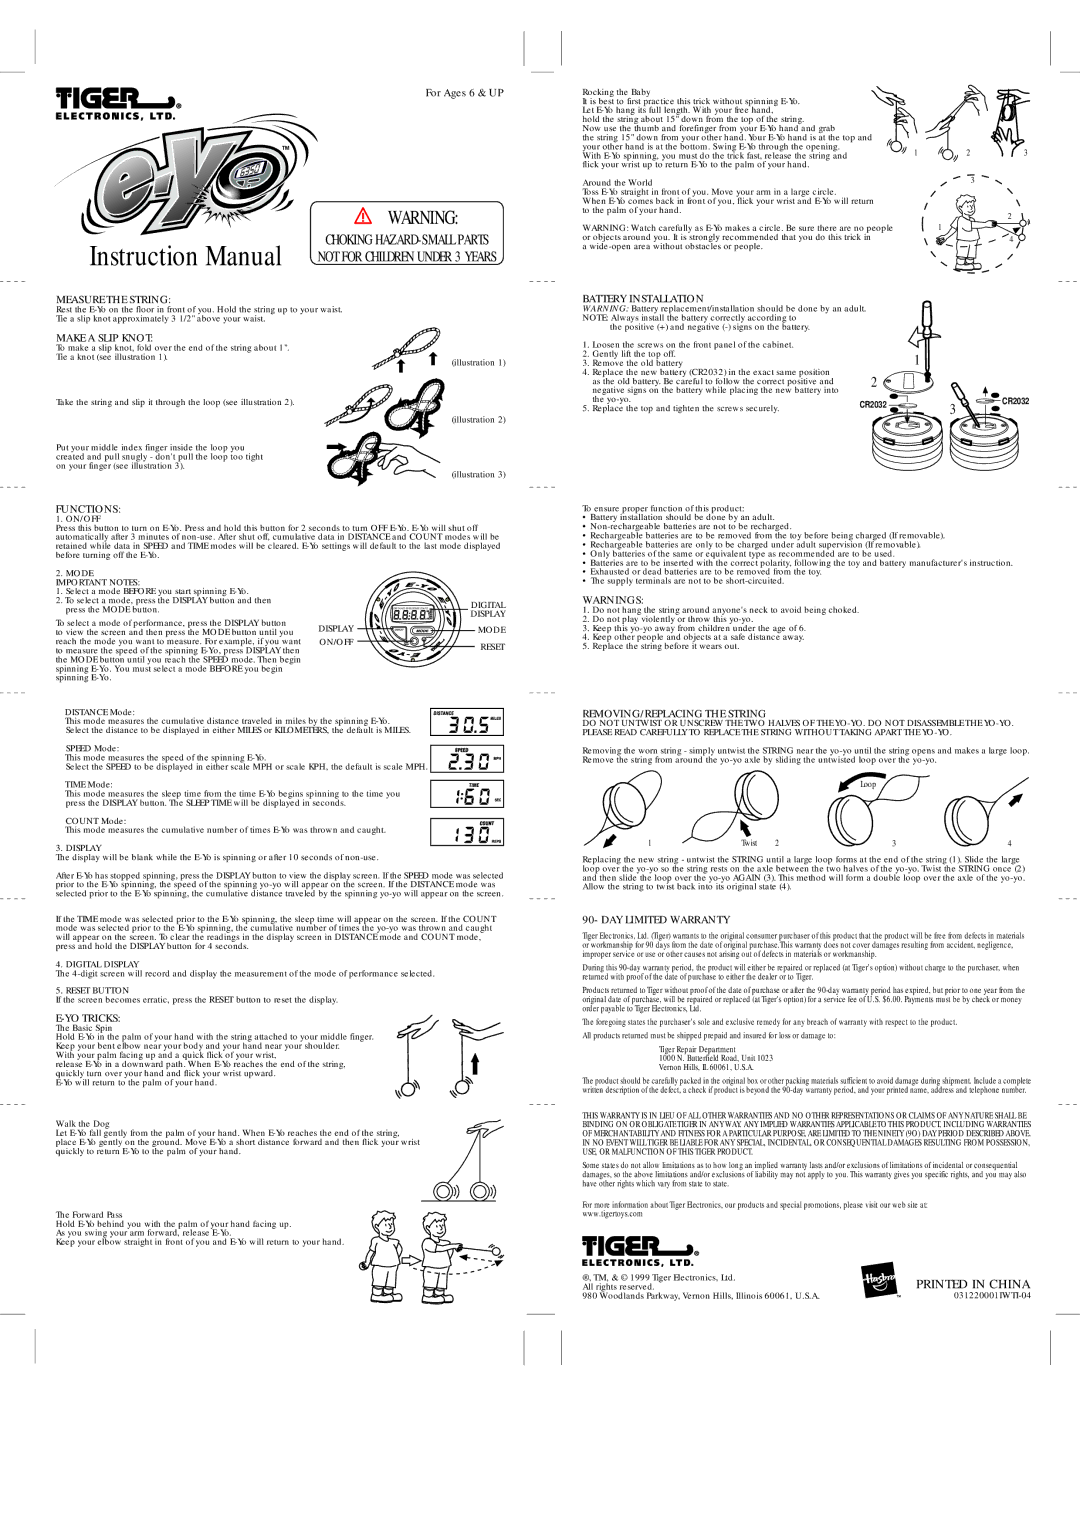
BATTERY INSTALLATION
WARNING: Battery replacement/installation should be done by an adult.
NOTE: Always install the battery correctly according to
MAKE A SLIP KNOT:
To make a slip knot, fold over the end of the string about 1". Tie a knot (see illustration 1).
Take the string and slip it through the loop (see illustration 2).
Put your middle index finger inside the loop you created and pull snugly - don't pull the loop too tight on your finger (see illustration 3).
(illustration 1)
(illustration 2)
(illustration 3)
| the positive (+) and negative |
|
|
|
|
1. | Loosen the screws on the front panel of the cabinet. |
|
|
|
|
2. | Gently lift the top off. | 1 | |||
3. | Remove the old battery | ||||
4. | Replace the new battery (CR2032) in the exact same position | 2 |
|
|
|
| as the old battery. Be careful to follow the correct positive and |
|
|
| |
| negative signs on the battery while placing the new battery into |
|
|
|
|
| the | CR2032 |
|
|
|
5. | Replace the top and tighten the screws securely. |
|
| ||
|
|
|
|
|
|
3
CR2032
FUNCTIONS:
1. ON/OFF
Press this button to turn on
2. MODE |
|
|
|
IMPORTANT NOTES: |
|
|
|
1. Select a mode BEFORE you start spinning |
|
|
|
2. To select a mode, press the DISPLAY button and then |
|
| DIGITAL |
press the MODE button. |
| DISTANCE SPEED TIME COUNT | |
|
| DISPLAY | |
To select a mode of performance, press the DISPLAY button |
|
| |
DISPLAY |
| MODE | |
to view the screen and then press the MODE button until you | DISPLAY | ||
reach the mode you want to measure. For example, if you want | ON/OFF |
| RESET |
to measure the speed of the spinning |
|
| |
the MODE button until you reach the SPEED mode. Then begin |
|
|
|
spinning |
|
|
|
spinning |
|
|
|
DISTANCE Mode: |
|
|
|
This mode measures the cumulative distance traveled in miles by the spinning |
|
| |
Select the distance to be displayed in either MILES or KILOMETERS, the default is MILES. |
| ||
SPEED Mode: |
|
|
|
This mode measures the speed of the spinning |
|
|
|
Select the SPEED to be displayed in either scale MPH or scale KPH, the default is scale MPH. |
| ||
TIME Mode:
This mode measures the sleep time from the time
COUNT Mode:
This mode measures the cumulative number of times
3. DISPLAY
The display will be blank while the
After
If the TIME mode was selected prior to the
4. DIGITAL DISPLAY
The
5. RESET BUTTON
If the screen becomes erratic, press the RESET button to reset the display.
E-YO TRICKS:
The Basic Spin
Hold
With your palm facing up and a quick flick of your wrist,
release
Walk the Dog
Let
The Forward Pass
Hold
As you swing your arm forward, release
Keep your elbow straight in front of you and
To ensure proper function of this product:
•Battery installation should be done by an adult.
•
•Rechargeable batteries are to be removed from the toy before being charged (If removable).
•Rechargeable batteries are only to be charged under adult supervision (If removable).
•Only batteries of the same or equivalent type as recommended are to be used.
•Batteries are to be inserted with the correct polarity, following the toy and battery manufacturer's instruction.
•Exhausted or dead batteries are to be removed from the toy.
•The supply terminals are not to be
WARNINGS:
1.Do not hang the string around anyone's neck to avoid being choked.
2.Do not play violently or throw this
3.Keep this
4.Keep other people and objects at a safe distance away.
5.Replace the string before it wears out.
REMOVING/REPLACING THE STRING
DO NOT UNTWIST OR UNSCREW THE TWO HALVES OF THE
Removing the worn string - simply untwist the STRING near the
Loop
1 | Twist | 2 | 3 | 4 |
Replacing the new string - untwist the STRING until a large loop forms at the end of the string (1). Slide the large loop over the
90- DAY LIMITED WARRANTY
Tiger Electronics, Ltd. (Tiger) warrants to the original consumer purchaser of this product that the product will be free from defects in materials or workmanship for 90 days from the date of original purchase.This warranty does not cover damages resulting from accident, negligence, improper service or use or other causes not arising out of defects in materials or workmanship.
During this
Products returned to Tiger without proof of the date of purchase or after the
The foregoing states the purchaser's sole and exclusive remedy for any breach of warranty with respect to the product.
All products returned must be shipped prepaid and insured for loss or damage to:
Tiger Repair Department
1000 N. Butterfield Road, Unit 1023 Vernon Hills, IL 60061, U.S.A.
The product should be carefully packed in the original box or other packing materials sufficient to avoid damage during shipment. Include a complete written description of the defect, a check if product is beyond the
THIS WARRANTY IS IN LIEU OF ALL OTHER WARRANTIES AND NO OTHER REPRESENTATIONS OR CLAIMS OF ANY NATURE SHALL BE BINDING ON OR OBLIGATE TIGER IN ANY WAY. ANY IMPLIED WARRANTIES APPLICABLE TO THIS PRODUCT, INCLUDING WARRANTIES OF MERCHANTABILITY AND FITNESS FOR A PARTICULAR PURPOSE, ARE LIMITED TO THE NINETY (9O) DAY PERIOD DESCRIBED ABOVE. IN NO EVENT WILL TIGER BE LIABLE FOR ANY SPECIAL, INCIDENTAL, OR CONSEQUENTIAL DAMAGES RESULTING FROM POSSESSION, USE, OR MALFUNCTION OF THIS TIGER PRODUCT.
Some states do not allow limitations as to how long an implied warranty lasts and/or exclusions of limitations of incidental or consequential damages, so the above limitations and/or exclusions of liability may not apply to you. This warranty gives you specific rights, and you may also have other rights which vary from state to state.
For more information about Tiger Electronics, our products and special promotions, please visit our web site at: www.tigertoys.com
®, TM, & © 1999 Tiger Electronics, Ltd. | PRINTED IN CHINA |
All rights reserved. | |
980 Woodlands Parkway, Vernon Hills, Illinois 60061, U.S.A. |