
58/65L5400UC, 58/65L5400U specifications
The Toshiba 58/65L5400U and 58/65L5400UC models represent a versatile line of televisions that cater to both entertainment enthusiasts and casual viewers alike. With a sleek modern design and a host of features, these models have positioned themselves as accessible options in the market for large-screen televisions.One of the standout features of the Toshiba 58/65L5400U series is its 4K Ultra HD resolution, delivering stunning picture clarity and vibrant colors. With a resolution of 3840 x 2160 pixels, viewers can enjoy an immersive viewing experience, whether they are watching movies, sports events, or gaming. Coupled with Toshiba's proprietary Color Master technology, the televisions produce a rich color gamut, ensuring that images appear more lifelike and engaging.
These models are equipped with LED backlighting which enhances contrast and provides deeper blacks, resulting in improved picture quality. The High Dynamic Range (HDR) compatibility further elevates the viewing experience by expanding the contrast ratio and color palette. This means viewers can enjoy finer details in both dark and bright scenes, making it perfect for varied content types.
The Toshiba 58/65L5400U series also features built-in smart capabilities, allowing users to easily access a wide range of streaming services like Netflix, YouTube, and Hulu. The user-friendly interface makes navigation effortless, letting viewers switch between content sources seamlessly. Additionally, with the included Toshiba Connect feature, viewers can sync their devices for easier media sharing.
Another benefit of these models is their integrated DTS Virtual:X technology, which enhances the audio experience by creating a more immersive sound environment. With multi-dimensional audio that can simulate surround sound without the need for additional speakers, these TVs elevate the home entertainment experience significantly.
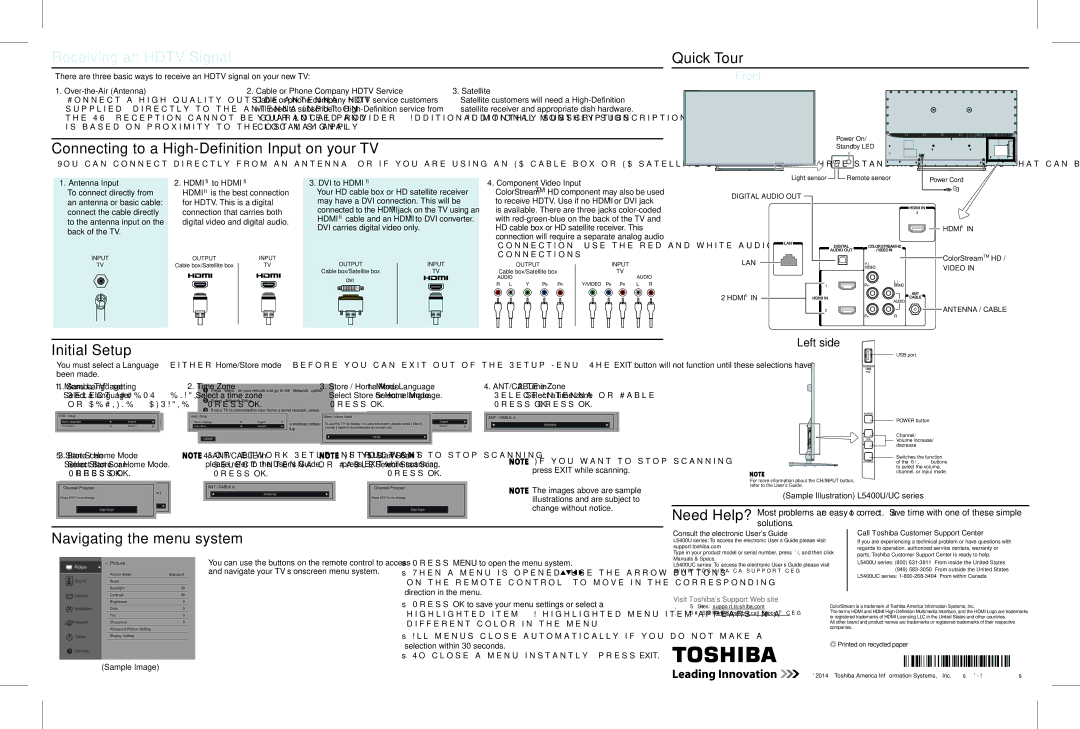
In terms of connectivity, the Toshiba 58/65L5400U and 58/65L5400UC come with multiple HDMI ports, USB inputs, and an optical digital audio output, ensuring compatibility with various devices such as gaming consoles, Blu-ray players, and soundbars.
Overall, the Toshiba 58/65L5400U and 58/65L5400UC models are powerful options for anyone looking for a large-screen television that combines advanced technologies with accessible features, transforming any living room into a cinematic experience. With their blend of picture quality, smart capabilities, and immersive audio, they offer great value to consumers seeking a comprehensive entertainment solution.