Preparation (Continued)
Step 2: Connecting to audio system
Sound can output from connected audio system.
If you made the HDMI connection between the player and a TV, this step is unnecessary. Skip to Step 3.
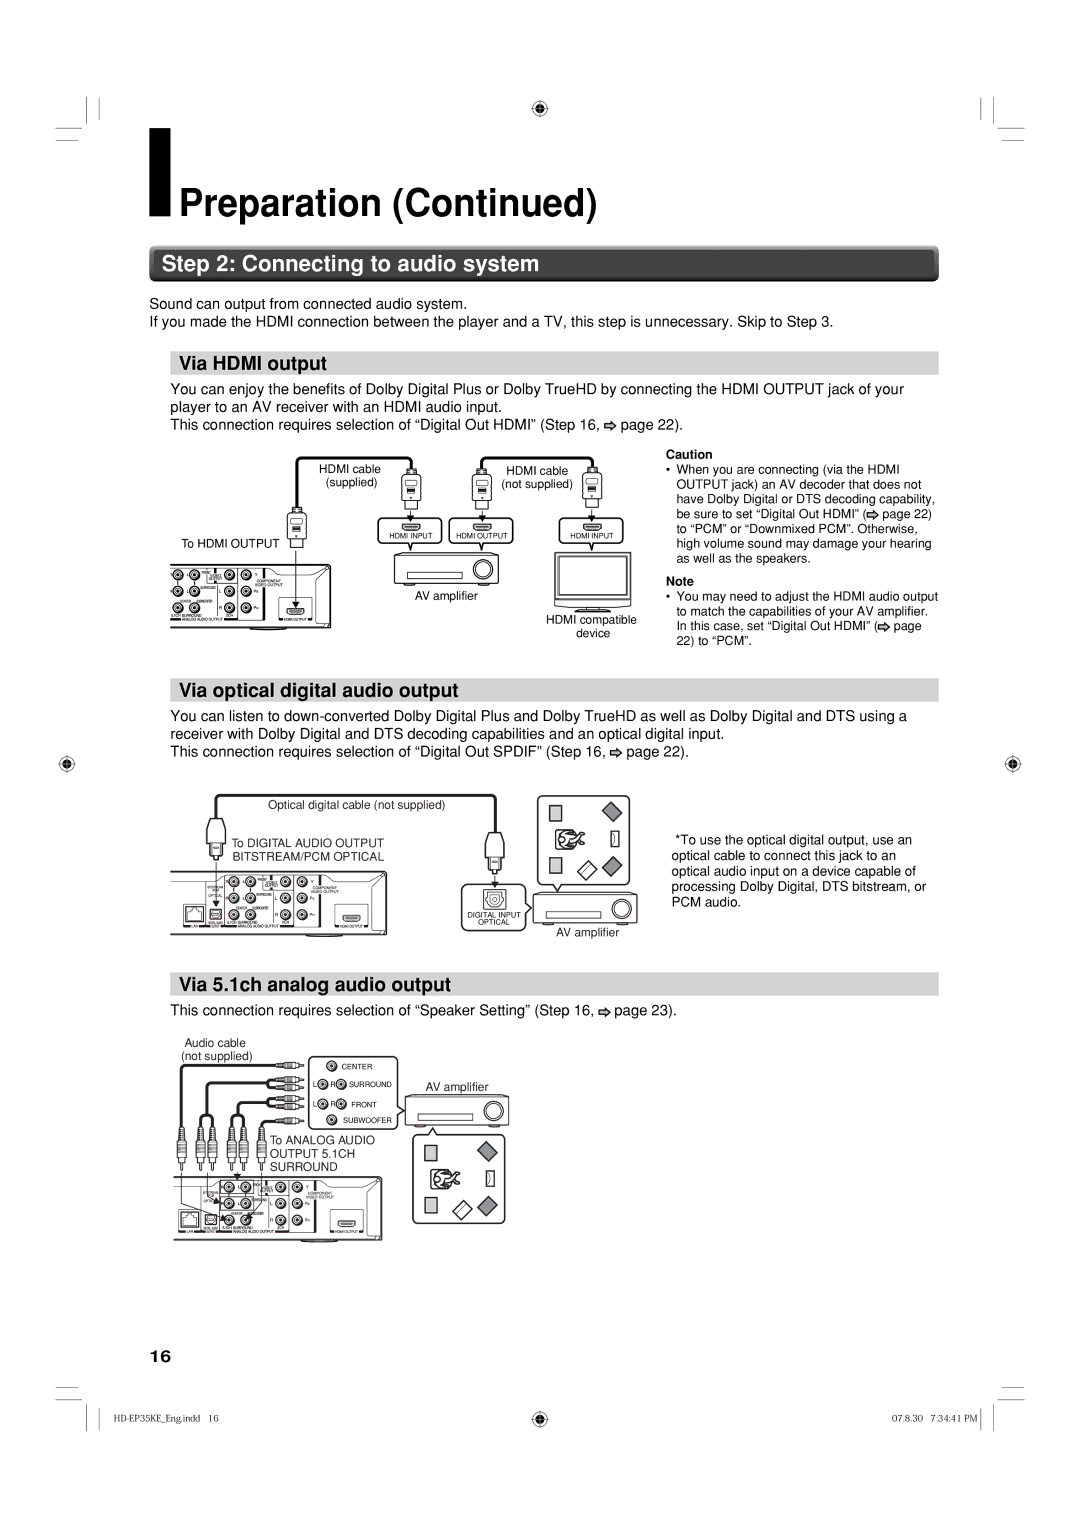
Via HDMI output
You can enjoy the benefits of Dolby Digital Plus or Dolby TrueHD by connecting the HDMI OUTPUT jack of your player to an AV receiver with an HDMI audio input.
This connection requires selection of “Digital Out HDMI” (Step 16, ![]() page 22).
page 22).
To HDMI OUTPUT
HDMI cable | HDMI cable |
|
(supplied) | (not supplied) | |
HDMI INPUT | HDMI OUTPUT | HDMI INPUT |
AV amplifier
HDMI compatible device
Caution
•When you are connecting (via the HDMI OUTPUT jack) an AV decoder that does not have Dolby Digital or DTS decoding capability, be sure to set “Digital Out HDMI” (![]() page 22) to “PCM” or “Downmixed PCM”. Otherwise, high volume sound may damage your hearing as well as the speakers.
page 22) to “PCM” or “Downmixed PCM”. Otherwise, high volume sound may damage your hearing as well as the speakers.
Note
•You may need to adjust the HDMI audio output to match the capabilities of your AV amplifier. In this case, set “Digital Out HDMI” (![]() page 22) to “PCM”.
page 22) to “PCM”.
Via optical digital audio output
You can listen to
This connection requires selection of “Digital Out SPDIF” (Step 16, ![]() page 22).
page 22).
Optical digital cable (not supplied)
To DIGITAL AUDIO OUTPUT
BITSTREAM/PCM OPTICAL
DIGITAL INPUT
OPTICAL
AV amplifier
*To use the optical digital output, use an optical cable to connect this jack to an optical audio input on a device capable of processing Dolby Digital, DTS bitstream, or PCM audio.
Via 5.1ch analog audio output
This connection requires selection of “Speaker Setting” (Step 16,  page 23).
Audio cable (not supplied)
| CENTER |
|
L R | SURROUND | AV amplifier |
|
|
L![]() R
R![]() FRONT
FRONT
SUBWOOFER
![]() To ANALOG AUDIO
To ANALOG AUDIO
OUTPUT 5.1CH
SURROUND
16
07.8.30 7:34:41 PM ![]()