WARNING: Do not connect the power supply module to the external power source before installing it into the chassis. Failure to observe this caution could result in equipment damage and/or personal injury or death.
Install the CPSMP-200
NOTE: The
To install the
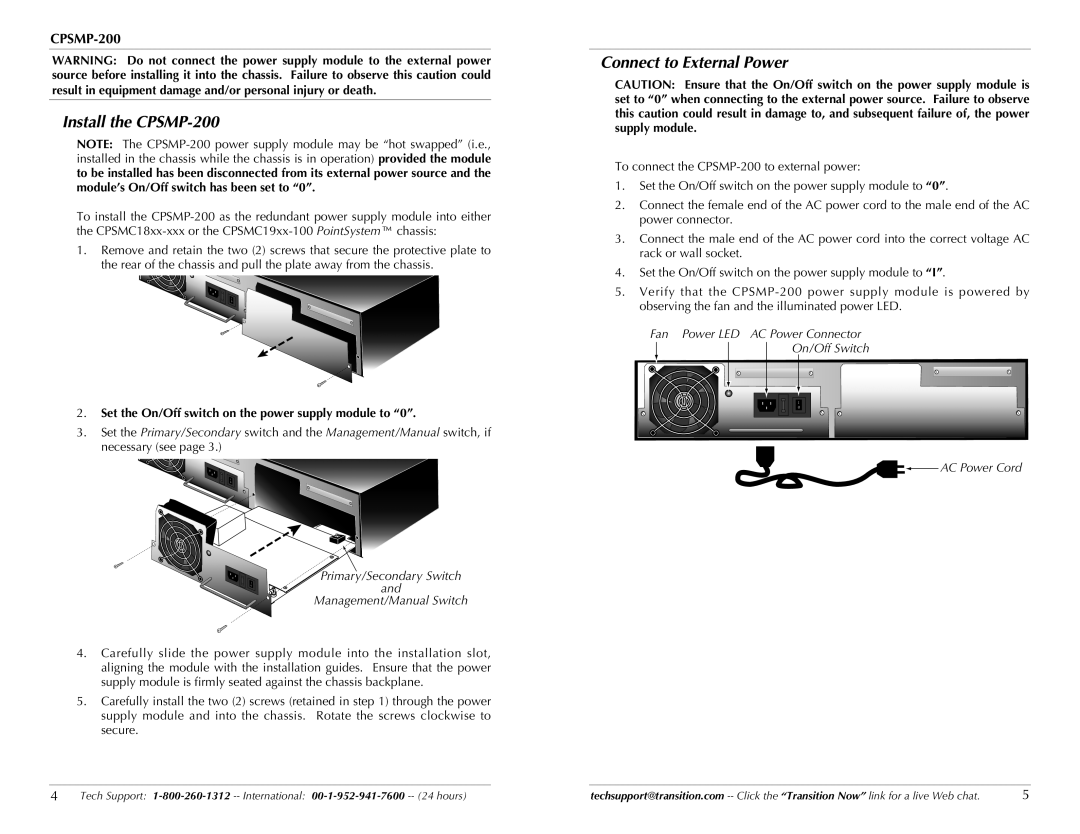
1.Remove and retain the two (2) screws that secure the protective plate to the rear of the chassis and pull the plate away from the chassis.
I 0
2.Set the On/Off switch on the power supply module to “0”.
3.Set the Primary/Secondary switch and the Management/Manual switch, if necessary (see page 3.)
I 0
I | Primary/Secondary Switch |
0 | and |
| Management/Manual Switch |
4.Carefully slide the power supply module into the installation slot, aligning the module with the installation guides. Ensure that the power supply module is firmly seated against the chassis backplane.
5.Carefully install the two (2) screws (retained in step 1) through the power supply module and into the chassis. Rotate the screws clockwise to
secure.
Connect to External Power
CAUTION: Ensure that the On/Off switch on the power supply module is set to “0” when connecting to the external power source. Failure to observe this caution could result in damage to, and subsequent failure of, the power supply module.
To connect the
1.Set the On/Off switch on the power supply module to “0”.
2.Connect the female end of the AC power cord to the male end of the AC power connector.
3.Connect the male end of the AC power cord into the correct voltage AC rack or wall socket.
4.Set the On/Off switch on the power supply module to “I”.
5.Verify that the
Fan Power LED AC Power Connector
On/Off Switch
I |
0 |
![]()
![]() AC Power Cord
AC Power Cord
4 | Tech Support: | techsupport@transition.com | 5 |
