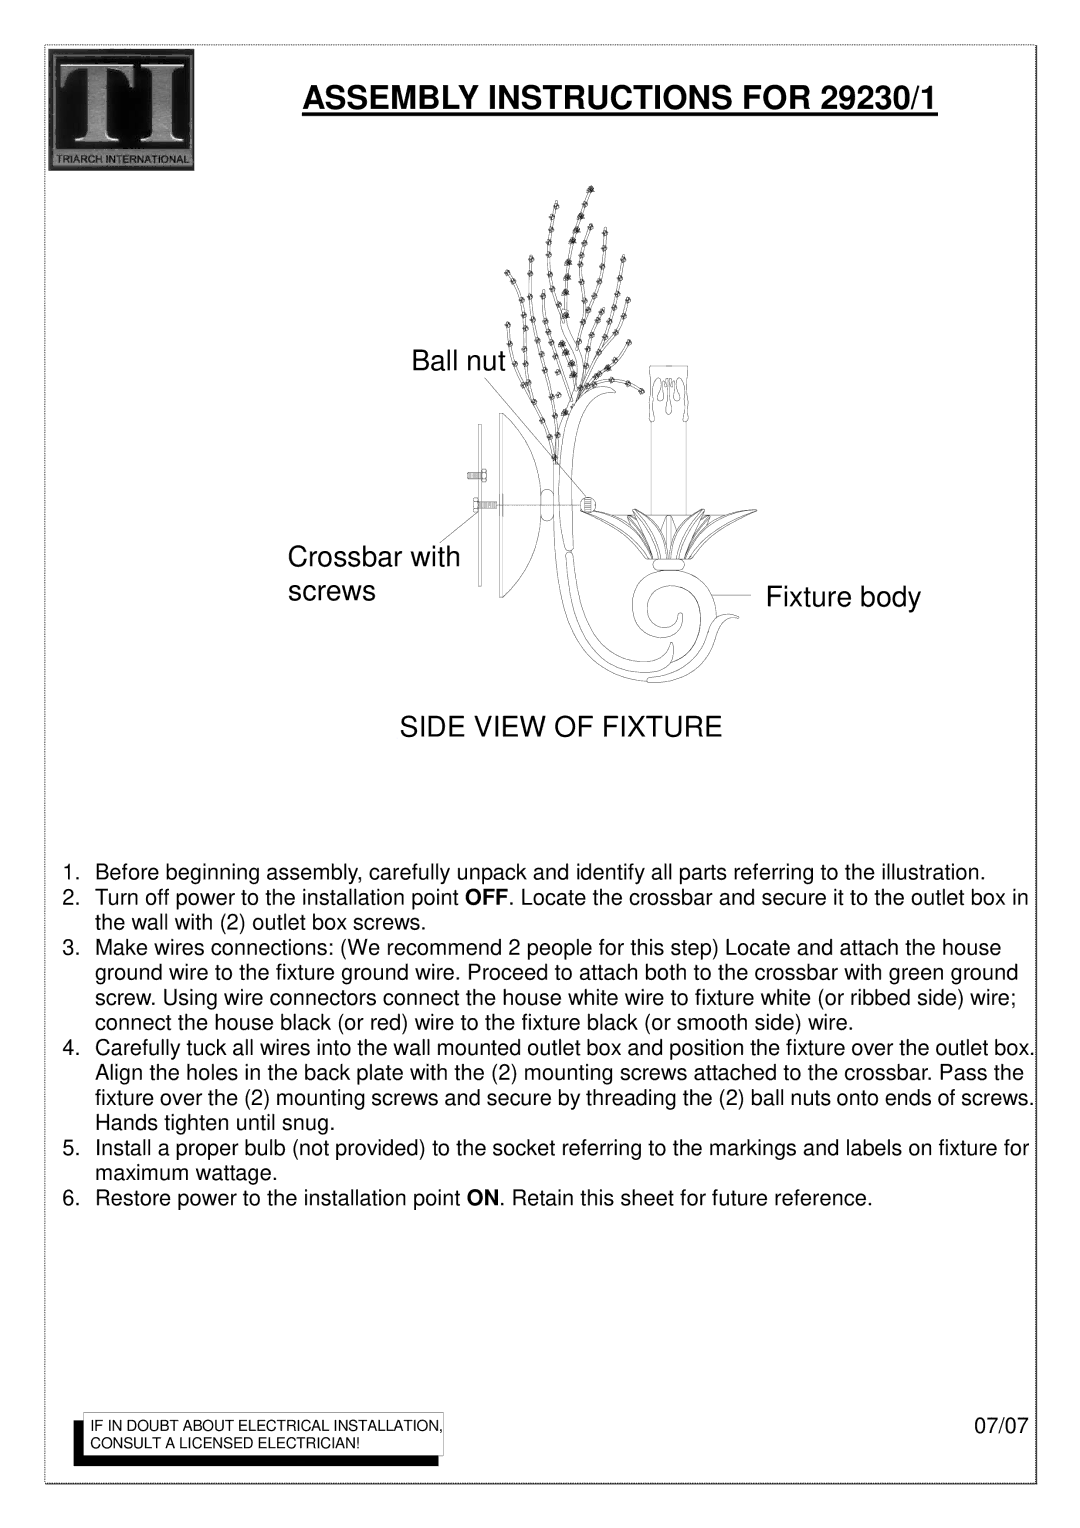
29230/1 specifications
Triarch 29230/1 is a state-of-the-art product designed for both high efficiency and versatility in various applications. This advanced model exemplifies the cutting-edge features and technologies that characterize the latest advancements in its category.One of the standout features of the Triarch 29230/1 is its highly efficient energy management system. This model incorporates a sophisticated algorithm that optimizes power consumption, allowing users to achieve maximum output while minimizing energy costs. This not only makes the Triarch 29230/1 an economical choice but also reflects a commitment to sustainability, as it significantly reduces the carbon footprint associated with its operation.
The ergonomic design of the Triarch 29230/1 promotes user-friendly interaction, equipped with an intuitive control interface that simplifies its operation. The responsive touchscreen ensures that users can easily navigate through different settings and features. Its compact size makes it suitable for a range of environments, from small workshops to larger industrial settings.
Another key aspect of the Triarch 29230/1 is its robust construction. Built from high-quality materials, this model is designed to withstand rigorous use while maintaining peak performance. Its durability ensures a long lifespan, reducing the need for frequent replacements and ultimately lowering operational costs.
In terms of connectivity, the Triarch 29230/1 shines with its comprehensive range of integrated technologies. It supports both wired and wireless connections, allowing for seamless integration with existing systems and enabling remote management capabilities. This facilitates real-time monitoring and data collection, which is crucial for efficiency analysis and process improvements.
The Triarch 29230/1 is also equipped with advanced safety features. Its built-in sensors continuously monitor operational parameters, providing alerts and automatic shutdowns in case of anomalies. This ensures a secure working environment and protects both the equipment and the users.
Moreover, the Triarch 29230/1 is flexible in its applications. Whether used in manufacturing, testing, or research settings, it accommodates various tasks, making it a valuable asset across different sectors.
In conclusion, the Triarch 29230/1 represents a significant advancement in its field, marked by its energy efficiency, user-friendly design, robust construction, advanced connectivity, safety features, and versatile applications. This model is poised to meet the demands of modern users while contributing to a sustainable future.